9
Play Deck Model 5010 • 09-1209
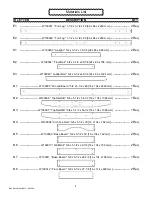
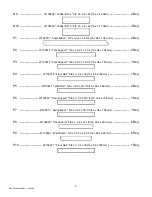
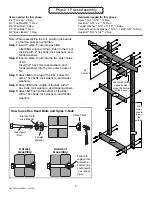
Items needed for this phase:
Hardware needed for this phase:
Spike T-Nut * 5/16" * 22 Req
Hex Bolt * 5/16" x 2" * 14 Req
Hex Bolt * 5/16" x 3/4" * 4 Req
Fender Washer * 5/16" x 11/16" * 18 Req
Internal Tooth Lock Washer * 5/16" – 19/32" OD * 18 Req
Wood Screw * #8 x 1-1/2" * 4 Req
E1 * Fort Leg * 2 Req
N2 * Top Rail-SB * 1 Req
N6 * Wall Rail * 1 Req
N1 * Ground Board * 1 Req
P5 * Wall Rail * 1 Req
P7 * Swing Block * 1 Req
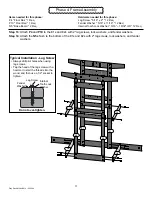
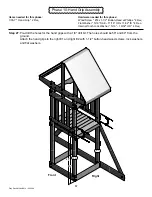
Step 6
: Insert 8 spike T-nuts into each
E1
.
Attach
N2
, angle cut down, fl ush to the top of the E1s with 2" hex bolts, lock washers, and fender
washers.
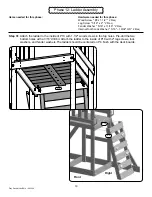
Step 7
: Insert 4 spike T-nuts into the four outer holes of N2.
Insert 3/4" hex bolts, lock washers, and fender washers into the four outer T-nuts of N2.
Phase 2: Frame Assembly
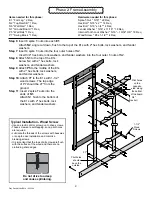
Step 8
: Attach N6 to the top of the E1s,
below N2, with 2" hex bolts, lock
washers, and fender washers.
Step 9
: Attach
P5
to the middle of the E1s
with 2" hex bolts, lock washers,
and fender washers.
Step 10
: Attach P7 to the E1s with 1-1/2"
wood screws. The top edge
of P7 should be 27" from the
ground.
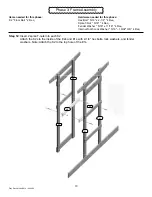
Step 11
: Insert 2 spike T-nuts into the
ends of
N1
.
Attach
N1
fl ush to the bottom of
the E1s with 2" hex bolts, lock
washers, and fender washers.
27"
N2
E1
N1
P7
N6
Typical Installation - Wood Screw
• Use an electric drill or screw gun to drive screws.
• These screws are self-tapping, so no pilot holes
are required.
• Lubricate the threads of the screws with beeswax
or soap to ease installation and minimize
breaking screws.
• It is important that the tops of all screws are fl ush
with the surface of the wood and there are no
protruding sharp edges.
Do not drive too deep
and cause splintering.
E1
P5
3/4"
Hex bolt
1-1/2"
Wood
Screws
Pilot holes
should
be on the
outside.
Pilot holes
on the
opposite
side, along
the bottom
of the board.

