© Copyright Playground Inc
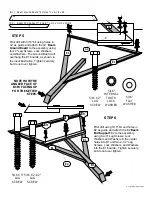
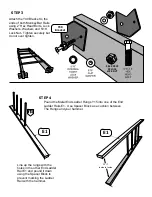
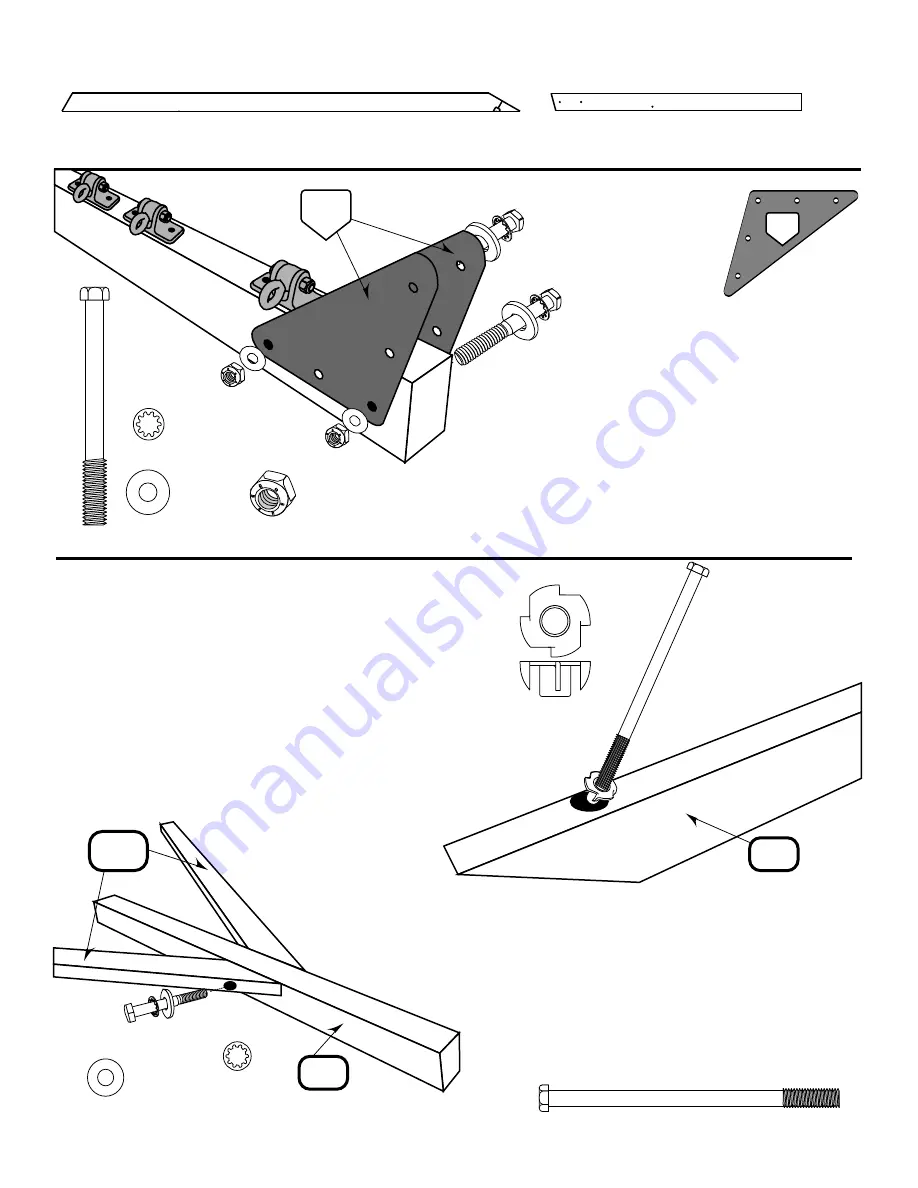
Thread a 3/8" Spike Tee Nut
as shown in the illustration
so that you can pound it into the countersunk hole on one
Long Angle Brace E1. Once the Spike Tee Nut is firmly
embedded in the wood at the bottom of the hole, un-
screw and remove the bolt. This is the easiest way to
install the Spike Tee Nuts in a countersunk hole. You
only need to do this on one of the Long Angle Braces.
Attach the E1
Long Angle Braces
to the B1
Beam End Post
using a
3/8"x6-1/2" Hex Head Bolt, 3/8" Lock Washer, and 3/8" Flat Washer,
threading the bolt through the wooden parts into the Spike Tee
Nut installed in Step 3.
Tighten securely, but don't over tighten.
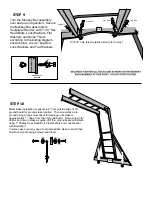
Use any convenient
long 3/8" bolt.
( E1 ) Long Angle Brace * 1 Hole * 30° - 60° * 1-1/2 x 3-1/2 x 85
( B1 ) Beam End Post * 3 Holes * 3-1/4 x 3-1/4 x 47
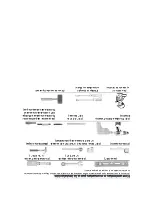
3/8 X 6-1/2" HEX HEAD BOLT
3/8"
SPIKE TEE
NUT
3/8"
INTERNAL
TOOTH
LOCK
WASHER
SAE 3/8"
FLAT
WASHER
STEP 3
STEP 4
E1
E1
B1
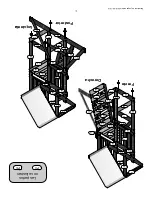
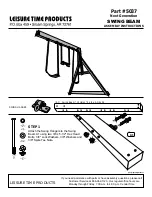
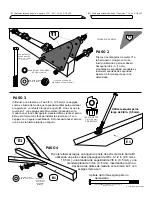
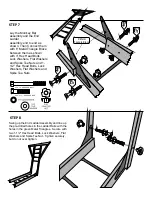
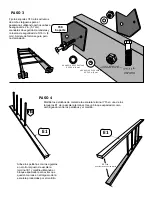
Attach the two
Metal Triangles
Y1 to the Swing Beam as shown
using two 4" Hex Head Bolts,
Lock Washers, Washers and 5/16
Nylock Lock Nuts. Tighten
securely, but do not over tighten.
METAL TRIANGLE
Y1
5/16 X 4"
HEX
HEAD
BOLT
5/16 X 2018
NYLOCK
LOCK NUT
5/16" LOCK WASHER
5/16"
FLAT
WASHER
Y1
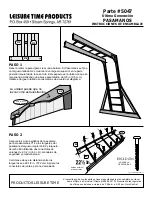
STEP 2


