background image

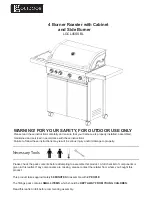
WARNING! FOR YOUR SAFETY, FOR OUTDOOR USE ONLY

Please read these instructions carefully and ensure that your barbecue is properly installed, assembled, 

maintained and serviced in accordance with these instructions.

Failure to follow these instructions may result in serious injury and/or damage to property.

Necessary Tools

Please check the pack contents before attempting to assemble this product. A full checklist of components is 

given in this leaflet. If any components are missing, please contact the retailer from whom you bought this 

product.

This product takes approximately 

50 MINUTES

 to assemble with 

2 PEOPLE

The fittings pack contains 

SMALL ITEMS

 which should be 

KEPT AWAY FROM YOUNG CHILDREN

Read this leaflet in full before commencing assembly

.

LGCL45SSBL

                    4 Burner Roaster with Cabinet

and Side Burner

Summary of Contents for LGCL45SSBL

Page 1: ...Necessary Tools Please check the pack contents before attempting to assemble this product A full checklist of components is given in this leaflet If any components are missing please contact the retai...

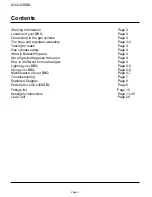
Page 2: ...re all gas bottle gases the same How is it different from natural gas Lighting your BBQ Using your BBQ Maintenance of your BBQ Troubleshooting Exploded Diagram Assembly instructions Leak Test Page 3 P...

Page 3: ...level surface Minimum clearance from any combustible materials on ALL sides is 430mm 18 Minimum clearance from any combustible material from the TOP of the bbq is 1000mm 39 Fig 1 Not to be used in ga...

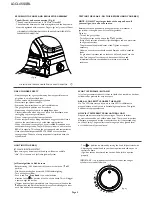
Page 4: ...der is changed you must check for gas leaks Do so by Turn on the gas cylinder Turn all gas valves on the bbq to the off position Brush a soap solution of one part liquid detergent and one part water t...

Page 5: ...eplace all the cooking surfaces back into the barbecue light the burners and turn them to low for at least 15 minutes Your cooking surfaces are now seasoned Note Curing seasoning cast iron will help t...

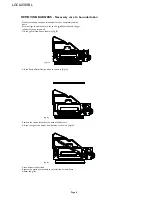
Page 6: ...ff position and the gas cylinder has been turned off Lift the grills off the bbq as shown in Fig 14 Lift the flame diffuser from position as shown in Fig 15 Remove the screws located at the back of th...

Page 7: ...IS A FIRE If there is a fire at the appliance If there is a fire at the appliance turn the gas off at the cylinder Smother the flames with a wet cloth If there is a fire at the cylinder or you cannot...

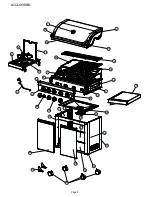
Page 8: ...Page 8 1 2 3c 4 5 7 6 8 9 10 11 12 13 14 15 17 19 20 21 22 23 24 25 26 27 28 33 29 30 16 18 34 35 36 38 37 3b 3a 39 LGCL45SSBL...

Page 9: ...7 Left Side Panel 1 SP 100 CLD LSP 18 Right Side Panel 1 SP 100 CLD RSP 19 Trolley Base Shelf 1 SP 100 CL45 BS 20 Right Front Leg 1 SP 100 CLD RFL 21 Right Back Leg 1 SP 100 CLD RBL 22 Left Front Leg...

Page 10: ...ew NOTE ALL HARDWARE IS DRAWN IN FULL SCALE TO HELP IDENTIFY EACH PART X 2 M4X10 screw Tools required not supplied Cross Head Screwdriver Philips Spanner Prepare frame for assembly Lift hood remove un...

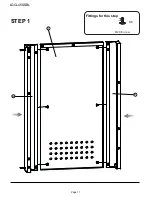
Page 11: ...Page 11 STEP 1 Fittings for this step X 6 17 22 23 M4X8 screw LGCL45SSBL...

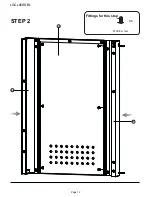
Page 12: ...Page 12 STEP 2 Fittings for this step X 6 20 21 18 M4X8 screw LGCL45SSBL...

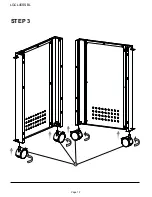
Page 13: ...Page 13 STEP 3 24 LGCL45SSBL...

Page 14: ...Page 14 STEP 4 Fittings for this step X 8 M6X12 screw 19 LGCL45SSBL...

Page 15: ...Page 15 STEP 5 27 Fittings for this step M4X12 screw X 4 LGCL45SSBL...

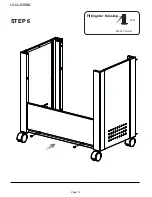
Page 16: ...Page 16 STEP 6 Fittings for this step X 2 M4X12 screw LGCL45SSBL...

Page 17: ...Page 17 STEP 7 Fittings for this step M4X12 screw X 4 16 LGCL45SSBL...

Page 18: ...STEP 8 25 26 Please tighten screw after positioning and adjusting door LGCL45SSBL Page 18...

Page 19: ...Page 19 STEP 9 Fittings for this step X 8 15 M4X12 screw LGCL45SSBL...

Page 20: ...Page 20 STEP 10 Fittings for this step X 8 X 2 M6X12 screw M6 washer LGCL45SSBL...

Page 21: ...Page 21 STEP 11 4 LGCL45SSBL...

Page 22: ...Page 22 STEP 12 Fittings for this step X 3 M4X8 screw LGCL45SSBL...

Page 23: ...Page 23 STEP 13 Fittings for this step 5 M4X8 screw X 1 LGCL45SSBL...

Page 24: ...Page 24 STEP 14 29 30 LGCL45SSBL...

Page 25: ...ioned to the left of the BBQ NEVER on the Base Shelf 2 Side Gas hose should be connected using a spanner see hose regulator instructions with this item STEP 15 For optimum performance please ensure th...

Page 26: ...Page 26 LGCL45SSBL...
Page 27: ...regrow Products Ltd Dewmead Farm New Inn Road Hinxworth Hertfordshire SG7 5HG United Kingdom Tel 44 0 1462 744500 E mail consumerservice leisuregrow com PLEASE KEEP THESE INSTRUCTIONS FOR FUTURE REFER...

Reviews: