Grinders Line - William
- PL72
12
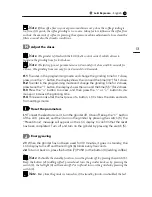
age referring to the dose per 2 coffees, the grinding time programmed and the
image of the grinder in action.
The grinder grinds the dose according to the set time. Wait until the grinding
is over, the message “OK” and then the grinder icon will appear on the LCC (9)
display. Remove the filterholder from the fork (8).
E.6.
To grind any quantity of coffee continuously, press the switch (4) and keep
it pressed, the image referring to the “adding coffee” function will appear on
the LCC (9) display.
E.7.
Check the grinding and the quantity per dose.
Note.
Once the grinding has started, you can stop it before the set time, pressing the
switch (4).
Caution.
The switch (4) is for: continuous grinding (keep it always pressed: maxi-
mum time 19 seconds); stopping the grinding once started before the set time; adding coffee
once the grinding is over.
E.8
Eventual coffee rests can be removed from the removable drip tray (12) just
pulling it. The tray (12) is fixed with magnets: removing and placing it back is really
easy and practical!
F
Regulate the chute
F.1
The grinder is equipped with an innovative adjustable coffee chute (10)
that precisely directs the coffee into any filterholder. If the ground coffee is not
delivered in the center of your filterholder, move the internal part of the chute
backwards/onwards with your fingers in order to center the fall of the ground
coffee into your filterholder.
G
Regulate the grinding
Note.
The grinder has been set in the factory for a medium size grinding, ideal for
the grinding of most types of coffee blends, available in the market.
Caution.
Regulate the grinding ALWAYS and ONLY while the grinder is grinding.
G.1
Rotate the grinding wheel (3) to change the coffee granulometry. Rotate
the wheel clock-wise (towards the small points) to obtain a finer grinding, anti-
clock-wise for a coarser grinding.
Note.
Micrometric regulation does not require any blockage.


