19
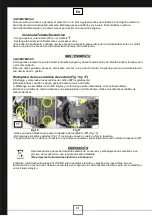
- If the tine chisel or flat chisel is used at the position of “rotation hammering”, the tool can start to rotate, resulting
in unexpected accidents. Make sure that they are used at the position of “hammering”.
(1) Switching to “hammering”
Turn the function knob counterclockwise. Align
▲
of the function knob and
of the cover as showed in Fig. 7.
(2) When fixing working positions of flat chisel such as cold chisel, etc.:
(a) Turn the function knob, Align
▲
of the function knob and
of the cover as illustrated in Fig. 8.
(b) Turn the selector as illustrated in Fig. 9 and fix the flat chisel to the desired working direction.
(c) Switch the selector lever to “hammering” according to the procedures mentioned in the above item (1) and
secure the position of the tool.
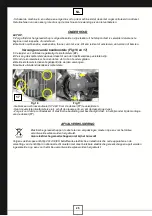
4. Warming up (Fig.10)
The grease lubrication system in this unit may require warming up in cold regions.
Position the end of the bit to make contact with the concrete, turn on the switch and perform the warming up
operation. Make sure that a hitting sound is produced and then use the unit.
CAUTION:
When the warming up operation is performed, hold the side handle and the main body securely with both hands to
maintain a secure grip and be careful not to twist your body by the jammed drill bit.
MAINTENANCE AND INSPECTION
1. Inspecting the tool
Since use of a dull tool will degrade efficiency and cause possible motor malfunction, sharpen or replace the tool
as soon as abrasion is noted.
2. Inspecting the mounting screws
Regularly inspect all mounting screws and ensure that they are properly tightened. Should any of the screws be
loose, retighten them immediately. Failure to do so could result in serious hazard.
3. Maintenance of the motor
The motor unit winding is the very “heart” of the power tool. Exercise due care to ensure the winding does not
become damaged and/or wet with oil or water.
4. Inspecting the carbon brushes
The Motor employs carbon brushes which are consumable parts. When they become worn to or near the “wear
limit”, it could result in motor trouble. The red service indicator LED lights up when the carbon brushes are worn
out to indicate that the tool needs servicing.
The power tool must then be sent to an after-sales service agent.
When you have to replacement the carbon brushes by yourself, please following the order
:
(1) Loosen the four set screws and remove the fan cover.
(2) Remove the helical spring and carbon brushes.
(3) After replacing the carbon brushes, install the helical spring and fan cover, with securely tightening four set
screws.
CAUTION:
Repair, modification and inspection must be must be carried out by a LEMAN Authorized Service Center.
In the operation and maintenance of power tools, the safety regulations and standards prescribed in each country
must be observed.
MODIFICATIONS:
LEMAN Power Tools are constantly being improved and modified to incorporate the latest technological
advancements.
Accordingly, some parts (i.e. code numbers and/or design) may be changed without prior notice.
DISPOSAL
Do not dispose of electric tools together with household waste material!
In observance of European Directive on waste electrical and electronic equipment and its
implementation in accordance with national law, electric tools that have reached the end of their life
must be collected separately and returned to an environmentally compatible recycling facility.
GB
Summary of Contents for PSM040
Page 4: ...4 Fig 1 Fig 2 Fig 9 Fig 10 Fig 7 Fig 8 Fig 3 Fig 4 Fig 5 Fig 6...
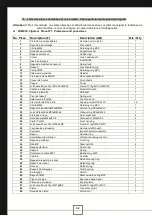
Page 35: ...35 Figure A 2015 08...
Page 36: ...36 Notes...
Page 38: ...38 Notes...
Page 39: ...39 Notes...


