6 of 21
7 of 21
2.3
Display
The
screen
shows
various
menus
,
dialogues
and
displays
as described
below
.
There
are
basically
six
types
of
screen
:
Ÿ
Standby
(
clock
)
Ÿ
Splash
(
mode
)
Ÿ
Now
playing
Ÿ
Dialogue
Ÿ
Error
/
Information
Ÿ
Menu
When
text
is
too
long
to
fit
on
the
screen
,
it
is
first
shown truncated
,
then
after
a
few seconds
,
slowly
scrolls
so
that
you can
read
it
all
.
The
Standby
screen
shows
the
time, date
and any
active
alarm
times
.
As
you
cycle
through
the
play
modes
using
SOURCE
,
CR2
shows a
splash
screen for
each
mode
.
After
one
second
,
CR2
enters
the selected
mode
and
tries
to
start playing
the
last
station
or
track that
was
playing
in
that
mode
.
If
this
is
not possible
,
CR2
tries
to connect
to
the
selected
source
by
scanning
for
stations
,
or prompting
for user
input
as
appropriate
.
Now
playing
screens
show
information
about
the
audio
source and
track
now
playing
,
where
available
.
Dialogue
screens
are
shown
to
allow
the
user
to
change
settings
.
Error
/
Information
screens
give
specific
messages
for
a
few seconds
,
then
change automatically
to
another
screen
.
Menus
CR2
has
basically
three
types
of
menu
.
Use
the
Select
control
to step
through
and select
options
.
A
scroll
bar
on
the
right
of
the screen
shows
if
there are
further options
above
or
below
those visible
.
Each
mode
has
a
Mode
menu
,
with
options
specific
to
that
mode
.
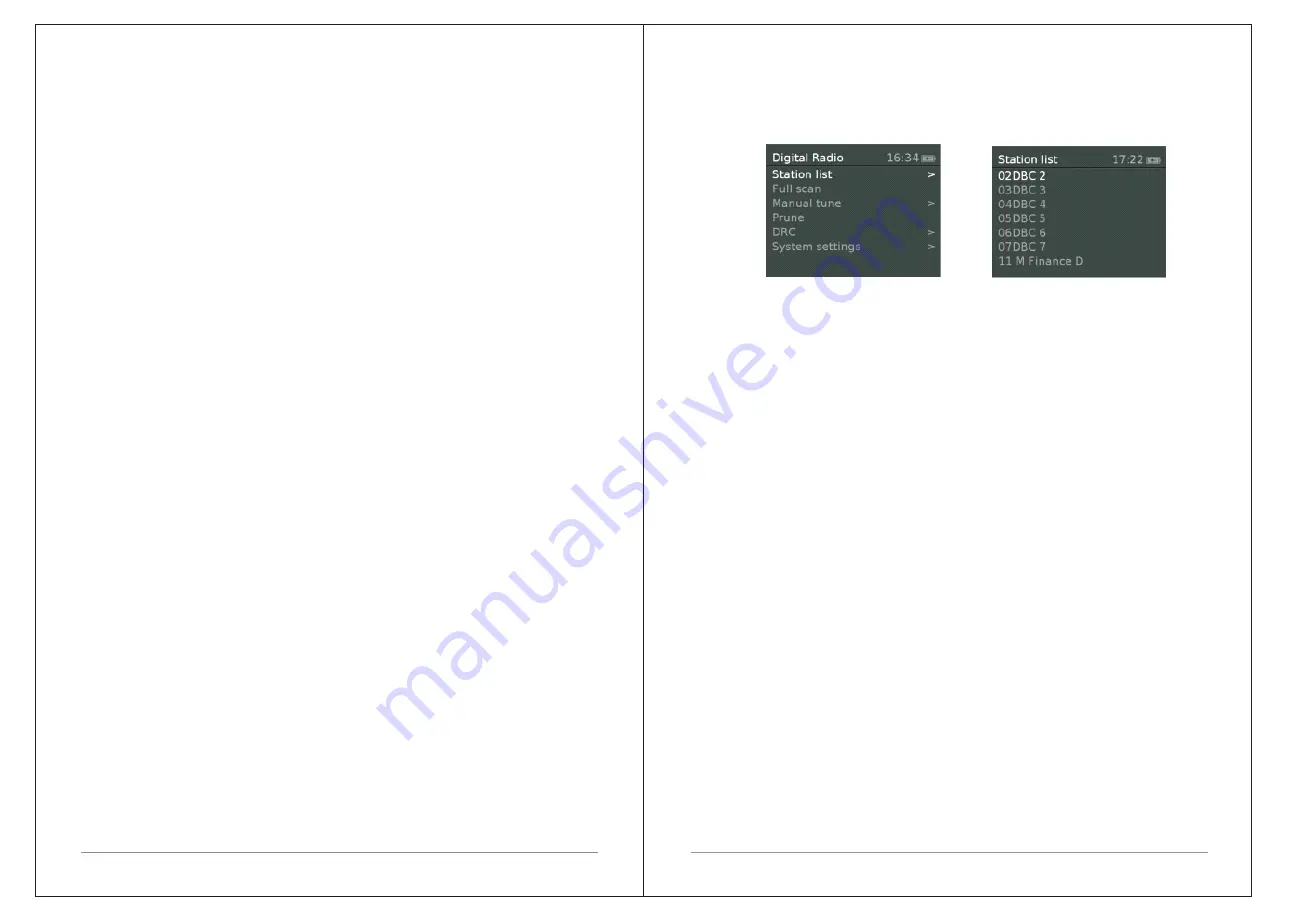
Below for DAB
mode menu as an example
.
System
settings
>.
The
'>'
indicates
options leading
to
further menus
.
The
System
settings
menu
allows
access
to
system
settings
and information
such
as
time
,
language
and
software
update
.
Menus
with
more
options
than
will
fit
on
one
screen
have
a
">"
in the
right
.
Some
menus
,
for
example
the
System
settings
menu
,
have several
submenus
.
3.
Started
and
setup
CR2
is
easy
to
use
.
To
play
DAB
or
FM
radio
,
all
you
need
is
a power
source
(
a
100-240
V
mains
supply
);
1.
Place
CR2
on
a
suitable
shelf
or
table
.
2.
Extend
the
telescopic
antenna
.
3.
Connect
the
power
adaptor
between
CR2
and
the
mains
supply
.
3.1 12/24
hour
display
To
change
between
12
and
24
hour
display
,
select
Set
12/24
hour
and
then
select
your preference
.
3.2
Time
/
date
The
time
and
date
can
be
updated
manually
or
automatically
.


