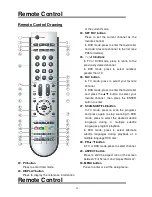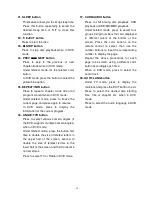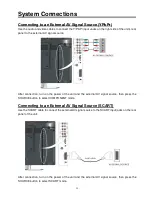
background image

- 12 - 

System Connections                                                                       


Do not connect the power cord until all other connections have been made. 


Ensure that you observe the color cables when connecting audio and video cables. 


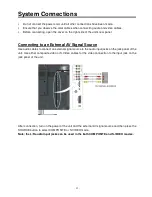
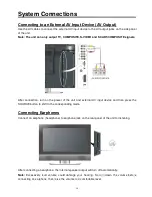
Before connecting, open the cover on the right side of the unit’s rear panel. 


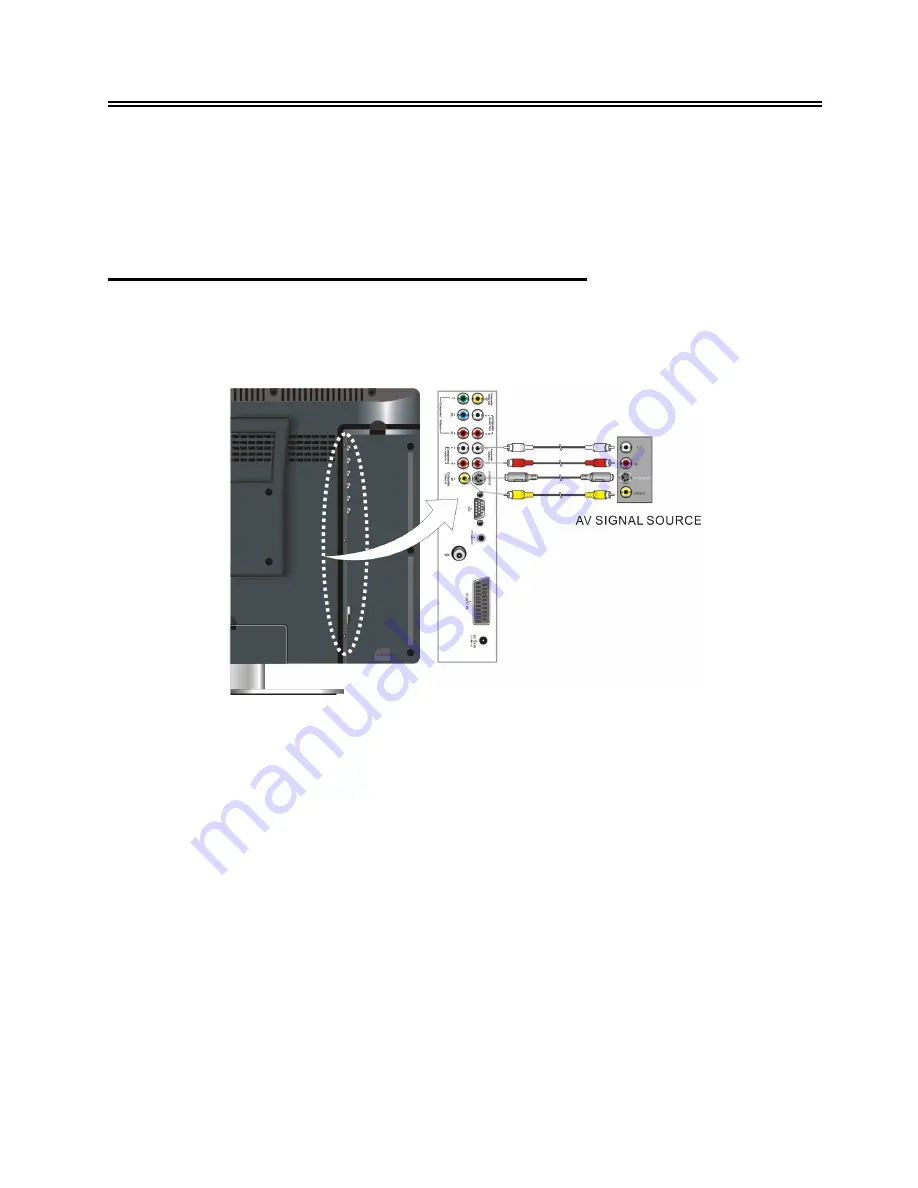
Connecting to an External AV Signal Source 

Use audio cables to connect an external signal source to the audio input jacks on the jack panel of the 

unit. Use either composite video or S-Video cables for the video connection to the input jack on the 

jack panel of the unit. 


After connection, turn on the power of the unit and the external AV signal source and then press the 

SOURCE button to select COMPOSITE or S-VIDEO mode. 

Note: the L/R audio input jacks can be used in the both COMPOSITE and S-VIDEO modes. 


Summary of Contents for DVT-1941

Page 1: ...Connecting External AV Device AV Output 14 Connecting Headphone 14 Connecting PC 15 Connecting Power Supply 16 Connecting DVB T Antenna 16 Connecting TV Antenna 17 TV Function 18 Preparations 18 Image...

Page 2: ...utions and modification of the product without authorization from the manufacturer s or authorized unit WARNING The apparatus shall not be exposed to dripping or splashing and that no objects filled w...

Page 3: ...atus 13 Only use attachments accessories specified by the manufacturer 14 Use only with the cart stand tripod bracket or table specified by the manufacturer or sold with the apparatus When a cart is u...

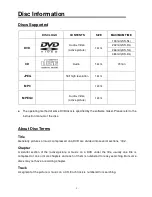
Page 4: ...fied by the software maker Please refer to the instruction manual of the disc About Disc Terms Title Generally pictures or music compressed on a DVD are divided into several sections title Chapter A s...

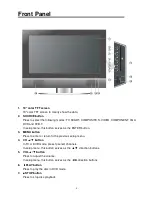
Page 5: ...is button serves as the ENTER button 3 MENU button Press to enter or return to the previous setup menu 4 CH button In TV or DVB mode press to select channels In setup menu this button serves as the di...

Page 6: ...he SD MS or MMC card into the port 11 Disc Tray Slot Used to load a disc 12 Earphone Jack When an earphone is connected the internal speakers will automatically turn off 13 USB Connecting Port To conn...

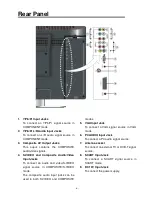
Page 7: ...e Audio Video Input Jacks To connect an audio and video S VIDEO signal source in COMPOSITE S VIDEO mode The composite audio input jacks can be used in both S VIDEO and COMPOSITE modes 5 VGA Input Jack...

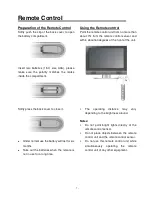
Page 8: ...when the remote is not in use for a long time Using the Remote control Point the remote control unit from no more than about 7m from the remote control sensor and within about 60 degrees of the front...

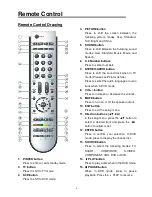
Page 9: ...ase see P26 for details Press to select the audio language or audio track when in DVD mode 8 VOL button Press to increase or decrease the volume 9 MUTE button Press to turn on or off the speaker outpu...

Page 10: ...MENU TEXT button under DVD mode Press to enter the disc menu when in DVD mode Under teletext mode press to disable teletext display and press again to resume Press to display the teletext in DVB mode...

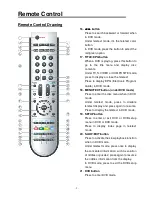
Page 11: ...to select your favorite channel In DVB mode press to enter the favorite list and press the button to select your favorite channel then press the ENTER button to enter 27 SCAN SUBTITLE button In TV mod...

Page 12: ...e Under teletext mode press the button first time to double the size of teletext letters in the upper half of the screen second to double the size of teletext letters in the lower half of the screen a...

Page 13: ...AV Signal Source Use audio cables to connect an external signal source to the audio input jacks on the jack panel of the unit Use either composite video or S Video cables for the video connection to...

Page 14: ...nnection turn on the power of the unit and the external AV signal source then press the SOURCE button to select COMPONENT mode Connecting to an External AV Signal Source SCART Use the SCART cable to c...

Page 15: ...n turn on the power of the unit and external AV input device and then press the SOURCE button to shift to the corresponding mode Connecting Earphones Connect an earphone headphone to earphone jack on...

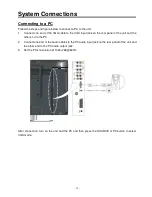
Page 16: ...ut jack on the rear panel of the unit and the other end to the PC 2 Connect one end of the audio cables to the PC audio input jack on the rear panel of the unit and the other end to the PC audio outpu...

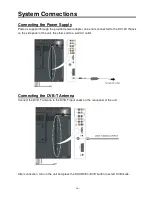
Page 17: ...one end is connected to the DC 12V IN jack on the side panel of the unit the other end to a wall AC outlet Connecting the DVB T Antenna Connect the DVB T antenna to the DVB T input Jacks on the rear p...

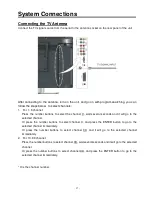
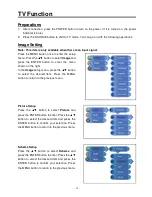
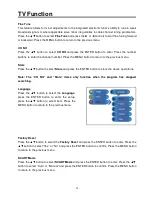
Page 18: ...wait several seconds and it will go to the selected channel Or press the number buttons to select channel X and press the ENTER button to go to the selected channel immediately Or press the number but...

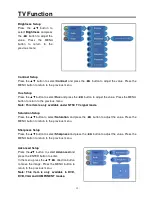
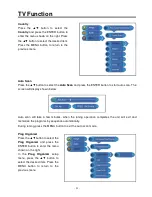
Page 19: ...esired item and press the ENTER button to confirm your selection Press the MENU button to return to the previous menu Picture Setup Press the button to select Picture and press the ENTER button to ent...

Page 20: ...o adjust the value Press the MENU button to return to the previous menu Sharpness Setup Press the button to select Sharpness and press the button to adjust the value Press the MENU button to return to...

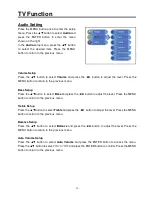
Page 21: ...on to select Phase and press the button to adjust the value Press the MENU button to return to the previous menu Clock Press the button to select Clock and press the ENTER button to enter its menu Pre...

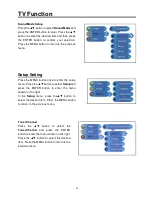
Page 22: ...nu Balance Setup Press the button to select Balance and press the button to adjust the level Press the MENU button to return to the previous menu Auto Volume Setup Press the button to select Auto Volu...

Page 23: ...previous menu Tuner Channel Press the button to select the Tuner Channel and press the ENTER button to enter the menu shown on the right Press the button to select the desired item Press the MENU butt...

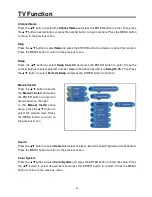
Page 24: ...s the MENU button to exit the auto scan mode Prog Organizer Press the button to select the Prog Organizer and press the ENTER button to enter the menu shown on the right In the Prog Organizer setup me...

Page 25: ...e operations to Swap To Ch Then Press the button to select Perform Swap and press the ENTER button to confirm Search Press the button to select Search and press the or to start searching forward or ba...

Page 26: ...button to select Store and press the ENTER button to store the above operations Note The CH NO and Store items only function when the program has stopped searching Factory Reset Press the button to s...

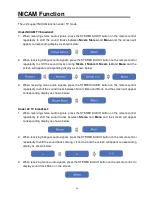
Page 27: ...io signals press the STEREO AUDIO button on the remote control repeatedly to shift the sound tracks between Nicam Mono and Mono and the screen will appear corresponding display as shown below Under A2...

Page 28: ...nu Press the buttons to select System Setting and press the ENTER button to enter the screen will display as below Time Setting You can set the TimeZone Setting and the Banner Timer Setting Press the...

Page 29: ...button to select Language Setting press the ENTER button to enter the menu as shown on the left In the menu press the direction button to display a different menu languages and press the buttons to se...

Page 30: ...button to enter the Factory Setting menu the screen will display as below Select Change Pin Code and press the ENTER button to enter The screen will display as shown on the left Use the number buttons...

Page 31: ...e channels Press the SLOW EXIT button to exit Booking list Press the button to select Booking list and press the ENTER button to enter the menu as shown below Event List 1 Event Id Select Event Id and...

Page 32: ...start time 5 Start date Select Start date and use the number buttons to enter the start date 6 Duration Select Duration and use the number buttons to enter the duration 7 Purpose Select Purpose to pl...

Page 33: ...ndWidth and press the direction button to enter Press the buttons to select the proper one and press the ENTER button to confirm 4 Encrypted Select Encrypted and press the direction button to enter Pr...

Page 34: ...the direction button to enter the popup menu as shown below In the menu press the buttons to select the desired item and press the ENTER button to confirm Press the SETUP button to return to the prev...

Page 35: ...Lock Unlock Select Lock Unlock and press the ENTER button to enter Enter the pin code by pressing the number buttons to lock or unlock the channel 5 Move Select Move and press the ENTER button to ent...

Page 36: ...ion button to enter the PopUp menu and press the buttons to select Delete Press the ENTER button to display the confirm information on the screen Press the ENTER button to delete the channel and the S...

Page 37: ...to enter the setup menu Press the buttons to select EPG and press the ENTER button to enter the screen will display as below Use the button to select the channel press the ENTER button to book the ch...

Page 38: ...D Playback Region Code DVD players and discs are coded by region These regional codes must match the played discs If the codes don t match the disc cannot be played This player s default code is regio...

Page 39: ...Title Chapter Normally there are several titles in a DVD disc and several chapters sections in a title You can select any title or chapter quickly by entering the relevant number Language Audio There...

Page 40: ...e previous system mode Pause Press the PAUSE button to pause playback and then press the PAUSE button again or PLAY button to resume normal playback Previous and Next Press the button once to go the b...

Page 41: ...TOP button once to stop playback and return to the preview menu Press the PLAY button to resume normal playback Press this button twice repeatedly to stop playback completely and the unit will return...

Page 42: ...ton to resume normal playback Previous and Next In menu mode press the or button to go to the previous or next file Fast Playback Press the FB or FF button on the remote control to activate fast backw...

Page 43: ...the button to play the next file Fast Playback During playback press the button to activate fast forward playback press the button to activate fast backward playback During fast playback press the PLA...

Page 44: ...ck The default state is disk playback Please see the below figure 6 Press the buttons to select the folder and press the ENTER button to enter 7 Press the buttons to select the desired track Then pres...

Page 45: ...to exit the setup General Setup Page Press the SETUP button to enter the General setup menu The screen will display as below TV Display Angle Mark In the menu Use the buttons to select the desired it...

Page 46: ...er 2 Press the ENTER button to enter the setup 3 Use the buttons to select On or Off 4 Press the ENTER button again to confirm your selection and to return 1 Press the buttons to select Last Memory 2...

Page 47: ...ess the buttons to select Dolby Digital 2 Press the ENTER button to enter the setup 3 In the menu use the buttons to select items 4 Press the button to return 1 Press the buttons to select Media Cente...

Page 48: ...as the below 1 Press the buttons to select Dynamic 2 Press the ENTER button to enter 3 Use the buttons to adjust 4 Press the ENTER button again to confirm the setting and return 5 Press the button to...

Page 49: ...he ENTER button to enter the setup 3 Use the buttons to select High Medium or Low 4 Press the ENTER button again to confirm your selection and return 1 Press the buttons to select Brightness 2 Press t...

Page 50: ...io 2 Press the ENTER button to enter the setup 3 Press the buttons to select the audio language 4 Press the ENTER button again to confirm the setting and return 1 Press the buttons to select Subtitle...

Page 51: ...t the desired item Press the ENTER button to enter the item Press the button to return DVD discs equipped with the child lock function are rated according to their contents and settings vary from disc...

Page 52: ...change the password by yourself 1 Press the buttons to select Password 2 Press the ENTER button to enter the setup 3 Press the ENTER button again to change the password 4 According to the indication i...

Page 53: ...o shift to the corresponding mode Then you can go on to set up the menu in a certain mode Computer Screen Function The TFT LCD screen of the unit can be used as a computer screen Take the steps of con...

Page 54: ...o play and play a section repeatedly Make sure it is not in repeat status Make sure the disc is not dirty or damaged There is no picture or the picture is moving up and down unsteady Check if the conn...

Page 55: ...nder license from Dolby Laboratories Dolby and the double D symbol are trademarks of Dolby Laboratories Confidential unpublished works 1992 1997 Dolby Laboratories Inc All rights reserved If at any ti...

Reviews: