


EN 25
•
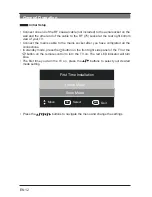
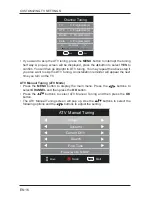
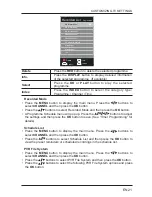
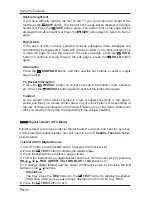
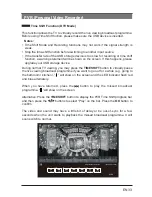
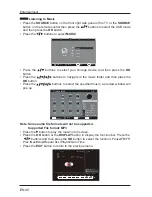
Press the
MENU
button to display the main menu. Press the
buttons to
select
TIME
and then press the
OK
button.
•
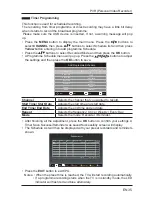
Press the
buttons to select the option you want to adjust in
TIME
menu.
•
Press the
buttons to adjust each option’s setting.
•
Press the
EXIT
button to exit the menu.
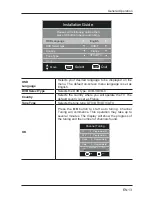
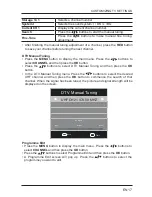
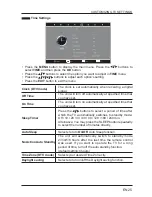
Time Settings
Clock (DTV mode)
The clock is set automatically when receiving a digital
signal.
Off Time
The unit will turn off automatically at specified time that
you have set.
On Time
The unit will turn on automatically at specified time that
you have set.
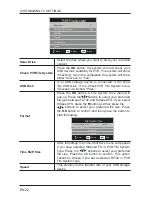
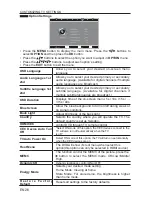
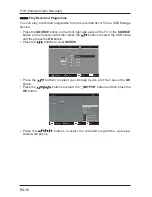
Sleep Timer
Press the
buttons to select a period of time after
which the TV automatically switches to standby mode:
Off / 10 / 20 / 30 / 60 / 90 / 120 / 180 / 240 min.
Alternative: You may press the SLEEP button repeatedly
to select the number of minutes directly.
Auto Sleep
Selects to turn
On/Off
Auto Sleep function.
No Action Auto Standby
The unit will automatically switch to standby mode
2/3/4/5/6 hours after the last time the remote control
was used. If you want to operate the TV for a long
period of time, turn off the auto standby function.
(default setting:4 hours)
Time Zone (DTV mode)
Selects your desired Time Zone city.
Daylight saving
Selects to turn on/off the Daylight saving function.
CUSTOMIZING TV SETTINGS
Summary of Contents for LED-3901-4K
Page 2: ......