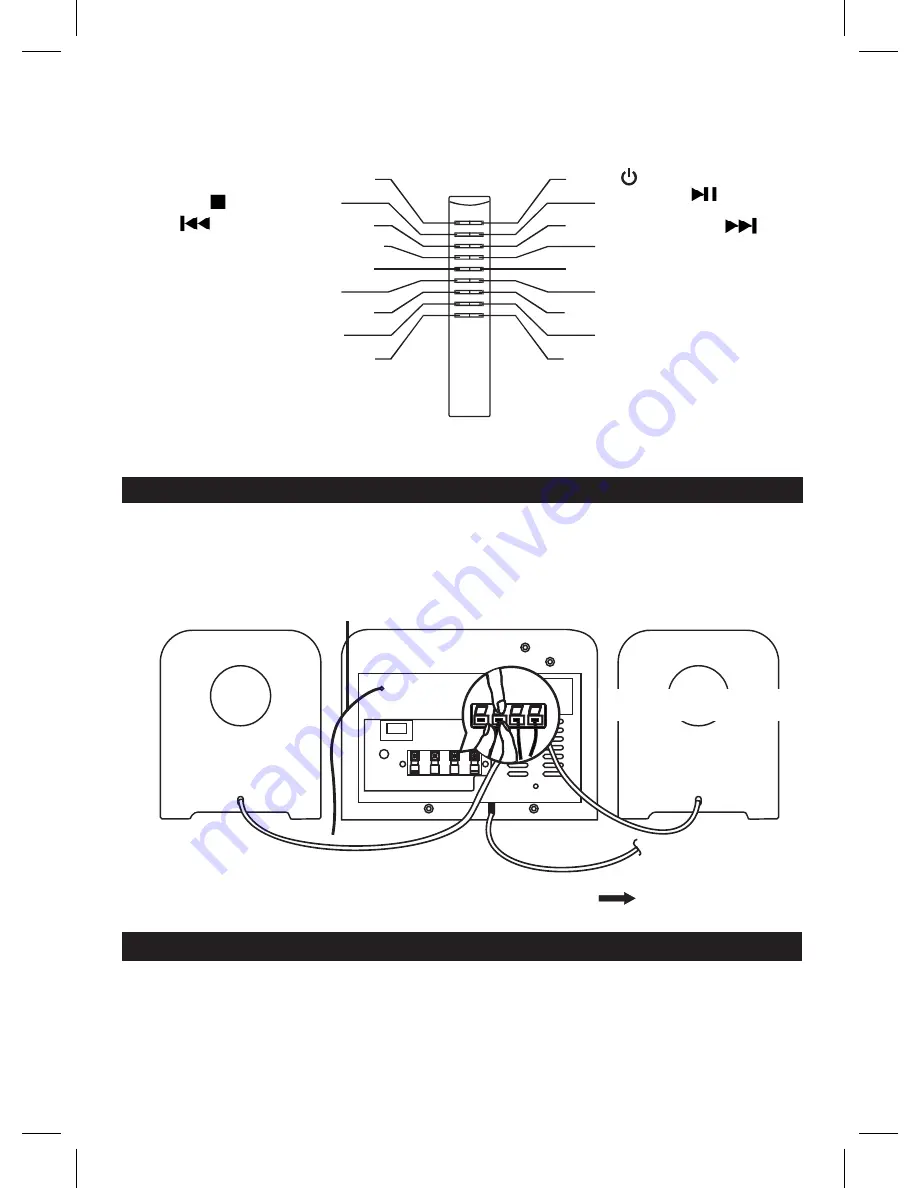
SYSTEM CONNECTIONS
Power is fed to the unit even when it is in standby.
Ensure that the unit is switched off before you make any connections.
FITTING THE BATTERIES INTO THE REMOTE CONTROL
REMOTE CONTROL UNIT
VOLUME BUTTON
VOLUME BUTTON
TUNE + NEXT BUTTON
ON / STANDBY BUTTON
+10 TRACK BUTTON
FOLDER UP / P + BUTTON
ENTER /PLAY
/PAUSE BUTTON
FUNCTION BUTTON
STOP / BAND BUTTON
TUNE - BACK BUTTON
FOLDER DOWN / P- BUTTON
-
+
ID3/DISPLAY BUTTON
MEMORY/CLOCK/ADJ. BUTTON
- 10 TRACK BUTTON
GB 1
Remove the battery door. Insert the batteries (2 x AAA SIZE battery, not included) and ensure that the polarities are correct (see
illustration inside the battery compartment).
Close the battery door.
To an AC outlet
LEFT SPEAKER
RIGHT SPEAKER
FM WIRE ANTENNA
* LEFT/RIGHT
SPEAKER SOCKET
Connect the black wire to the (-) terminal.
Connect the white wire to the (+) terminal.
SPEAKER WIRE
AC POWER CORD
SPEAKER WIRE
MUTE BUTTON
PRESET EQ BUTTON
ST./MO./PLAY MODE BUTTON
TIMER/SLEEP BUTTON


