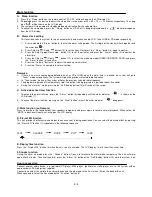
4. Press the “ Mem/Clk-Adj ” button (16) to store the track into memory.
5. Repeat steps 3 and 4 to enter additional tracks into the program memory if necessary.
6. When all the desired tracks have been programmed, press “ Play/Pause
” button (18) to play the tracks in given order.
7. Press the “ Stop
” button (17) to stop playback, press the Stop button again to clear the program memory.
The programming mode will automatically stop if no button is being pressed in a period of about 10 seconds after pressing
the “Mem/Clk-Adj ” button.
Playback of MP3 song via USB storage media or memory Card
Connecting
The system is able to playback MP3 and WMA files which are stored on media such as an USB-drive or an SD/MMC memory
card.
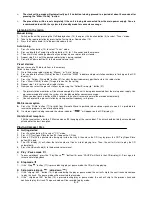
1. First switch the system to standby mode or set any function but SD or USB mode.
2. Plug-in the USB-drive with the face up & make sure it going into completely or insert the SD
memory card in the direction of the arrow as shown on the label of the memory card slot. Insert
it gently without bending.
Inserting the USB-drive upside down or backwards could damage the audio system or
the storage media (USB-drive/SD/MMC card). Check to be sure the direction is correct
before insertion.
3. Set function button (6) to “
” SD/MMCcard or “
” USB mode.
4. The system will start reading the storage media automatically after connecting, and the LCD display (3) will show the total
number of MP3/WMA files being detected.
5. Repeat the same playback procedure as playing CD/MP3 disc as above.
Remarks
-
The system can detect and read MP3 / WMA files only in USB/SD mode. Other music file formats are not supported.
-
Due to variances in MP3 encoding, some MP3 files will not play via the USB socket. This is not a malfunctioning of
the unit.
-
The USB port does not support the use of USB extension cables and is not designed for communication with a
computer.
Removing USB-drive / memory card
To remove the USB-drive / memory card, turn off the power or switch the function mode to CD, Aux, Tape or Tuner first. For USB
drive – unplug it by pulling out the USB drive directly. For memory card – pull out the SD/MMC card gently without bending.
Listening to tape recordings
General operation
Stop / eject
key
Press to stop all deck operation. Press again to open the cassette door.
Fast Forward
key
Press to start rapid tape winding in either forward or reverse
& Fast Rewind
key
direction. Press Stop key when the cassette spools stop turning.
Play
key
Press to start playing tape.
Pause
key
Press to stop tape operation temporarily. Press again to resume play.
Record
key
Press together with play key to start tape recording.
Playback
Press the Function button (5) to select “ Tape ” mode.
Insert the tape cassette with the opening facing upwards.
Close the cassette lid.
Press “
play “ key to active playback
Press the Volume knob (4) to the desired volume level.
Use the pause
key when you want to stop playback temporarily.
Press Stop / Eject
key when finished.
Recording
The cassette deck can record from all sources (CD/Tuner/USB/SD/Aux) as following:
Select the source you want to record from.
Insert a blank tape cassette into the cassette deck.
Press “ record” & “
play “ key together to start recording.
Start to playback the music.
Press the “pause ” key and then “stop/eject
” key at the cassette deck when you are finished recording. Press
“stop/eject
” key again to eject the tape.
E-4


