More features
A. Sleep function
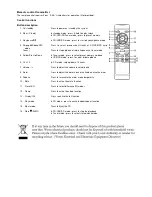
1. Press the “ Sleep ” button on the remote control. “SLP-90 “ will be shown on the LCD display (3).
2. Repeatedly press this button to adjust the sleep timer in the order of 90 > 80 > 70 >….10 minutes respectively. The sleep
icon “
” will be shown on the LCD display.
3. The system will stop and go to standby mode automatically after the selected time.
4. To cancel the sleep mode, press the “ Sleep ” button until “SLP-off’ is being displayed and the “
“ indicator disappears
from the LCD display.
B. Alarm clock setting
This function allows the system to turn on automatically and wake you up by CD , Tuner, USB or SD mode respectively.
1. Press and hold the “ Alarm ” button(6) to enter the alarm setting mode. The first digits of the clock will flash together with
the alarm icon
.
2. Press Skip Up
/
Down
button (19) to set the hour. Next press the “ Alarm ” button (6) again to confirm.
3. Press the Skip Up
/
Down
” button (19) to set the minutes and press the “ Alarm “ button (6) to confirm the
alarm time.
4. Press the Skip Up
/
Down
” button (19) to select the wake up mode(TUNER/CD/USB/SD CARD) and press
the “ Alarm “ button (6) to confirm.
5. Press the “ Volume “ button (4) to adjust the wake up volume level.
6. Press the “ Alarm “ to complete the alarm setting.
Remarks:
If there is no music source being detected (such as CD or USB) when the alarm time is reached, the system will go to
“ Tuner ” mode automatically. The system will play the previous selected radio frequency.
In “ Tuner mode “ wake up, the system will play the previous selected radio frequency.
The programming mode will automatically stop if no button is being pressed in a period of about 4 seconds.
During the “alarm on” mode, pressing the “On/Standby“ button(10) will switch off the system.
Active/de-active timer function
1. To activate the alarm function, press the “ Alarm ” button (6) repeatedly until the alarm indicator “
” is shown on the
LCD display (7).
2. To cancel the alarm function, press again the “ Alarm” button (6) until the alarm indicator “
” disappears.
C. Mute function (on Remote)
Press to terminate the sound output from speakers temporarily and press again to resume normal playback. When active, the
“MUTE” indication will continue flashing on the LCD display.
D. Pre-set EQ function
This unit provides 4 different sound modes to enhance your listening experience. You can select the desired effect by pressing
the “ Preset EQ ” button (11) repeatedly in the following sequence:
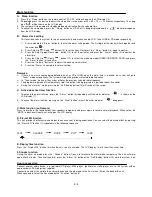
FLAT
CLASSIC
ROCK
POP
JAZZ
E. Display time function
Press the “ Display/ID3 “ button (8) when the unit is on at any mode. The LCD display (3) will show the current time.
F. Snooze function
During the alarm on mode, press the “ Snooze “ button(7) once to terminate the alarm mode temporarily. The unit will alarm
again after 9 minutes. To cancel the alarm, press the “ Alarm “ (6) button or the “ On/Standby “ button (10) while the system is on.
Aux-in connection
Connect another audio device, e.g. (portable) CD player, MP3 player, (portable) cassette player, etc. to this system with an
audio cord with RCA plugs (not supplied).
Connect one end of this cord to the external device and the other end to the Aux-in jack (24) on the back of the unit.
When connected, select the Aux mode by the “ Function “ button (5).
E-5


