Appendix B
-
Destinator OP
Console
Installing the Destinator OP
Console
You will need to install the Destinator
OP Console in order to install
additional maps, or to create your
own maps by cutting out sections of
existing maps.
Insert the
Destinator OP Disk 1
into
the PC’s CD-ROM drive, and the
Destinator OP installer screen
appears automatically.
(1)From the Select language
pop-up– highlight your language
preference and click OK.
(2)After reading the Welcome
message click Next.
(3)We recommend that you use the
default directory on your PC and click
Next.
Or, if you wish to install to a
installation directory click Browse
and follow the onscreen instructions.
(4)Select the default Destinator
language for your MO. Click Next.
(5)An installation
rmation
window is displayed. Click Next.
(6)A status window indicates the
progress of the installation. Click
Finish to exit installer program.
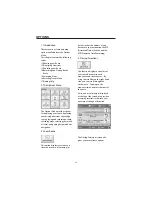
Toolbar
Figure 2 - Destinator Console Toolbar
(1) Install / Remove Map
– Dual
function of installing new or
self created maps or removing
old
unused
maps
to
save
memory
(2) Cut Map
– Allows you to
create and cut own selection of
map(s)
(3) Favorites Importer
– You can
download a list of locations
from your PC to your MO to
any category within Favorites
(See
Chapter
7
Favorites
Importing)
(4) Quick
Activation
–
This
activation featureis reserved for
additional maps.
File Menu
FAVORITES IMPORTING
43

