background image

Verbinding voor stereomuziek met andere Bluetooth-apparaten

Een verbinding voor stereomuziek vereist een apparaat die het Bluetooth A2DP-profiel ondersteunt.
Zorg ervoor dat uw apparaat de laatste versies van de stuurprogramma's en/of firmware heeft die Bluetooth-
functionaliteit ondersteunt. Compatibiliteit met alle apparaten is niet gegarandeerd. In aanvulling op de procedures 
die hierboven zijn beschreven voor mobiele telefoons, kan deze radio ook stereomuziek ontvangen van vele andere 
Bluetooth-bronapparaten, waaronder PC's, PDA's en muziekspelers met Bluetooth. De exacte procedures om een 
verbinding op te zetten kunnen variëren van apparaat tot apparaat, raadpleeg de handleiding van het apparaat voor 
specifieke instructies.

Opmerking:

 Een toenemend aantal computers biedt ondersteuning aan Bluetooth en vele bieden ook 

ondersteuning aan stereomuziek over Bluetooth (A2DP). Zorg er voor de beste prestaties met uw specifieke 
apparaat voor dat u gebruik maakt van de laatste updates of stuurprogramma's en/of firmware die beschikbaar zijn. 
In bepaalde gevallen kan een update naar de meeste recente release van de stuurprogramma's of firmware van uw 
apparaat ondersteuning toevoegen aan A2DP, zelfs als dit in een eerdere release niet beschikbaar was. Neem 
contact op met de verkoper van uw apparaat voor zulke updates en raadpleeg de handleiding voor 
updateprocedures. Onthoud dat systeemupdates alleen moeten worden uitgevoerd door gekwalificeerde individuen 
en na het uitvoeren van een volledige backup van het systeem.

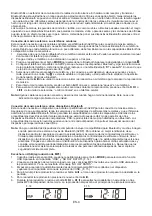
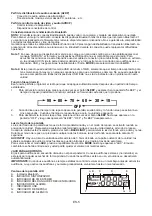
LUISTEREN NAAR MUZIEK VAN USB (Afspelen MP3)

1. 


Als de radio is ingeschakeld, druk herhaaldelijk op

 MODE

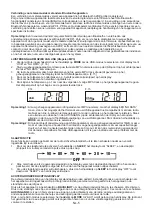
 om de USB-modus te selecteren. Het display toont 


“USB” en “NO DATA”. (F. 14)

2. 


Sluit uw geheugenapparaat met daarop uw favoriete MP3-nummers aan op de USB-poort op het achterpaneel. 


De tekst “NO DATA” zal verdwijnen.

3. 


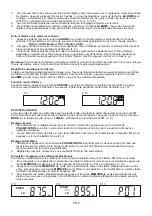
De radio begint automatisch met afspelen vanaf de eerste MP3-track die wordt gevonden op het 


geheugenapparaat en het display toont het USB-afspeelicoontje. (F. 15)

4. 


Druk om het afspelen te onderbreken op , het afspeelicoontje knippert op het display.

5. 


Druk om het afspelen te hervatten nogmaals op .

6. 


Druk tijdens het afspelen op  of  om naar de volgende of vorige MP3-track op het geheugenapparaat te gaan. 


Het afspelen start op het begin van de geselecteerde track.

Opmerking 1:

 Als uw geheugenapparaat wordt ingeladen met MP3-nummers, maar het display blijft 'NO DATA” 


tonen, dan is het mogelijk dat het formaat van uw USB-apparaat niet compatibel is met deze radio. 


Gebruik een line-in-kabel (niet meegeleverd) om naar nummers op het apparaat te luisteren. Steek 


een uiteinde van de kabel in de AUX INGANG (op de achterkant van de radio) en het andere 


uiteinde in de line-out of hoofdtelefoonuitgang van uw USB-apparaat. Druk daarna herhaaldelijk op 


MODE

 om de AUX-modus te selecteren.

Opmerking 2: 

Dit product biedt ondersteuning aan USB-apparaten met een geheugencapaciteit tot 16GB, maar u 


moet er rekening mee houden dat het inladen van geheugenapparaten met veel capaciteit langer 


duurt en het kan in enkele gevallen leiden tot een time out. Er kan dus niet worden gegarandeerd 


dat de radio compatibel is met alle USB-apparaten, dit is geen indicatie van een probleem met de 


radio.

SLAAPFUNCTIE

Deze functie kan worden gebruikt om de radio zichzelf automatisch uit te laten schakelen nadat een vooraf 
ingestelde tijd is verstreken.
1. 


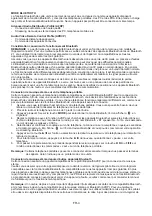
Druk om de slaapfunctie te activeren herhaaldelijk op 

SLEEP

, het display toont “SLEEP”, en de slaaptijd


(knippert in minuten) veranderd bij elke druk op de knop:

2. 


Stop met drukken als de gewenste slaaptijd op het display verschijnt, de slaapfunctie wordt na 5 seconden 


geactiveerd. Als de slaaptijd is afgeteld tot nul, dan zal het apparaat worden uitgeschakeld.

3. 


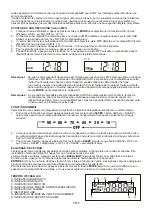
Als u de slaapfunctie eerder wilt uitschakelen, druk dan herhaaldelijk op 

SLEEP

 tot het display “OFF” toont, 


daarna zal “SLEEP” van het display verdwijnen. 

ACHTERGRONDVERLICHTING DISPLAY

De achtergrondverlichting van het display zal standaard worden gedimd in standbymodus en zal inschakelen als 
het apparaat wordt ingeschakeld. De achtergrondverlichting zal weer worden gedimd als het apparaat in de 
standbymodus wordt gezet.
Druk als het apparaat is ingeschakeld op 

BACKLIGHT

 om de achtergrondverlichting in te schakelen of te dimmen.

Druk in de standbymodus op een willekeurige knop om de achtergrondverlichting voor 10 seconden in te schakelen.

AUX INGANG

 Er zit een 3,5mm stereo aux-ingang op de achterkant van de radio; analoge audiosignalen van 

andere apparaten kunnen met behulp van deze ingang worden verstuurd naar de radio.
Druk, om de AUX-modus te selecteren, herhaaldelijk op

 MODE

 tot “AUX” wordt getoond op het display. De radio zal 

het geluid dat via de aux-ingang wordt ontvangen laten horen en u kunt de volumeregeling gebruiken om het 
volume in te stellen.
 

NO DATA 

USB

F.14

F.15

USB

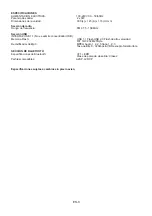
90       8 0          7 0        60     30       1  0            

OFF

NL-5

Summary of Contents for SR-03 BT

Page 1: ...STEREO FM CLOCK RADIO WITH BLUETOOTH SR 03 BT SR 03 BT INSTRUCTION MANUAL MODE BAC LI HT K G CL K OC SLEEP ALARM SNOOZE MEMORY MEMORY ...

Page 2: ...not indicate a problem with the unit DANGEROUS VOLTAGE Conductor dangerous voltage that may be of sufficient magnitude to constitute a risk of electric shock to persons is present within this product s enclosure ATTENTION The owner s manual contains important operating and maintenance instructions for your safety it is necessary to refer to the manual Mains Cable Make sure the unit is not resting ...

Page 3: ...en the minute F 3 3 When the display shows the correct time press the CLOCK button again to confirm the clock setting is now completed 4 The clock is displayed during unit standby or under AUX USB and Bluetooth operation ALARM FUNCTION This unit incorporates an alarm function You can use this function to wake you to an electronic buzzer tone your favourite FM radio station or the USB MP3 songs The...

Page 4: ...gnized when the alarm arrives the buzzer sound will be activated in place automatically Automatic alarm repeat The alarm will automatically repeat each day at the selected wake up time as long as the alarm icon is displayed alarm function on To cancel the alarm repeatedly press the ALARM button until the display shows OFF and the alarm icon will be disappeared Snooze function During alarm press th...

Page 5: ... has an approximate operational range of 30 feet in open space Generally Bluetooth devices can communicate with each other clearly within a regular sized room or office Operation between different rooms will depend on the construction of the room It is important to recognize the fact that Bluetooth communication range may be substantially reduced if the signal passes through a solid object Human b...

Page 6: ...l show USB and NO DATA F 14 2 Connect your memory device loaded with your favourite MP3 songs via the USB port located on the back panel The NO DATA will then go off 3 It will begin to playback automatically from the first MP3 track found in the device and the display willshow the USB playback icon F 15 4 To interrupt playback press the II button the playback icon in the display will flash 5 To re...

Page 7: ... this jack for private listening When headphones are in use the speaker will be automatically cut off IMPORTANT When using headphones always set the volume control to a low level before you put the headphones on then put the headphones on and gradually increase the volume to a comfortable listening level LCD DISPLAY WINDOW BLUETOOTH SECTION BLUETOOTH SPECIFICATION V2 1 EDR OUTPUT POWER CLASS Class...

Page 8: ...MODE BAC LI HT K G CL K OC SLEEP ALARM SNOOZE MEMORY MEMORY SR 03 BT SR 03 BT BEDIENUNGSANLEITUNG UKW STEREO UHRENRADIO MIT BLUETOOTH ...

Page 9: ...nd kein Anzeige einer Fehlfunktion des Geräts ACHTUNG STROMSCHLAGGEFAHR NICHT ÖFFNEN GEFÄHRLICHE STROMSPANNUNG Gefährliche Spannung kann innerhalb des Geräts vorhanden sein die stark genug ist um für Personen eine Stromschlaggefahr zu bilden ACHTUNG Die Bedienungsanleitung enthält wichtige Bedienungs und Wartungsanweisungen die für Ihre Sicherheit gedacht sind Es ist deshalb wichtig die Anleitung ...

Page 10: ...ten Betätige Sie die CLOCK Taste zur Bestätigung Daraufhin können Sie die Minuten einstellen Abb 3 3 Wenn die korrekte Uhrzeit angezeigt wird betätigen Sie die CLOCK Taste erneut zur Bestätigung und die Uhrzeit wird gespeichert 4 Die Uhr wird in Bereitschaftsmodus und im AUX USB und Bluetooth Betrieb angezeigt WECKFUNKTION Dieses Gerät verfügt über eine Weckfunktion Sie können diese Funktion verwe...

Page 11: ...e während des Weckalarms die SNOOZE Taste um den Alarm vorübergehend für 5 Minuten auszuschalten Das Schlummersymbol wird zur gleichen Zeit angezeigt Sie können dies während der einstündigen Alarmdauer beliebig oft wiederholen Abb 10 RADIOBETRIEB Wenn das Gerät angeschlossen und zum ersten Mal eingeschaltet wird geht es automatisch in den UKW Radiomodus Um den Radiomodus in anderen Betriebsarten z...

Page 12: ...Funktionen Ihres Mobiltelefons vertraut sein Da jedes Telefon Unterschiede aufweist machen Sie sich bitte mit den Bluetooth Funktionen des Geräts vor dem Verbindungsaufbau vertraut 1 Vergewissern Sie sich dass die Bluetooth Funktion auf Ihrem Mobiltelefon eingeschaltet ist Für detaillierte Informationen müssen Sie unter Umständen dazu die Bedienungsanleitung Ihres Mobiltelefons lesen 2 Stellen Sie...

Page 13: ...icht garantiert werden Dies stellt kein Problem dieses Geräts dar AUTOMATISCHE ABSCHALTUNG Diese Funktion ermöglicht es Ihnen das Radio nach einer voreingestellten Zeitdauer automatisch auszuschalten 1 Um die Einschlaf Funktion zu aktivieren betätigen Sie mehrmals die SLEEP Taste und in der Anzeige erscheint SLEEP und die Abschaltzeit blinkend in Minuten kann in folgender Reihenfolge verändert wer...

Page 14: ...ZBEREICH UKW 87 5 108 MHz USB USB 1 1 SCHNITTSTELLE USB HUBs nicht unterstützt FLASH SPEICHER USB 1 1 Flash USB 2 0 High Speed F lash FAT 16 32 32 MB 2 TB MP3 DEKODER MPEG Audio 1 2 2 5 Layer 1 2 3 Bitrate 8 320 kbps VBR außer bei freien Formaten BLUETOOTH BLUETOOTH SPEZIFIKATIONEN V2 1 EDR LEISTUNGSKLASSE Klasse 2 UNTERSTÜTZTE PROFILE A2DP AVRCP ÄNDERUNG DER TECHNISCHEN DATEN VORBEHALTEN DE 6 B C...

Page 15: ...MODE BAC LI HT K G CL K OC SLEEP ALARM SNOOZE MEMORY MEMORY SR 03 BT SR 03 BT HANDLEIDING STEREO FM KLOK RADIO MET BLUETOOTH ...

Page 16: ...pparaat GEVAARLIJKE SPANNING Er is gevaarlijke spanning aanwezig in de behuizing van dit product die van voldoende kracht is om een risico op elektrische schokken voor personen te vormen LET OP De handleiding bevat belangrijke bedienings en onderhoudsinstructies het is voor uw veiligheid nodig om de handleiding te lezen Netsnoer Zorg ervoor dat het apparaat niet op het netsnoer wordt geplaatst omd...

Page 17: ...elijk op I of I om het juiste aantal uren in te stellen en druk daarna ter bevestiging op CLOCK Stel eerst de uren in en daarna de minuten F 3 3 Als het display de juiste tijd toont druk dan nogmaals ter bevestiging op CLOCK het instellen van de klok is nu voltooid 4 De klok wordt getoond als het apparaat standby staat of in de AUX USB en Bluetooth modus ALARMFUNCTIE Dit apparaat beschikt ook over...

Page 18: ...n keer op te drukken Opmerking Als de wekmodus is ingesteld op USB maar er geen USB apparaat is geplaatst of als het USB apparaat niet wordt herkend dan zal automatisch het zoemeralarm in plaats van het USB alarm worden geactiveerd wanneer de alarmtijd wordt bereikt Het alarm automatisch herhalen Het alarm zal elke dag automatisch op de geselecteerde wektijd worden geactiveerd als het alarmicoontj...

Page 19: ... kamer of kantoor van normaal formaat Gebruik in verschillende ruimten hangt af van de constructie van de ruimten Het is belangrijk om te realiseren dat het Bluetooth communicatiebereik aanzienlijk kan worden verminderd als het signaal door vaste objecten heen moet Menselijke lichamen bakstenen betonnen muren en zwaar meubilair of boekenkasten zullen het operationele bereik van uw Bluetooth appara...

Page 20: ... geheugenapparaat wordt ingeladen met MP3 nummers maar het display blijft NO DATA tonen dan is het mogelijk dat het formaat van uw USB apparaat niet compatibel is met deze radio Gebruik een line in kabel niet meegeleverd om naar nummers op het apparaat te luisteren Steek een uiteinde van de kabel in de AUX INGANG op de achterkant van de radio en het andere uiteinde in de line out of hoofdtelefoonu...

Page 21: ...DICATOR C FM STEREO INDICATOR D TIJD FREQUENTIEBEREIK INDICATOR E ALARM INDICATOR F USB INDICATOR G SLAAP INDICATOR H SNOOZE INDICATOR SPECIFICATIES VOEDING AC 100 240V 50 60Hz VERMOGEN 2 x 5W AFMETINGEN 300 L x 145 B x 115 H mm RADIO GEDEELTE FREQUENTIEBEREIK FM 87 5 108 MHz USB GEDEELTE INTERFACE USB 1 1 USB HUB niet ondersteund FLASH GEHEUGEN USB 1 1 Flash USB 2 0 High Speed Flash FAT 16 32 32M...

Page 22: ...MODE BAC LI HT K G CL K OC S P LEE ALARM SNOOZE MEMORY MEMORY SR 03 BT SR 03 BT MANUEL D INSTRUCTION RADIO REVEIL FM STEREO AVEC BLUETOOTH ...

Page 23: ... problème concernant l unité TENSION DANGEREUSE Une tension dangereuse des conducteurs d ampleur suffisante pour constituer un risque de choc électrique aux personnes est présente dans le boitier de ce produit ATTENTION Le manuel de l utilisateur contient des instructions importantes d utilisation et d entretien pour votre sécurité il est nécessaire de vous référer à ce manuel Câble secteur Assure...

Page 24: ...glez d abord les heures puis les minutes F 3 3 Lorsque l écran affiche l heure correcte appuyez sur la touche CLOCK de nouveau pour confirmer le réglage de l horloge est désormais terminé 4 L horloge s affiche pendant que l unite est en veille ou pendant le fonctionnement AUX MP3 ou Bluetooth FONCTION ALARME Cette unité comporte une fonction alarme Vous pouvez utiliser cette fonction pour vous rév...

Page 25: ...alarme disparaisse Fonction report d alarme Pendant l alarme appuyez sur la touche SNOOZE pour éteindre l alarme temporairement pendant 5 minutes l icône de report d alarme s affichera Vous pouvez répéter cela pendant toute la durée de l alarme F 10 ÉCOUTER LA RADIO Lorsque l unité est allumée et alimentée pour la première fois elle passera automatiquement en mode radio FM Pour sélectionner le mod...

Page 26: ...ifféremment commencez par vous familiariser avec les fonctions Bluetooth de votre appareil avant la connexion 1 Assurez vous que le Bluetooth est activé sur votre téléphone portable Vous aurez peut être besoin de vous référer au manuel de l utilisateur du téléphone pour plus de détails 2 Placez la radio et le téléphone à moins de 3 pieds l un de l autre 3 Appuyez plusieurs fois sur la touche MODE ...

Page 27: ...B le temps de reconnaissance pour des mémoires plus volumineuses sera plus long et pourra causer une inactivité du système Donc la compatibilité avec tous les appareils USB ne peut être garantie cela n indique pas un problème de cette unité FONCTION SOMMEIL Cette fonction vous permet de programmer le système à s éteindre automatiquement après un certain temps 1 Pour activer la fonction sommeil app...

Page 28: ...USB INTERFACE USB 1 1 USB HUB non compatible MEMOIRE FLASH USB 1 1 Flash USB 2 0 High Speed Flash FAT 16 32 32M 2Toctets DECODEUR MP3 MPEG Audio 1 2 2 5 Layer 1 2 3 Débit binaire 8 320kbps VBR sauf format libre SECTION BLUETOOTH SPECIFICATION BLUETOOTH V2 1 EDR PUISSANCE DE SORTIE Classe 2 PROFILS COMPATIBLES A2DP AVRCP CARACTÉRISTIQUE SUJETTES A CHANGEMENTS SANS NOTIFICATION PRÉALABLE ...

Page 29: ...MODE BAC LI HT K G CL K OC S P LEE ALARM SNOOZE MEMORY MEMORY SR 03 BT SR 03 BT MANUAL DE INSTRUCCIONES RADIO RELOJ ESTÉREO CON BLUETOOTH ...

Page 30: ...rcasa del producto existe voltaje peligroso conductor que puede tener suficiente magnitud para generar riesgos de descargas eléctricas en las personas ATENCIÓN El manual del propietario contiene instrucciones de mantenimiento y operativas importantes para su seguridad Es necesario que consulte el manual Cable de alimentación eléctrica Asegúrese de que la unidad no reposen la parte superior de los ...

Page 31: ... la hora correcta Presione el botón CLOCK nuevamente para confirmar La configuración del reloj ahora se ha completado 4 El reloj se muestra cuando la unidad esté en standby o funcionando en AUX USB y Bluetooth Función de alarma Esa unidad trae la función de alarmas Usted puede usar esta función con un tono de timbre electrónico su emisora de radio FM favorita o canciones USB MP3 La función de alar...

Page 32: ...a seleccionar la recepción mono FM presione el botón y el icono de desaparecerá de la pantalla F 12 Sintonización automática 1 Presiones sostenga el control VOLUME SCROLL por más de dos segundos control para buscar arriba y abajo la frecuencia y se buscará la primera emisora con fuerza del señor suficiente 2 Repite el procedimiento anterior si desea buscar otra emisora Almacenar y recuperar emisor...

Page 33: ...e la unidad o seleccione omitir controles en su teléfono celular Nota Algunos celulares se pueden conectar y desconectar cuando haga o termine llamadas Este no es una indicación de algún problema de su unidad Conexión de música estéreo a otros dispositivos Bluetooth Esta conexión necesita un dispositivo que admita el perfil Bluetooth A2DP para la conexión de música estéreo Asegúrese de que su disp...

Page 34: ...en el panel posterior Conecte audífonos estéreos no incluidos en este jack para poder escuchar de forma privada Cuando los audífonos estén en uso el autobús se desactivará automáticamente IMPORTANTE Cuando use audífonos siempre establezca control de volumen a un nivel bajo antes de activar los audífonos Luego active los audífonos y aumente gradualmente el volumen hasta un nivel adecuado Ventana de...

Page 35: ...FAZ USB 1 1 No se admite concentrador USB Memoria Flash USB 1 1 Flash USB 2 0 Flash de alta velocidad FAT 16 32 32M 2TByte Decodificador de Mp3 MPEG Audio 1 2 2 5 Capa 1 2 3 Tasa de Bits 8 320kbps VBR excepto formato libre SECCIÓN DE BLUETOOTH Especificaciones de Bluetooth V2 1 EDR Clase de potencia de salida Clase 2 Perfiles compatibles A2DP AVRCP Especificaciones sujetas a cambios sin previo avi...

Page 36: ...araat aan te sluiten 8 Raadpleeg eventueel de FAQ veelgestelde vragen U kunt ook mailen naar onze helpdesk 9 Zorg dat u uw aankoopbon bij de hand heeft of neem deze mee indien u het apparaat retourneert 10 Zorg ervoor dat het model nummer naam van uw Lenco apparaat bekend is Deze staat vermeld op het apparaat en op de verpakking 11 Indien u de helpdesk belt zorg er dan voor dat het apparaat bedrij...

Page 37: ...rf die FAQ Liste mit häufig gestellten Fragen durch Sie können auch den Helpdesk anmailen 9 Achten Sie darauf dass Sie den Kaufbeleg bereit liegen haben oder dass Sie den Kaufbeleg mitnemen wenn Sie das Gerät zurück bringen wollen 10 Achten Sie darauf dass die Modellnummer Ihres Lenco Gerätes bereit liegt Diese steht auf dem Gerät und auf der Verpackung 11 Indem Sie den Helpdesk anrufen wollen ach...

Reviews: