background image

b.


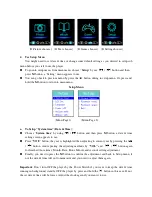
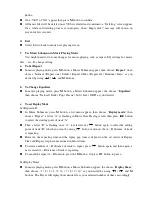
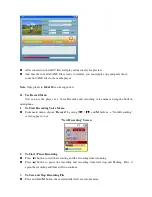
To change “LCD set” 

You can set the backlight to illuminate the screen for a certain amount of time as you desired 

or make the backlight to always ON when every time you turn ON the player. 


To change LCD backlight, choose “

LCD set

” > choose “

Dark mode

”, a level bar with number 

appear then chose “0 (always On) / 5 / 10 / 15 / 20 / 25 / 30 / 35 / 40 / 45 / 50 seconds” as you 

desired by using 

M

 and   

  / 

  buttons. Choose “0” to prevent the LCD backlight from 

turning to off. (choosing this option decrease battery performance) 

c.


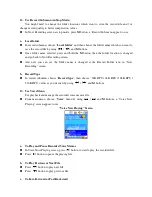
To Change “Language” 

This player can use difference OSD languages. 


To set the language, choose “

Language

”, and then choose which language as  you desired by 

using 

and   

  / 

  buttons. 

d.


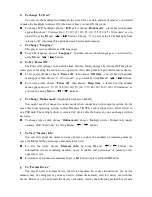
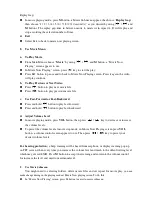
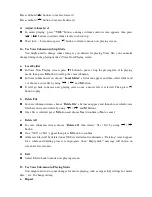
To Set “Power Off” 

The Power Off setting can extend the time between battery charges by turning OFF the player 

when you are not using the controls or no operation. Also, Sleep function provided for more choice. 


To set power off time, choose “

Power off

”, then choose “

Off time

”, a levels bar with number 

menu appear, then choose “0 - 200 seconds” as you want by using 

and   

  / 

  buttons. 


To  set  sleep  time,  choose  “

Power  off

”,  then  choose  “

Sleep  time

”,  a  levels  bar  with  number 

menu appear, choose “0 / 10 / 20 /30 / 40 / 50 / 60 / 70 / 80 / 90 / 100 / 110 / 120 minutes” as 

you want by using 

M

 and   

  / 

  buttons. 


e.


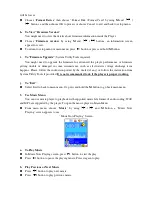
To Change “Online mode” 

(Applicable depend on Model)


You  might  need  to  change  the  online  mode  when  connecting  with  computer  system.  In  the 

sense  that  some  operating  systems  (under  Windows  2K  SP4)  cannot  support  two  driver  letters  in 

one USB disk. The multiply driver is selected by device default; however, you can change it when 

necessary. 


To change type of disk, choose “

Online mode

” choose “Multiply driver / Normal only (single 

ordinary disk) / Card only” by using M and   

  / 

  buttons. 


f.


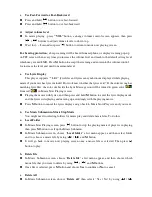
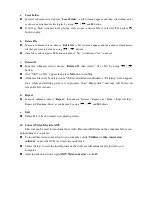
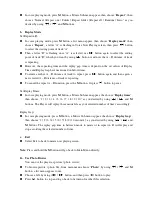
To View “Memory info” 

You can view about the memory status of player, such as the numbers of remaining memory 

space available and the percentage of memory have used. 


To  view  the  status,  choose  “

Memory  info

”  by  using 

M

  and   

  / 

  buttons.  An 

information  screen,  remaining  memory  space  available  and  percentage  of  memory  used, 

appear for view. 


To return to setup menu or main menu press 

  button or press and hold 

M

 button 


g.


To “Format Device”   

You  might  need  to  format  device  the  device  memory.  In  some  circumstances,  the  device 

memory  may  be  corrupted,  or  you  may  need  to  format  the  memory  card  if  it  newly  use  with  this 

device. However, you can format the device or memory card by the following method but all data 

Summary of Contents for Xemio-645

Page 1: ...USER S MANUAL Xemio 653 Media Player For information and support www lenco com ...

Page 2: ... for commercial or industrial use Do not expose to dripping or splashing No naked flame sources such as lighted candles should be placed on the product Ventilation should not be impeded by covering ventilation openings with items such as newspapers table cloths curtains and the like Make sure the unit is adjusted to a stable position Damage caused by using this product in an unstable position or b...

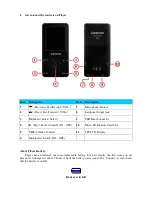
Page 3: ...til the battery status icon in the Connect screen shows that the battery is in full Battery is in full Item Description Item Description 1 Previous Fast Rewind VOL 7 Microphone Mono 2 Next Fast Forward VOL 8 Earphone Output Jack 3 M Menu Enter Select 9 USB Mini Connector 4 Play Pause Standby ON OFF 10 Micro SD Memory Card Slot 5 VOL Volume Control 11 TFT LCD Display 6 Main Power Switch ON OFF ...

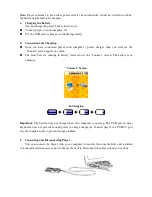
Page 4: ...ct screen appear on screen The level bars are running in battery status icon at the Connect screen The battery is in charging Connect Screen In Charging Important The battery does not charge when your computer is in sleep The USB port on most keyboards does not provide enough power to charge the player Connect player to a USB 2 0 port on your computer only to prevent charge problem 2 Connecting an...

Page 5: ...layer in My Computer or by clicking the Safely Remove Hardware icon in the Windows system tray select the correspondence name of USB Device and choose Stop choose Confirm choose Confirm follow by the pop up windows you re your computer If you re using a Mac you can also eject player by dragging the player icon on the desktop to the Trash Disconnect the USB cable from the player and computer simply...

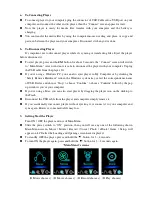
Page 6: ... time by using button and then press M button a date time setting screen appears to use Press VOL button the year is highlighted then adjusting to current year by pressing the button And repeating the adjusting methods by VOL and button again for finished those items Month Date Hour Minute and seconds setting adjustment Finally you need to press the M button to confirm the adjustment and back to S...

Page 7: ... levels bar with number menu appear choose 0 10 20 30 40 50 60 70 80 90 100 110 120 minutes as you want by using M and buttons e To Change Online mode Applicable depend on Model You might need to change the online mode when connecting with computer system In the sense that some operating systems under Windows 2K SP4 cannot support two driver letters in one USB disk The multiply driver is selected ...

Page 8: ...atic voltage discharge issue happens Please follow the instruction posted by the dealer if any or follow the instruction from System Utility Tools if provided It is not recommended to do if the player is proper working j To Exit Select Exit to back to main menu Or press and hold the M button to go back main menu 5 Use Music Menu You can use music player to playback with supported music file format...

Page 9: ...e turned to green color from red in Music Now Playing screen Playing the music with lyrics and then press and hold M button to enter the lyric display mode and the lyrics is displaying and moving up accordingly with the playing music Press M button to cancel the lyrics display and go back to Music Now Play screen if you want 6 Use Music Submenu in Music Stop Mode You might need to selecting folder...

Page 10: ... you desired c To set Replay Mode Set Repeat A B In Music Submenu press M button a list menu appear then choose Replay mode then choose Repeat a letter A is flashing in Music Now Playing screen then press button to select the starting point of track A Then a letter B is flashing once A is selected use button again to select the ending point of track B which you want by using button And now the A B...

Page 11: ...rd Press and hold button to play fast forward Press and hold button to play fast backward d Adjust Volume Level In movie playing mode press VOL button then press key to decrease or increase the volume levels To preset the volume level at movie stop mode in Movie Now Playing screen press VOL button a volume control screen appears to use Then press key to preset your desired volume levels For hearin...

Page 12: ...l music files will be deleted once YES is selected and confirmed a Deleting screen appear for a while and deleting process is in progress then Empty disk message will shown on screen for few seconds d Repeat In movie submenu choose Repeat then choose Normal Repeat one Folder Repeat folder Repeat all Random Intro as you desired by using and M buttons e Exit Select Exit to back to music now playing ...

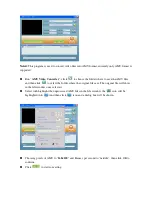
Page 13: ...then click to select the folder where the original files are The original file will show in the file window once selected Select with highlight the unprocessed AMV files in the file window the icon will be highlighted into And then click icon and a dialog box will be shown Choosing pixels of AMV to 160x120 and Frames per second to middle then click OK to confirm Click to start converting ...

Page 14: ...ng voice memos using the built in microphone 1 To Start Recording Voice Memo From main menu choose Record by using and M buttons a Now Recording screen appear to use Now Recording Screen 2 To Start Pause Recording Press button to start the recording and the recording time is running Press button to pause the recording and recording time will stop and flashing Press it again the recording and time ...

Page 15: ...creen And now you can see the folder name is changed at the Record Folder icon in Now Recording screen b Record Type In record submenu choose Record type then choose 32K BPS 64K BPS 128K BPS 256K BPS values as you desired by using and M buttons 13 Use Voice Menu For playback and manage the recorded voice memos file From main menu choose Voice menu by using and M buttons a Voice Now Playing screen ...

Page 16: ...r choose a voice file by using and M button It will go back to music now playing screen once a music file is selected Then press button to play b Delete File In voice submenu screen choose Delete file a list menu appear and then choose which voice file that you want to delete by using and M buttons Once file is selected press M button and choose Yes to confirm or No to cancel c Delete All In voice...

Page 17: ...s repeating To cancel the repeat A B function press the M button Or press button to pause Set Replay Times In voice playing mode press M button a Music Sub menu appear the choose Replay times then choose 1 2 3 4 5 6 7 8 9 10 as you desired by using and M buttons The Player will replay those music file as your selected number of times accordingly Replay Gap In voice playing mode press M button a Mu...

Page 18: ...using and M buttons The slide show function is activated as your selected time gap to playing the photo files one by one automatically c Delete file In photo submenu choose Delete file a list menu appear and then choose which photo file that you want to delete by using button Once file is selected press M button and choose Yes to confirm or No to cancel d Delete All In photo submenu choose Delete ...

Page 19: ...change next previous page for reading when Manual Play is selected Or Choose Auto play a setting menu appears then choose 1 2 3 4 5 5 6 7 8 9 10 second s as you desired by using and M buttons The Page Flip function is activated as your selected time gap to playing c Delete file In eBook Submenu choose Delete file a list menu appear and then choose which eBook file that you want to delete by using ...

Page 20: ...r allows you to play those support media files from your memory card T Flash Also it will increase the mobile hard disk memory capacity of the player if you use this option a To Play From Memory Card Turn Off the player Now insert your Micro SD memory card into the memory card slot on side of player Turn On the player and now the Micro SD memory card T Flash is ready to use The Card folder item wi...

Page 21: ... is connected properly Check whether driver is installed correctly Check whether the player s memory is in full 24 Specification Dimension 80 5 mm H x 40 5 mm W x 9mm D Weight 26g LCD 1 8 Inches Resolution RGB 128 x 160 PC connection USB 1 0 1 1 2 0 Earphone Impedance 32 Ohm Internal Memory See carton Battery Li ion 3 7V 170mAh Max Play Time 8 10 Hours MP3 music with power saving mode Audio Max Ou...

Page 22: ...struction specifications and pictures in this documentation may differ slightly from your particular situation All items described in this guide for illustration purposes only and may not apply to particular situation No legal right or entitlements may be obtained from the description made in this manual ...

Page 23: ...found on the back of the device Please write down the serial number below Model XEMIO 653 Serial number _________________________________ Lenco offers service and warranty in accordance to European law which means that in case of repairs both during and after the warranty period you should contact your local dealer Important note It is not possible to send products that need repairs to Lenco direc...

Page 24: ...nt or batteries In so doing you will help to conserve natural resources and improve standards of environmental protection in treatment and disposal of electrical waste Waste Electrical and Electronic Equipment Directive Products with the CE marking comply with the EMC Directive 2004 108 EC and the Low Voltage Directive 2006 95 EC issued by the Commission of the European Community The declaration o...

Reviews: