background image


Finally,  you  need  to  press  the


button  to  confirm  the  adjustment  and 

the screen will back to previous menu. 

Set Date 


Choose 

“Date  settings”

 to  date,  then  choose 

“Set  date  format”

  or 

“Set 

date”

 as you want; 


Choose 

“Set date format”

 then choose 

“MM DD YYYY / YYYY MM DD”


which format as you desired. 


Choose 

“ Set date”

, a date interface will appear to set;   


The 

“MM / DD / YY”

 set item is highlighted, press 

M

 button to switch in 

between day, month and year which you want to set. And adjusting them 
to current date by pressing the 

  / 

  button. 


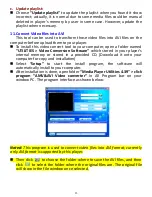
Finally,  you  need  to  press  the


button  to  confirm  the  adjustment  and 

the screen will back to previous menu. 

d.


Language: 

This player can use difference OSD languages. 


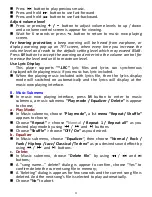
To  set  the  language,  choose  “

Language

”,  and  then  choose  which 

language as you desired by using 

  / 

  buttons and 


button. 

e.


Information: 

You can view about the player information and disk memory status, such 

as firmware version, remaining memory space available and the number of 
support media files available in player. 


In  Setup  menu,  choose  “

Information

”  by  using 

  / 

  button  and 


button, a list appears to use. 


Choose 

“Player information” 

or 

“Disk space”

 which you want to view. 

f.


Factory Settings: 


In  Setup  menu,  choose 

“Factory  settings”

,  a  dialog 

“Restore  factory 

settings?” 

will pop up to confirm; 


Choose 

“Yes”

 to confirm. Or, 

“No”

 to abort. 


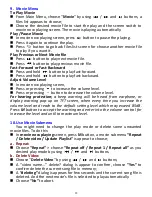
Press 

  button to exit Setup menu. 


6.


Use Bluetooth Menu 


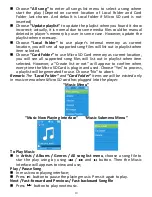
From  main  menu,  choose 

“Bluetooth”

  menu  by  using 

  / 

  and 


buttons, a Bluetooth list menu 

“Search Device / Device’s List / All Music 

/ BT Now Playing”

 is appear to choose; 


Summary of Contents for Xemio-658 UK

Page 1: ...1 USER S MANUAL Xemio 658 UK MP3 MP4 player with Bluetooth For more information www lenco com ...

Page 2: ...nly and not for commercial or industrial use Do not expose to dripping or splashing No naked flame sources such as lighted candles should be placed on the product Ventilation should not be impeded by covering ventilation openings with items such as newspapers table cloths curtains and the like Make sure the unit is adjusted to a stable position Damage caused by using this product in an unstable po...

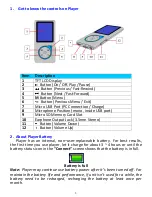
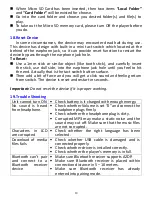
Page 3: ...mm Stereo 11 Button Volume Down 12 Button Volume Up 2 About Player Battery Player has an internal non user replaceable battery For best results the first time you use player let it charge for about 3 4 hours or until the battery status icon in the Connect screen shows that the battery is in full Battery is full Note Player may continue use battery power after it s been turned off For maintain the ...

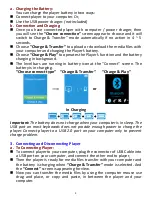
Page 4: ...creen The battery is in charging Choose connect type Charge Transfer Charge Play or In Charging Important The battery does not charge when your computer is in sleep The USB port on most keyboards does not provide enough power to charge the player Connect player to a USB 2 0 port on your computer only to prevent charge problem 3 Connecting and Disconnecting Player a To Connecting Player To connect ...

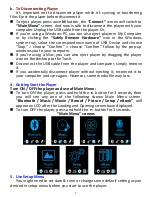
Page 5: ... Mac you can also eject player by dragging the player icon on the desktop to the Trash Disconnect the USB cable from the player and computer simply remove it If you accidentally disconnect player without ejecting it reconnect it to your computer and sync again However some media file may loss 4 Getting Start the Player Turn ON OFF the player and use of Main Menu To turn ON the player press and hol...

Page 6: ...In Setup menu choose Display settings choose Backlight timer a list appear to use then chose Always On 10 20 30 seconds as you desired by using buttons and buttons Choose Always On to prevent the LCD backlight from turning to off choosing this option decrease battery performance Choose Screen saver choose Digital clock or Screen off to turn On and Off the screen saver function Chosen digital clock...

Page 7: ...n use difference OSD languages To set the language choose Language and then choose which language as you desired by using buttons and button e Information You can view about the player information and disk memory status such as firmware version remaining memory space available and the number of support media files available in player In Setup menu choose Information by using button and button a li...

Page 8: ...aying To search for new Bluetooth Device Before you search for new device please disconnect the current paired device For better result turn the paired Bluetooth receiver to power off Choose Search Device the device searching mode will start again for new device s name list to choose again Choose new found and wanted Bluetooth receiver device for pairing b Device s List Choose Device s List to ent...

Page 9: ...hoose No to abort Bluetooth Function Limitation 1 When you turn the player into Bluetooth audio transmitting mode the player earphone output sound will turned to Off automatically 2 Only music format files with MP3 WMA and WAV can be transmitting by the player s Bluetooth function in music playing interface mode 3 Fast Forward and Fast Backward is not allowed to use in Bluetooth mode 7 Use Music M...

Page 10: ...ry as current location you will see all supported song files will list out in playlist when item selected However a Create list or not will appear to confirm when every time the Micro SD Card is plug in and used Choose Yes to process a playlist will be generated for use Choose No to abort Remark The Local Folder and Card Folder items are will be existed only in music menu when Micro SD card has pl...

Page 11: ... music included with lyrics file then the lyrics display mode will switched on automatically and the lyrics will display at the music now playing interface 8 Music Submenu In music now playing interface press M button to enter to music submenu a music submenu Play mode Equalizer Delete is appear to choose a Play Mode In Music submenu choose Play mode a list menu Repeat Shuffle appears to choose Ch...

Page 12: ...ease the volume level For hearing protection a beep warning will be heard from earphone or display warning pop up on TFT screen when every time you increase the volume level and reach to the default setting level which may exceed 85dB Press M button to accept the warning and enter into the volume control for increase the level and until to maximum level 10 Use Movie Submenu You might need to chang...

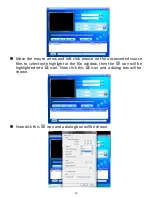
Page 13: ...which stored in your player s internal memory or stored in a provided CD Download it onto your computer for copy and installation Select Setup to start the install program the software will automatically install to your computer After installation is done open folder Media Player Utilities 4 39 click program AMV AVI Video converter in All Program bar on your window PC The program interface as show...

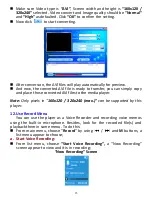
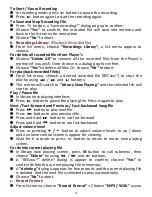
Page 14: ... click mouse on the unconverted source files to select with highlight in the file window then the icon will be highlighted into icon Now click this icon and a dialog box will be shown Now click this icon and a dialog box will be shown ...

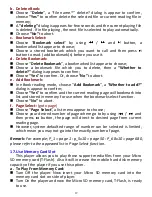
Page 15: ... and place those converted AVI files to the media player Note Only pixels in 160x120 320x240 max can be supported by this player 12 Use Record Menu You can use the player as a Voice Recorder and recording voice memos using the built in microphone Besides look for the recorded file s and playback them in same menu To do this From main menu choose Record by using and M buttons a list menu appear to ...

Page 16: ...Playing and the selected file will start to play Play Pause file In library now playing interface Press button to pause the playing file Press it again to play Next Fast forward and Previous Fast backward Song file Press button to play next file Press button to play previous file Press and hold button to use fast forward Press and hold button to use fast backward Adjust volume level Press or press...

Page 17: ... selection Change previous next picture Press button to next picture Press button to previous picture Slideshow play Press button to enter into slideshow mode those picture files will play file by file according to slideshow settings in submenu Press button to cancel the slideshow mode Pressing button to back to main menu 14 Use Picture Submenu You might need to change some settings for picture br...

Page 18: ...a file which you want to start the read Press button to go back to list menu for other file selection Change previous next page in eBook file In eBook play mode Press button to next page Press button to previous page Auto page flip Press button to enter into auto page flip function the reading page will flip according to desired time set of play settings in submenu Press button to cancel the auto ...

Page 19: ... to confirm Choose Yes to confirm and the current reading page will bookmark into list and stored in memory for use when the bookmark select function Choose No to abort f Page Select goto page Choose Page Select a list menu appear to choose Choose your desired number of page where go to by using and then press button the page will direct to desired page from current reading page However system def...

Page 20: ...lick sound and feeling return from switch The device is reset and restart in seconds Important Do not reset the device if it is proper working 19 Trouble Shooting Unit cannot turn ON Check battery is it charged with enough energy No sound is heard from headphone Check whether Volume is set 0 and connect the headphone plugs firmly Check whether the headphone plug is dirty Corrupted MP3 may make a s...

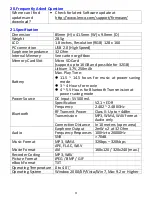
Page 21: ... 14 5 hours for music at power saving mode 3 4 Hours for movie 4 5 5 Hours for Bluetooth Transmission at power saving mode Power Source DC Input 5V 500mA Bluetooth Specification V2 1 EDR Frequency 2 402 2 480GHz RF Transmit Power Class II Up to 4dBm Transmission MP3 WMA WAV format Audio only Connection Distance In 10 meters open area Audio Earphone Output 2mW x 2 at 32 Ohm Frequency Responses 100H...

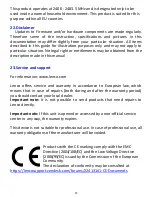
Page 22: ... information www lenco com Lenco offers service and warranty in accordance to European law which means that in case of repairs both during and after the warranty period you should contact your local dealer Important note It is not possible to send products that need repairs to Lenco directly Important note If this unit is opened or accessed by a non official service center in any way the warranty ...

Page 23: ...f the product and battery please dispose them in accordance to any applicable local laws of requirement for disposal of electrical equipment or batteries In so doing you will help to conserve natural resources and improve standards of environmental protection in treatment and disposal of electrical waste Waste Electrical and Electronic Equipment Directive All rights reserved ...

Reviews: