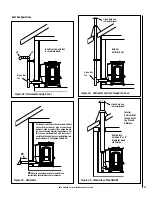
NOTE: DIAGRAMS & ILLUSTRATIONS ARE NOT TO SCALE
19
CARE AND OPERATION
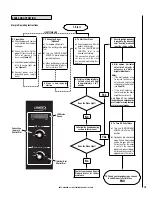
Simple Operating Instructions
3. Priming the Auger
(Optional)
a]
Fill hopper with pellets
Note: Use quality grade pellet
fuel
b]
Turn the "IGNITION/HEAT
CONTROL" dial to begin the
ignition sequence
e]
When pellets begin to drop
from feed tube into Burn-
Pot, turn dial to "OFF"
1. Start
4. Stove is now ready for
start-up
5. To Start Your Stove
a]
Check hopper, and fill with
pellets, if necessary.
b]
Turn the "IGNITION/HEAT
CONTROL" dial to the
desired heat setting.
The convection blower will
not turn on until the stove
has reached operating tem-
perature.
6. Pellets will drop into Burn-
Pot and stove will light
in approximately 3 to 7
minutes
Does the Stove Light?
7.
Once the ignition sequence
is complete, the stove will
enter "heating" mode and
run at the chosen setting
8.
After approx. 5 minutes
adjust draft adjuster if
necessary to obtain a
bright vibrant flame.
Notes:
•
If the draft adjuster is too
far inward the flame will
be lazy/sooty and the fuel
will pile up in the Burn-Pot
(see Page 10).
•
If the draft adjuster is
too far outward the flame
might burn erratically.
See Page 21 for further
instructions on adjusting the
draft adjuster using thermo-
stat vs manual modes.
No
7a.
Follow the troubleshooting
section in this manual
Contact your Lennox Hearth
Products dealer for further
assistance
10. Thank you for purchasing a Lennox
Hearth Products Pellet Stove
END
Does the Stove Light?
No
FIRST TIME USE
Convection
(room air)
Control Dial
9. To Turn Off Pellet Stove
a]
Turn the "IGNITION/HEAT
CONTROL" dial to the "OFF"
position.
b]
Stove goes into cool-down
mode. Pellets stop feeding
and the fire goes out within
2 minutes after the auger
is shut off, the room air
blower and exhaust blower
will automatically shut off in
approximately 15 minutes.
2. Preparation
a]
Check hopper and remove
any materials from hopper
and auger
b]
Check cast Burn-Pot for
proper fit (ensure cast Burn-
Pot is set securely in the
base - see
Figure 34)
c]
Check door gasket and door
latch to ensure tight seal
(see
Figure 31)
d]
Connect power cord to
grounded power supply
outlet
Yes
Yes
WA
A
I
I
T
T
20 M NUTES
O F
F
S
T
R
OFF
MIN
MAX
LOW
HIGH
FAN
HEAT
FAN SPEED
IGNITION / HEAT CONTROL
LCD Status
Screen
Ignition / Heat
Control Dial
Figure 29
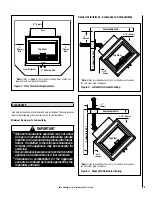
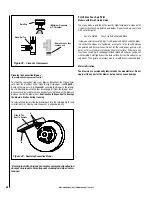
- Positive Flue Connection Into a Factory-Built Fireplace
Summary of Contents for BELLA
Page 43: ...43 NOTES ...

