background image

11

NOTE: DIAGRAMS & ILLUSTRATIONS ARE NOT TO SCALE.

LENNOX HEARTH PRODUCTS  •  MERIT PLUS

®

 B-VENT GAS FIREPLACES (MPB33/35/40/45)  •  CARE AND OPERATION INSTRUCTIONS

MAINTENANCE

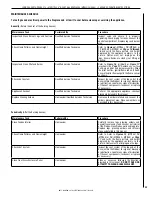
Refer to the maintenance schedule on 

Page 

23

 for maintenance tasks, procedures, and 

the frequency and by whom they should be 

performed. Always verify proper operation of 

the appliance after servicing.

WARNING: Never use abrasive cleaners 

on the glass, or clean the glass when it 

is hot.

The viewing glass should be cleaned periodi-

cally to remove any build-up caused by the 

following:

• 

During start-up, it is normal for conden-

sation to form on the inside of the glass 

(this condensation and fog will usually 

disappear in a few minutes). The moisture 

can cause lint, dust and other airborne par-

ticles to cling to the glass surface. 

• 

During the initial curing of the high tem-

perature paint and burning off of lubricants 

used in the manufacturing process, a film 

may collect on the glass. 

• 

A white coating may form on the glass as 

a result of impurities and minerals in the 

fuel.

Clean the glass two or three times each heat-

ing season, as necessary. 
The following cleaning solutions are approved 

for use to clean glass:

• 

Non-ammonia based household cleaner

• 

50/50 mix of white vinegar and water

• 

Gas fireplace/stove glass cleaner 

Inspect Glass Gasket

Visually inspect the gasket on the back side 

of the glass enclosure panels. The gasket sur-

face must be clean, free of irregularities, and 

seated firmly.

Clean Control Compartment

Keep the control compartment clean by vacu-

uming or sweeping it out at least twice a year. 

More frequent cleaning may be required due 

to excessive lint from carpeting, bedding ma-

terial, etcetera. It is imperative that control 

compartments, burners and circulating air 

passageways of the appliance be kept clean.

Clean Logs And Burner

Carefully remove the logs (use care when han-

dling fiber logs, as they become quite fragile 

after curing). Vacuum out any foreign matter 

(lint, carbon, etc.) on the burner. Ensure the 

burner ports are “open”. Remove any carbon 

deposits from the under side of the logs using 

a vacuum cleaner, or a soft bristled brush (i.e. 

paint brush). 

NOTE: Improper positioning of the logs can 

create carbon build-up and will alter the per-

formance of the appliance.

Replacing Logs

If the logs become damaged by accident or 

improper handling and need replacement, use 

only the proper replacement logs from manu-

facturer (see 

Page 30

 for ordering informa-

tion).

Re-Install Embers and Logs

Carefully follow placement instructions on 

Page 13

. All logs should fit onto the corre-

sponding pins and/or log stoppers. This will 

ensure a proper flame and safe combustion.

Inspect Wiring

Refer to 

"Wiring" on Page 19

.

CAUTION:  Label all wires prior to discon-

nection when servicing controls. Wiring 

errors can cause improper and dangerous 

operation. Verify proper operation after 

servicing.

ATTENTION:  Au moment de l'entretien 

des commandes, étiquetez tous les fils 

avant de les débrancher.  Des erreurs 

de cáblage peuvent entraîner un fonc-

tionnement inadéquat et dangereux.

Inspect and clean all wire connections. Ensure 

that there is no melting or damage. Inspection 

should include:

• 

Terminals at the valve

• 

ON/OFF Switch  (optional unit mounted 

switch) or standard CPI switch (electronic 

models only)

• 

Remote control or remote wall switch kit 

(optional control switch)

Inspect Burner Flame and Pilot Flame Ap-

pearance

Periodically do a visual check of the burner 

flame and the pilot flame. Ensure that the 

burner flame appearance resembles the flame 

shown in 

Figures 12, 13 and 14

 and as de-

scribed in Flame Appearance and Sooting 

on 

Page 17

. Refer to 

Figures 16 and 17

 on 

Page 18

 for more information about the pilot 

flame appearance. Contact a qualified service 

technician at once if any abnormal condition 

is observed.

Small Area Paint Touch-Up

Use only a factory supplied paint kit for touch-

ups. Paint is available from Lennox Hearth 

Products dealers. Never attempt to paint a hot 

fireplace. 
Do not attempt to repaint the appliance until 

the finish is completely cured (see Burn-In Pe-

riod on 

Page 7

)

. If the surface later becomes 

stained or marred, it can be lightly sanded and 

touched up with spray paint.

 WARNING

Turn off gas and electrical power 

to the fireplace and  allow it to 

cool before cleaning or servicing 

the appliance.

CAUTION:  Wear gloves and safety  

glasses for protection while doing 

required maintenance.
Verify proper operation after servicing.
S'assurer que l'appareil fonctionne adé-

quatement une fois l'entretien terminé.

Always turn off gas to the pilot (millivolt 

appliances) before cleaning. Before re-

lighting, refer to the lighting instructions in 

this manual 

(

Page 24

)

. Instructions are also 

found on a pull-out panel located in the con-

trol compartment.

Always keep the appliance area clear and free 

from combustible materials, gasoline and 

other flammable liquids.

Inspect Venting System

The appliance and venting system should be 

thoroughly inspected before initial use and, 

at a minimum, annually by a qualified service 

technician. Inspection should include ensur-

ing the exhaust passage is unobstructed and 

vent components are properly assembled and 

not damaged. Contact a qualified service tech-

nician at once if any abnormal conditions are 

observed.
If the venting system is disassembled for any 

reason, a qualified service technician should 

follow vent installation instructions for proper 

reassembly and proper sealing of the venting 

system components. However, more frequent 

periodic inspections and cleanings should be 

performed by the homeowner. 

Cleaning Glass

See 

"Front Glass Enclosure Panel, Removal, 

and Installation" on Page 12

.

NOTE: Do not clean the viewing glass before 

completing the burn-In period (the first two 

weeks of operation). Clean the glass only 

when necessary and when the fireplace is 

cool. Wipe the surface with a clean, damp, 

soft cloth. Follow with a dry, soft towel. Take 

care not to scratch the glass surface.

Summary of Contents for MPB-35

Page 1: ...ng property damage personal injury or death WARNING AVERTISSEMENT AVISO HOT GLASS WILL CAUSE BURNS DO NOT TOUCH GLASS UNTIL COOLED NEVER ALLOW CHILDREN TO TOUCH GLASS UNE SURFACE VITRÉE CHAUDE PEUT CAUSER DES BRÛLURES LAISSER REFROIDIR LA SURFACE VITRÉE AVANT D Y TOUCHER NE PERMETTEZ JAMAIS À UN ENFANT DE TOUCHER LA SURFACE VITRÉE EL VIDRIO CALIENTE CAUSARÁ QUEMADURAS USTED DEBE NUNCA TOCAR EL VID...

Page 2: ...s Controls Control Compartment Access 8 Variable Flame Height Adjustment 9 Vent Operation Test and Resetting The Safety Limit Switch 9 Maintenance 11 Front Glass Enclosure Panel Removal and Installation 12 Install Volcanic Stone Glowing Embers and Logs 13 Burner Flame Appearance Sooting 17 Burner Flame Adjustments 18 Millivolt Appliance Checkout 18 Electronic Appliance Checkout 18 Wiring Diagrams ...

Page 3: ...oir Page 5 Lisez la section Informations importantes relatives à la sécurité Page 4 Toutes les parties de votre foyer Lennox Hearth Products deviennent EXTRÊMEMENT CHAUDES Instale una malla o barrera física para evitar el contacto directo con el vidrio y prevenir las quemaduras y lesiones graves Ver los detalles a la izquierda para ordenar un Lennox SAFETY GUARD GRATIS para su chimenea Siga las in...

Page 4: ...s peuvent subir des brûlures s ils viennent en contact avec la surface chaude Il est recommandé d installer une barrière physique si des personnes à risques habitent la maison Pour empêcher l accès à un foyer ou à un poêle installez une barrière de sécurité cette mesure empêchera les tout petits les jeunes enfants et toute autre personne à risque d avoir accès à la pièce et aux surfaces chaudes 8 ...

Page 5: ...uptor opera la chimenea encendiéndola y apagándola Limpie bien la placa del interruptor de pared para quitar el polvo y aceite Pegue la etiqueta en la superficie de la placa del interruptor que controla la chimenea Figura A Seleccione el idioma que más se habla en la casa 2 Si se usa un control remoto para controlar la chimenea encuentre el transmisor y límpielo bien para quitar el polvo y aceite ...

Page 6: ...r assistance or additional information consult a qualified installer service agency or the gas supplier AVERTISSEMENT Une installation un réglage une modification une réparation ou un entretien mal effectué peut causer des dommages matériels ou des blessures Voir la notice de l utilisateur qui accompgne l appareil Pour de l aide ou des renseignements supplémentaires consultez un installateur un te...

Page 7: ...d gas pressure requirements Inlet Gas Supply Pressure Fuel Minimum Maximum Natural Gas 4 5 WC 1 12 kPa 10 5 WC 2 62 kPa Propane 11 0 WC 2 74 kPa 13 0 WC 3 24 kPa Table 2 The appliance and its appliance main gas valve must be disconnected from the gas supply piping system during any pressure testing of that system at test pressures in excess of 1 2 psi 3 5 kPa The appliance must be isolated from th...

Page 8: ...ter HI LO flame adjustment knob pilot and main gas ON OFF control knob and gas valve Figure 1 are located behind the lower access panel On electronic systems the hi lo flame adjustment knob and gas valve are located behind the lower access panel To remove the lower access panel slide the hinge pin on the left side of the panel to the RIGHT until it disengages from the left corner post hole Pull th...

Page 9: ...mit switch perform the following steps NOTE Allow the appliance to cool com pletely 1 Remove the top louver panel 2 Reset the safety limit switch by pushing the red reset button located between the wire terminals on the back of the switch See Figure 4 Detail A 3 The appliance should then relight and re main lit NOTE If the appliance does not relight turn off the appliance and call for a qualified ...

Page 10: ...n Page 12 5 Remove the three 3 screws securing the lintel and then remove the lintel One of the lintel cabinet top holes is shown in Figure 4 Detail B 6 Remove the three 3 screws securing the scoop and then remove the scoop see Figure 4 Detail B 7 Remove the two 2 screws securing the safety switch bracket and remove the switch bracket assembly with low voltage wires attached through the side panel...

Page 11: ...ing ATTENTION Au moment de l entretien des commandes étiquetez tous les fils avant de les débrancher Des erreurs de cáblage peuvent entraîner un fonc tionnement inadéquat et dangereux Inspect and clean all wire connections Ensure that there is no melting or damage Inspection should include Terminals at the valve ON OFF Switch optional unit mounted switch or standard CPI switch electronic models on...

Page 12: ...igned to operate only when the front glass enclosure panels are installed Generally the front glass enclosurepanelshouldnotberemovedexceptto gainaccesstothecomponentswithinthefirebox REMOVING GLASS ENCLOSURE PANELS Remove the top louver assembly To access the glass door securing latch first open the lower control compartment door Figure 5 by pushing in simultaneously the left and right top corners...

Page 13: ...volcanic stone should be placed directly on top of the firebox bottom along the front and to the back at the right and left sides of the burner Position any optional ceramic fiber liners before placing the volcanic stone Logs should be positioned after the volcanic stone NOTE This appliance is provided with enough glowing embers for several applications do not feel compelled to use all that is in ...

Page 14: ... with the log s notches directly over the brackets Position the right log log no 3 by inserting the pin from the rear log into the hole on its upper end Place the left log and then the smaller left and right top logs All logs that have notches to fit over the grate tines should be positioned with these notches directly against the grate All top logs that rest on lower logs do so over flattened mou...

Page 15: ...e placed in the order shown Position the rear log on the brackets at the rear of the firebox with the log s notches directly over the brackets Position the right log log no 3 by inserting the pin from the rear log into the hole on its upper end Place the left log and then the smaller left and right top logs All logs that have notches to fit over the grate tines should be positioned with these notc...

Page 16: ... Position the individual logs as shown below Logs should be placed in the order shown Position the center log on the burner first then place the glowing embers as shown in Figure 7 Place the rear log both the right and left and then the smaller left and right top logs All logs that have notches to fit over the grate tines should be positioned with these notches directly against the grate All top l...

Page 17: ...r opening must be adjusted between these two extremes Air Shutter Adjustment Guidelines If there is smoke or soot present first check the log set positioning to ensure that the flames are not impinging on any of the logs If the log set is properly positioned and a sooting condition still exists then the air shutter opening should be increased Themoreoffsetsintheventsystem thelarger the air shutter...

Page 18: ...mentally to a more closed position until the proper flame appearance is achieved 4 When satisfied that the burner flame appearance is normal turn the ON OFF control unit mounted or remote switch depending on your application to the OFF position 5 Reinstall the lower control access panel then proceed to finish the installation Millivolt Appliance Checkout To light the burner rotate the gas valve co...

Page 19: ...WITCH WALL SWITCH OR REMOTE CONTROL RECEIVER A B H C T I W S T I M I L WT BK BK BK Schematic Representation Only Figure 19 Wiring Diagram Electronic Gas Valves P N 580491 01 JUNCTION BOX 120V AC REMOTE RECEIVER ON OFF SWITCH WALL SWITCH LIMIT SWITCH B VENT MODELS ONLY AC DC POWER ADAPTOR HOT NEUTRAL OPTIONAL GROUND BATTERY HOLDER DFC WIRE HARNESS SPARK WIRE CABLE PILOT GROUND WIRE PILOT SENSOR CAB...

Page 20: ...Low Battery Detection Remote Control The life of the remote control batteries depends on many factors including battery quality and number of appliance ignitions When the transmitter batteries are low the LED light will be dim to alert of a low battery condition before losing all power As soon as the depleted batteries are replaced the Transmitter will restart its normal operation Low Battery Dete...

Page 21: ...e Remote Simple On Off Cat No Model No Description H8840 KIT RC G FIRE Remote Control Cost Effective Solution Simple On Off operation Workswithmillivoltandlowvoltageelectronic ignition controls Kit includes Remote and Receiver Remote Two Button Timer On Off Or Timer Mode Cat No ModelNo Description H8860 RC S 1 Remote Control Wall Control 4 button timer with 30 60 120 OFF minutes Wall surface mount...

Page 22: ...thout duct FOAK 4LD for use if outside combustion air is required or desired If model FOAK 4LDisuseditmustbeusedinconjunction with locally purchased non combustible Class 1 or Class 0 flexible duct Outside Combustion Air Kits Cat No ModelNo Description 81L87 FOAK 4 Combustion Air Kit with duct 81L88 FOAK 4LD Combustion Air Kit without duct Style View Doors Style View doors come in three styles The...

Page 23: ...t the vent system at the top and at the base within the firebox for signs of blockage or obstruction Look for any signs of dislocation of the vent components reconnect or replace as necessary Appliance Checkout Qualified Service Technician Perform the appropriate appliance checkout procedure detailed in this manual Replace Glowing Embers Homeowner Qualified Services Technician Remove old ember mat...

Page 24: ... repeat steps 5 through 9 If knob does not pop up when released stop and immediately call your service technician or gas supplier LIGHTING INSTRUCTIONS TO TURN OFF GAS TO APPLIANCE If the pilot will not stay lit after several tries turn the gas control knob to OFF and call your service technician or gas supplier 10 Turn gas control knob counterclockwise to ON 11 Close control compartment 12 If app...

Page 25: ...t La veilleuse devrait rester allumée Si elle s éteint répétez les étapes 5 à 8 inclusivement Si la manette ne se soulève pas d elle même lorsqu on la relâche arrêter et appeler immédiatement un technicien qualifié ou le fournisseur de gaz Si la veilleuse ne reste pas allumée après plusieurs tentatives réglez la manette d admission du gaz à la position OFF et appelez un technicien qualifié ou le f...

Page 26: ...ult in a fire or explosion D Do not use this appliance if any part has been under water Immediately call a qualified service technician to inspect the appliance and to replace any part of the control system and any gas control which has been under water Electronic Gas Control Valve SIT Electronic Pilot Assembly 3 Turn off all electric power to the appliance if service is to be performed NOTE The c...

Page 27: ... peut avoir une batterie de secours installer les batteries au besoin 8 Placez l interrupteur du récepteur en position REMOTE ou l interrupteur mural en position ON 9 Si applicable Appuyez sur le bouton ON OFF pour sélectionner ON 10 Si applicable Ajustez le thermostat sur la télécommande à l ajustement désiré 11 Si l appareil ne se met pas en marche suivez les instructions intitulées Comment coup...

Page 28: ...e the limit switch Disconnect the wires from the ON OFF switch and the valve label wires for reattachment Test for continuity with a multimeter If continuity is not indicated switch is de fective and must be replaced Wall switch or wires defective Check wall switch and wires for proper connections Jumper wire across terminals at wall switch if burner comes on replace defective wall switch If okay ...

Page 29: ...a service technician if required Pilot flame is not engulfing the sensor Call a service technician Obstructed vent system Call a service technician Soot is present on the glass and panels Initial fireplace operation A white film may develop on the glass during the first few fires as part of the burn in process The first few times you use the fireplace clean the glass after each use AFTER THE GLASS...

Page 30: ...rner Natural Gas 99K74 1 60J80 1 99K76 1 24M10 1 11 Orifice Main Burner LP Gas 99K78 1 19L52 1 21L01 1 37G00 1 12 Bag Of Embers Rockwool 88L53 1 88L53 1 88L53 1 88L53 1 13 Bag Of Decorative Volcanic Stone 80L42 1 80L42 1 80L42 1 80L42 1 14 Gas Line Flexible Connector 93L32 1 93L32 1 93L32 1 93L32 1 15 Safety Limit Switch High Limit Disc 62L16 1 62L16 1 62L16 1 62L16 1 WARNING Failure to position t...

Page 31: ...LE LENNOX HEARTH PRODUCTS MERIT PLUS B VENT GAS FIREPLACES MPB33 35 40 45 CARE AND OPERATION INSTRUCTIONS Replacement Parts 7 4 11 5 14 9 40 45 9 33 35 17 16 10 40 45 33 35 10 12 13 19 18 20 22 21 23 25 24 31 1 2 3 8 40 45 33 35 8 15 29 30 28 27 6 ...

Page 32: ...ices and also to discontinue colors styles and products Consult your local distributor for fireplace code information LENNOX the LENNOX design DAVE LENNOX the image of DAVE LENNOX and other related LENNOX marks are registered or common law trademarks of Lennox Industries Inc and are used with permission Printed in U S A 2012 Lennox Hearth Products LLC P N 506017 04 Rev D 04 2013 1508 Elm Hill Pike...

Reviews: