18
NOTE: DIAGRAMS & ILLUSTRATIONS ARE NOT TO SCALE.
Log Set Installation Instructions
(ref. form # 775275M)
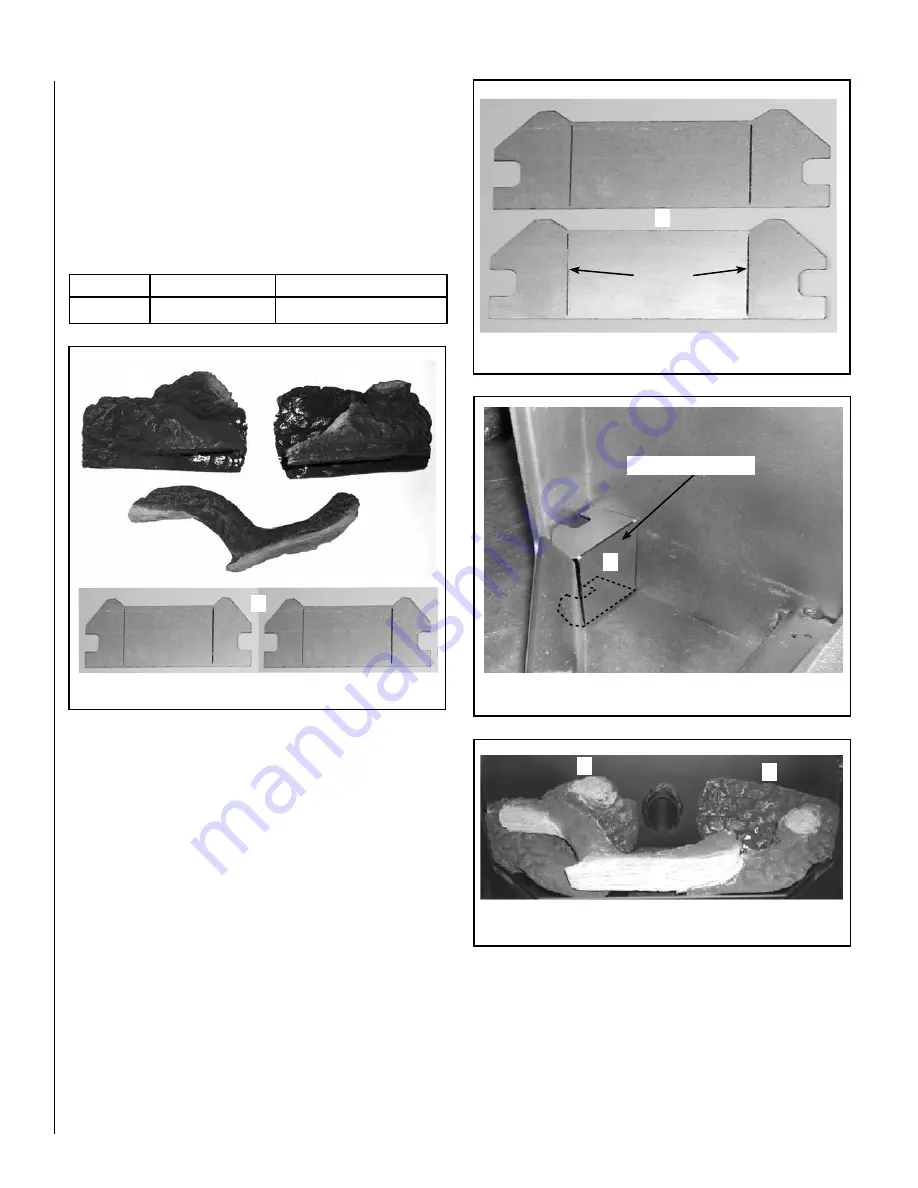
Kit Contents
(refer to Figure 38)
1 ea. Left Log (A)
1 ea. Right Log (B)
1 ea. Front Log (C)
2 ea. Log Support Brackets (D)
1 ea. Instruction Sheet
Tools Required
None
CAUTION: The logs can be damaged if they are not handled
with care!
To Install the log set:
1. Remove the two log support brackets (D) from the box and bend the
ends of the brackets 90 degrees at the bend lines. See
Figures 39 and
40
.
2. One bracket goes into the left corner and the other into the right corner
of the firebox. Rotate the brackets (D) so they are placed as shown
in
Figure 40
. The bracket fits between the back of the firebox and the
air wash at the front of the insert.
3. Remove the ceramic logs from the box and carefully unwrap them.
Position each back log (A and B in
Figure 41
) in their proper place,
one on each side against the back of the firebox.
4. The front log should face the front of the firebox with the wood grain
showing. It should rest on the other two back logs. See
Figure 41
for assembled log set.
Cat. No.
Model
Description
H 5142
P40LOG
Winslow Log Set
bend lines
Figure 39 - Log Support Brackets
D
Bracket correctly placed
D
Figure 40 - Log Support Bracket
Figure 41 - Completed Installation
A
B
C
Figure 38 - Kit contents
A
B
C
D


