Page 6
506072−01 02/08
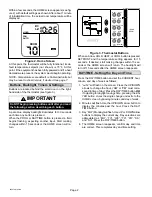
The default setting for the reminders is OFF (disabled).
Press Up/Down arrow buttons to select the desired re-
minder intervals.
Table 1. Filter and Maintenance Reminders
Buttons to
Use
Reminder
Available Settings and
How to Use
SETTINGS
(1st press)
FILTER
Total fan run time expressed in
months (Off 1 3 6 12); for
(1st press)
then
Arrows
to scroll
months (Off, 1, 3, 6, 12); for
example, if fan runs 12 hours a
day 1 month reminder displays
to scroll
selections
day, 1 month reminder displays
in 2 calendar months.
SETTINGS
(2nd press)
then
Arrows
MAINTE-
NANCE
Elapsed chronological time in
months (Off, 6, 12). Use this,
for example to remind yourself
then
Arrows
to scroll
for example, to remind yourself
when to perform routine checks
to scroll
selections
when to perform routine checks
or when to call a technician for
perodic preventive
perodic preventive
maintenance.
Enter
Stores settings.
NOTE − The HOME screen will reappear about 15 seconds
after the final arrow button press. OR, press the ENTER
button at any time to store any changes and exit to the
HOME screen.
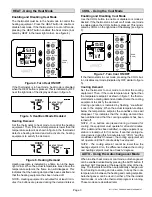
After either programmed interval has elapsed, the remind-
er will be displayed as shown in figure 16.
COOL
OFF
AUTO
EMG.
HEAT
I0:26
PROG
A B C D
HOLD
FAN
ON
AUTO
FILTER SERVICE
MAINTENANCE
76
ROOM
°
MO
AM
PM
COOL
OFF
AUTO
EMG.
HEAT
FAN
ON
AUTO
FILTER SERVICE
MAINTENANCE
76
Service
Indicator
Flashing
ROOM
°
Filter &
Maintenance
Indicators
Figure 16. Reminders
After the filter has been changed or maintenance per-
formed, reset the reminder by pressing the SETTINGS
button for 4 seconds at the corresponding reminder set-
tings screen. The screen will blink for a few moments to in-
dicate that the timer has been reset.
Service Indicator
When abnormal equipment operation is detected, the
SERVICE indicator will flash on the screen (see figure 16).
This indicates that the equipment requires service from a
qualified service technician.
Thermostat RESET
Under some abnormal conditions, it may be necessary to
reset" the thermostat to its default condition. Such a RE-
SET would delete all programming and settings and there-
fore should only be used on rare occasions when the the
thermostat fails to function as designed and/or as pro-
grammed. Such an instance can occur as a result of a pow-
er surge or similar electrical disturbance (e.g. after an elec-
trical storm or power outage). The RESET button can be
used to recover from this situation.
CAUTION
When the RESET button is pressed, ALL settings re-
vert back to the defaults, including the default pro-
gram (see tables 2 and 3).
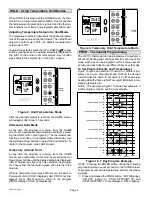
The RESET button is an unlabeled, recessed button lo-
cated behind the door on the right−hand side of the thermo-
stat, below the SETTINGS button (see figure 3). Use a pa-
per clip or small pencil to press the RESET button; ALL
thermostat settings will be reset to the defaults listed in the
Default Thermostat Settings section.
Removing/Installing Thermostat
The thermostat hinges on tabs on the top of the subbase;
no tool is needed to remove the thermostat from the sub-
base. Pivot the bottom of the thermostat outward (releas-
ing the snaps), then lift up to remove.
To replace it, first position the top tilted toward the wall
bracket and align it until you feel the tabs and slots engage;
then, while the top is in place, pivot the bottom toward the
wall until the thermostat snaps into place.
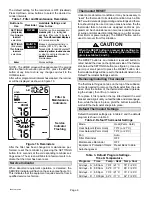
Default Thermostat Settings
Default thermostat settings are in table 2 and the default
program is shown in table 3.
Table 2. Default Thermostat Settings
Mode
Heat (Perm. Hold)
Heat Setpoint (Perm Hold)
70°F (or 21°C)
Cool Setpoint (Perm Hold)
78°F (or 26°C)
Fan
Auto
Filter Reminder
OFF
Maintenance Reminder
OFF
Equipment Protection Timers
Reset Back to Zero
Autochangeover
OFF
Table 3. Default Program Settings −
Time & Temperature
Programs
Time
Temp. − Heat
Temp. Cool
All days − A
6:00am
70
_
F / 21
°
C
78
_
F / 26
°
C
All days − B
8:00am
62
_
F / 17
°
C
85
_
F / 29
°
C
All days − C
6:00pm
70
_
F / 21
°
C
78
_
F / 26
°
C
All days − D
10:00pm 62
_
F / 17
°
C
82
_
F / 28
°
C


