Page 35
C-Supply Air VFD By-Pass (Optional)
IMPORTANT - All dampers must be open to prevent
damage to duct work and dampers.
1- Turn off all power to unit.
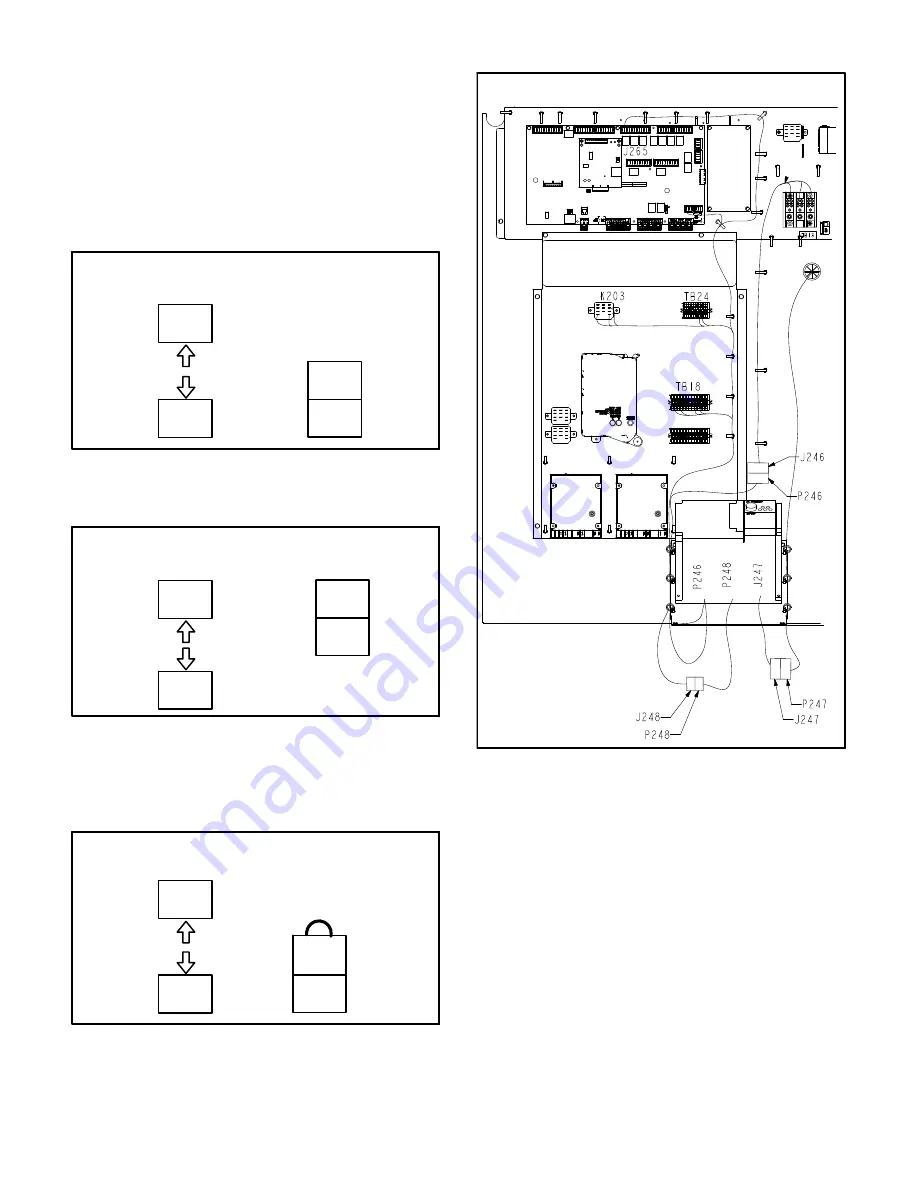
2- Locate J/P246, J/P247, J/P248 and J/P249
connectors near the VFD. See figure 30.
3- Disconnect P246 from J246 and connect P249 to
J246. See figure 27.
J246
FIGURE 27
SUPPLY AIR VFD BY-PASS CONNECTOR
P246
J246
P249
Disconnect
Connect
4- Disconnect P247 from J247 and connect J249 to
P247. See figure 28.
J249
FIGURE 28
SUPPLY AIR VFD BY-PASS CONNECTOR
P247
J247
P247
Disconnect
Connect
5- Disconnect J248 from P248 and connect connect
P248 jumper plug to J248. P248 jumper plug is
attached to the J248 wire harness near the J248 jack
connector. See figure 29.
P248
Jumper
Plug
J248
FIGURE 29
SUPPLY AIR VFD BY-PASS CONNECTOR
P248
J248
Disconnect
Connect
6- Locate VFD control relay K203 on the lower control
panel next to terminal strip TB24. See figure 30.
FIGURE 30
SUPPLY AIR VFD BY-PASS COMPONENTS
7- Remove the female receptacle terminal from K203
terminal A.
8- Locate the male tab terminal near K203. Connect
male tab terminal to the female receptacle terminal
removed in previous step.
9- Restore power to unit. Blower will operate in constant
air volume (CAV) mode.
10- Check the indoor blower motor nameplate for full load
amperage (FLA) value. Measure the amp readings
from the indoor blower motor operating in bypass
mode. If measured amps are higher than nameplate
FLA value, decrease the CFM by opening (turning
counterclockwise) the motor pulley. See figure 14. Do
not exceed minimum and maximum number of pulley
turns as shown in table 3.

