background image

134

ThinkCentre M73 User Guide

Summary of Contents for 10B4

Page 1: ...ThinkCentre M73 User Guide Machine Types 10B4 10B5 10B6 and 10B7 ...

Page 2: ...ation on page v and Appendix A Notices on page 125 Third Edition June 2014 Copyright Lenovo 2013 2014 LIMITED AND RESTRICTED RIGHTS NOTICE If data or software is delivered pursuant a General Services Administration GSA contract use reproduction or disclosure is subject to restrictions set forth in Contract No GS 35F 05925 ...

Page 3: ...ng audio 22 About your computer audio 22 Setting the volume from the desktop 22 Setting the volume from Control Panel 23 Using CDs and DVDs 23 Handling and storing CD and DVD media 24 Playing a CD or DVD 24 Recording a CD or DVD 24 Chapter 3 You and your computer 27 Accessibility and comfort 27 Arranging your workspace 27 Comfort 27 Glare and lighting 28 Air circulation 28 Electrical outlets and c...

Page 4: ... a device 93 Selecting a startup device 94 Selecting a temporary startup device 94 Selecting or changing the startup device sequence 94 Enabling ErP LPS compliance mode 94 ICE performance mode 95 ICE thermal alert 95 Exiting from the Setup Utility program 96 Chapter 8 Updating system programs 97 Using system programs 97 Updating flashing the BIOS from a disc 97 Updating flashing the BIOS from your...

Page 5: ...regulatory notice 129 Additional regulatory information 130 Appendix C WEEE and recycling information 131 Important WEEE information 131 Recycling information for Japan 131 Recycling information for Brazil 132 Battery recycling information for Taiwan 132 Battery recycling information for the European Union 132 Appendix D Restriction of Hazardous Substances Directive RoHS 135 European Union RoHS 13...

Page 6: ...iv ThinkCentre M73 User Guide ...

Page 7: ...allation are referred to as Customer Replaceable Units or CRUs Lenovo provides documentation with instructions when it is appropriate for customers to install options or replace CRUs You must closely follow all instructions when installing or replacing parts The Off state of a power indicator does not necessarily mean that voltage levels inside a product are zero Before you remove the covers from ...

Page 8: ... so can stress the cord in ways that can cause the cord to fray crack or crimp This can present a safety hazard Always route power cords so that they will not be walked on tripped over or pinched by objects Protect power cord and power adapters from liquids For instance do not leave your power cord or power adapter near sinks tubs toilets or on floors that are cleaned with liquid cleansers Liquids...

Page 9: ...ou might damage your computer To avoid possible damage to attached devices wait at least five seconds after the computer is shut down to disconnect external devices Heat and product ventilation Computers power adapters and many accessories can generate heat when turned on and when batteries are charging Always follow these basic precautions Do not leave your computer power adapter or accessories i...

Page 10: ...e to your computer If possible place your computer in a well ventilated and dry area without direct exposure to sunshine Keep electrical appliances such as an electric fan radio high powered speakers air conditioner and microwave oven away from your computer because the strong magnetic fields generated by these appliances can damage the monitor and data on the hard disk drive Do not place any beve...

Page 11: ...onents If you suspect a problem with one of these parts contact a service technician Cleaning and maintenance Keep your computer and workspace clean Shut down the computer and then disconnect the power cord before cleaning the computer Do not spray any liquid detergent directly on the computer or use any detergent containing flammable material to clean the computer Spray the detergent on a soft cl...

Page 12: ...x ThinkCentre M73 User Guide ...

Page 13: ...oprocessor To view the microprocessor information of your computer do the following On the Microsoft Windows 7 operation system click Start right click Computer and select Properties to view the information On the Microsoft Windows 8 or Windows 8 1 operating system go to the desktop and move your pointer to the top right or bottom right corner of the screen to display the charms Then click Setting...

Page 14: ... system thermal management solution that enables your computer to run with better thermal and acoustic performance The ICE function also monitors the thermal performance of your computer to identify thermal problems For more information see ICE performance mode on page 95 and ICE thermal alert on page 95 System Management SM Basic Input Output System BIOS and SM software The SM BIOS specification ...

Page 15: ...ay One optical drive bay One secondary solid state drive bay optional One slim card reader drive bay One PCI Express x16 graphics card slot Two PCI Express x1 card slots For more information see Locating internal drives on page 14 Power supply Your computer comes with 240 watt automatic voltage sensing power supply Security features Ability to enable or disable a device Ability to enable and disab...

Page 16: ...ating system Operating system s certified or tested for compatibility1 varies by model type Linux 1 The operating system s listed here are being certified or tested for compatibility at the time this publication goes to press Additional operating systems might be identified by Lenovo as compatible with your computer following the publication of this manual This list is subject to change To determi...

Page 17: ... 2 to 10 668 m 50 to 35 000 ft Electrical input Input voltage Low range Minimum 100 V ac Maximum 127 V ac Input frequency 50 60 Hz High range Minimum 200 V ac Maximum 240 V ac Input frequency 50 60 Hz Lenovo programs Your computer comes with Lenovo programs to help you work more easily and securely Depending on the Windows operating system preinstalled the programs might vary Accessing Lenovo prog...

Page 18: ...mmunications Utility Lenovo Web Conferencing Fingerprint Manager Pro or ThinkVantage Fingerprint Software Lenovo Fingerprint Manager Pro or Lenovo Fingerprint Reader Lenovo Bluetooth Lock Lenovo Bluetooth Lock Lenovo Reach Lenovo Reach Lenovo SHAREit Lenovo SHAREit Lenovo Solution Center Lenovo System Health and Diagnostics Lenovo ThinkVantage Tools Lenovo Thinkvantage Tools Password Manager Lenov...

Page 19: ...ice over IP VOIP experience Fingerprint Manager Pro or ThinkVantage Fingerprint Software Windows 7 Windows 8 and Windows 8 1 The integrated fingerprint reader provided on some keyboards enables you to enroll your fingerprint and associate it with your power on password hard disk password and Windows password As a result fingerprint authentication can replace passwords and enable simple and secure ...

Page 20: ...p and support information Lenovo ThinkVantage Tools Windows 7 The Lenovo ThinkVantage Tools program guides you to a host of information sources and provides easy access to various tools to help you work more easily and securely Lenovo Tools Windows 8 and Windows 8 1 The Lenovo Tools program guides you to a host of information sources and provides easy access to various tools to help you work more ...

Page 21: ...iple monitors to improve your productivity Locations This section provides information to help you locate the connectors on the front and rear of your computer parts on the system board and components and internal drives in your computer Locating connectors controls and indicators on the front of your computer Figure 1 Front connector control and indicator locations on page 9 shows the locations o...

Page 22: ... connector 10 Audio line in connector 11 PCI Express x16 graphics card slot 12 PCI Express x1 card slots 2 13 Ethernet connector 14 Security lock slot 15 Serial connector 16 Padlock loop Connector Description Audio line in connector Used to receive audio signals from an external audio device such as a stereo system When you attach an external audio device a cable is connected between the audio lin...

Page 23: ...connector Used to attach a mouse a trackball or other pointing devices that use a PS 2 mouse connector Serial port Used to attach an external modem a serial printer or other devices that use a 9 pin serial port USB 2 0 connector Used to attach a device that requires a USB 2 0 connection such as a keyboard a mouse a scanner a printer or a personal digital assistant PDA USB 3 0 connector Used to att...

Page 24: ...moving the computer cover on page 40 Figure 3 Component locations 1 Heat sink and fan assembly 2 Power supply assembly 3 Memory modules 4 Optical drive 5 Front audio and USB assembly 6 Front bezel 7 Slim card reader 8 Front fan system fan assembly 9 Hard disk drive or solid state drive 10 PCI Express card 11 Heat sink fan duct 12 ThinkCentre M73 User Guide ...

Page 25: ...s 10 Power fan connector 11 SATA 2 0 connector 12 Front panel connector for connecting LED indicators and power switch 13 Front USB connector 1 for connecting USB ports 1 and 2 on the front bezel 14 Front USB connector 2 for connecting an additional USB device 15 Cover presence switch connector intrusion switch connector 16 Clear CMOS Complementary Metal Oxide Semiconductor Recovery jumper 17 Seri...

Page 26: ...priate section in Chapter 5 Installing or replacing hardware on page 39 for instructions on how to install or replace internal drives for your computer Figure 5 Drive bay locations on page 14 shows the locations of the drive bays Figure 5 Drive bay locations 1 Bay 1 Secondary solid state drive bay with a 2 5 inch solid state drive or a hybrid hard disk drive installed in some models 2 Bay 2 Optica...

Page 27: ...ter When you contact Lenovo for help the machine type and model information helps support technicians to identify your computer and provide faster service The following is a sample of the machine type and model label Figure 6 Machine type and model label Chapter 1 Product overview 15 ...

Page 28: ...16 ThinkCentre M73 User Guide ...

Page 29: ...stem to help you get the most of your computer To access the Windows Help and Support information system do one of the following On the Windows 7 operating system click Start Help and Support On the Windows 8 or Windows 8 1 operating system move your pointer to the top right or bottom right corner of the screen to display the charms Then click Settings Help Additionally the Windows 8 1 operating s...

Page 30: ...to the Start screen Using a pointing device Move the pointer to the extreme bottom left corner of the screen until a small representation of the Start screen is displayed then click the representation Using a touch screen Do one of the following Swipe in and out on the left edge of the screen Representations of all available workspaces are displayed along the left edge of the screen Tap the repres...

Page 31: ...con Using a touch screen Swipe in and out on the left edge of the screen Representations of all available workspaces are displayed along the left edge of the screen Tap the Windows screen control icon at the bottom Note The Windows screen control icon is displayed only if you have at least one active workspace in the background of the system From the desktop or any other workspace that is opened f...

Page 32: ...cessed workspace application PC settings or desktop do one of the following Using a pointing device Move the pointer to the extreme top left corner of the screen until the Windows screen control icon is displayed then click the icon Using a touch screen Swipe in from the left edge of the screen For information about using other features of the Windows 8 1 operating system open the Help Tips applic...

Page 33: ...l key on the right side of the Spacebar Pressing the context menu key opens the context menu for the active program icon or object Note You can use the mouse or the Up and Down arrow keys to highlight menu selections On the Windows 7 operating system you can close the Start menu or the context menu by clicking the mouse or pressing Esc Using a fingerprint reader The integrated fingerprint reader p...

Page 34: ...use the connectors provided on the audio adapter Each audio solution provides at least three audio connectors audio line in connector audio line out connector and Microphone connector On some models a fourth connector is provided for the attachment of unpowered stereo speakers speakers that do not require an ac power source The audio adapter provides you with the ability to record and play back so...

Page 35: ...wing 1 On the Windows 7 operating system click Start Control Panel Hardware and Sound On the Windows 8 or Windows 8 1 operating system open Control Panel and click Hardware and Sound Note For detailed information on how to open Control Panel on Windows 8 and Windows 8 1 see Accessing Control Panel on the Windows 8 or Windows 8 1 operating system on page 20 2 In the Sound section click Adjust syste...

Page 36: ...pport the tray with one hand and then push on the center of the CD or DVD until it snaps into place 3 Press the Eject Load button again or gently push the tray forward to close the tray The CD or DVD player program starts automatically For additional information refer to the CD or DVD player program help system To remove a CD or DVD from the DVD drive do the following 1 With the computer on press ...

Page 37: ...l to open the program 3 Follow the instructions on the screen On the Windows 8 1 operating system run the Power2Go program by doing the following 1 On the start screen click the arrow icon in the bottom left corner to go to the Apps screen Then type Power2Go in the search box in the top right corner of the screen 2 Click Power2Go in the search result to open the program 3 Follow the instructions o...

Page 38: ...26 ThinkCentre M73 User Guide ...

Page 39: ...u arrange your workspace Comfort Although no single working position is ideal for everyone here are a few guidelines to help you find a position that suits you best Sitting in the same position for a long time can cause fatigue The backrest and seat of your chair should adjust independently and provide good support The seat should have a curved front to relieve pressure on the thighs Adjust the se...

Page 40: ... lengths The location of electrical outlets the length of power cords and cables that connect to the monitor printer and other devices might determine the final placement of your computer When arranging your workspace Avoid the use of extension cords When possible plug the computer power cord directly into an electrical outlet Keep power cords and cables neatly routed away from walkways and other ...

Page 41: ...more information about how to use and configure Narrator see the Windows Help and Support information system Screen reader technologies Screen reader technologies are primarily focused on software program interfaces help information systems and a variety of online documents For additional information about screen readers see the following Using PDFs with screen readers http www adobe com accessibi...

Page 42: ...about how to use and configure Magnifier see the Windows Help and Support information system Note For touch screen computer models you also can zoom in and zoom out by using touch gestures instead of the keyboard See Zoom on page 30 Zoom You can use the zoom feature to enlarge or reduce the size of text pictures maps or other objects From the keyboard Zoom in Press the Windows logo key the plus si...

Page 43: ...een Keyboard do the following For Windows 7 Click the Start button Then type On Screen Keyboard into the search field In the list of results click On Screen Keyboard For Windows 8 or Windows 8 1 Move your pointer to the top right or bottom right corner of the screen to display the charms and click Search Then type On Screen Keyboard into the search field In the list of results click On Screen Keyb...

Page 44: ... addition some locations offer extended privileges and services to registered users To register your computer with Lenovo do one of the following Go to http www lenovo com register and follow the instructions on the screen to register your computer Connect your computer to the Internet and register your computer through a preinstalled registration program For Windows 7 The preinstalled Lenovo Prod...

Page 45: ... turn on the computer an error message will be displayed To bypass the error message and log in to the operating system do the following 1 Properly install or close your computer cover See Completing the parts replacement on page 81 2 Press F1 to enter the Setup Utility program Then press F10 to save and exit the Setup Utility program The error message will not be displayed again Ability to enable...

Page 46: ...elps prevent unauthorized people from gaining access to the inside of your computer Your computer comes with a padlock loop so that the computer cover cannot be removed when a padlock is installed Figure 7 Installing a padlock 34 ThinkCentre M73 User Guide ...

Page 47: ...se of your computer BIOS passwords You can use the BIOS Setup Utility program to set passwords to prevent unauthorized access to your computer and data The following types of passwords are available Power On Password When a Power On Password is set you are prompted to type a valid password each time the computer is turned on The computer cannot be used until the valid password is typed in For more...

Page 48: ...thentication or Erasing Fingerprint Data as desired and press Enter 4 Select the desired settings and press Enter 5 Press F10 to save changes and exit the Setup Utility program Press Enter when prompted to confirm the exit Using and understanding firewalls A firewall can be hardware software or a combination of both depending on the level of security required Firewalls work on a set of rules to de...

Page 49: ...For more information about how to use your antivirus software refer to the help system of your antivirus software Chapter 4 Security 37 ...

Page 50: ...38 ThinkCentre M73 User Guide ...

Page 51: ...out setting the part down When this is not possible place the static protective package that the part came in on a smooth level surface and place the part on it Do not place the part on the computer cover or other metal surface Installing or replacing hardware This section provides instructions on how to install or replace hardware for your computer You can expand the capabilities of your computer...

Page 52: ...Locating connectors controls and indicators on the front of your computer on page 9 and Locating connectors on the rear of your computer on page 10 4 Remove any locking device that secures the computer cover such as an integrated cable lock or a padlock See Attaching a Kensington style cable lock on page 35 or Locking the computer cover on page 34 5 Remove the two screws that secure the computer c...

Page 53: ...puter Carefully lay the front bezel aside without disconnecting the power switch and light emitting diode LED assembly cable Figure 10 Removing the front bezel 4 To reinstall the front bezel align the other three plastic tabs on the bottom of the front bezel with the corresponding holes in the chassis then pivot the front bezel inward until it snaps into position Figure 11 Reinstalling the front b...

Page 54: ...ing 1 Remove all media from the drives and turn off all attached devices and the computer Then disconnect all power cords from electrical outlets and disconnect all cables that are connected to the computer 2 Remove the computer cover See Removing the computer cover on page 40 3 Remove the front bezel See Removing and reinstalling the front bezel on page 40 4 Pivot the drive bay assembly upward to...

Page 55: ...nstalling or replacing a memory module use 2 GB 4 GB or 8 GB DDR3 DIMMs in any combination up to a maximum of 16 GB To install or replace a memory module do the following 1 Turn off the computer and disconnect all power cords from electrical outlets 2 Remove the computer cover See Removing the computer cover on page 40 3 Lay the computer on its side for easier access to the system board 4 Remove t...

Page 56: ... pull the memory module out of the memory slot Figure 14 Removing a memory module If you are installing a memory module open the retaining clips of the memory slot into which you want to install the memory module Figure 15 Opening the retaining clips 44 ThinkCentre M73 User Guide ...

Page 57: ...s instructions on how to install or replace a PCI Express card Your computer has two PCI Express x1 card slots and one PCI Express x16 graphics card slot To install or replace a PCI Express card do the following 1 Turn off the computer and disconnect all power cords from electrical outlets 2 Remove the computer cover See Removing the computer cover on page 40 3 Remove the front bezel See Removing ...

Page 58: ...he card is held in place by a retaining latch press the card retaining latch 1 as shown to disengage the latch Grasp the card and gently pull it out of the slot If you are installing a PCI Express card remove the screw that secures the appropriate metal slot cover Then remove the metal slot cover 6 Remove the new PCI Express card from its static protective package 46 ThinkCentre M73 User Guide ...

Page 59: ... reading and understanding the Important safety information on page v Your computer has a special type of memory that maintains the date time and settings for built in features such as parallel port assignments configuration A battery keeps this information active when you turn off the computer The battery normally requires no charging or maintenance throughout its life however no battery lasts fo...

Page 60: ...he date time and any passwords See Chapter 7 Using the Setup Utility program on page 91 What to do next To work with another piece of hardware go to the appropriate section To complete the installation or replacement go to Completing the parts replacement on page 81 Replacing the hard disk drive Attention Do not open your computer or attempt any repair before reading and understanding the Importan...

Page 61: ...re 21 Pivoting the drive bay assembly 5 Hold the hard disk drive and remove the four screws that secure the hard disk drive Then remove the hard disk drive from the drive bay assembly Figure 22 Removing the hard disk drive 6 Disconnect the signal cable and the power cable from the hard disk drive to completely remove the hard disk drive from the chassis Chapter 5 Installing or replacing hardware 4...

Page 62: ...k drive bay and align the screw holes in the new hard disk drive with the corresponding holes in the drive bay Then install the four screws to secure the new hard disk drive in place Figure 24 Installing the hard disk drive What to do next To work with another piece of hardware go to the appropriate section To complete the installation or replacement go to Completing the parts replacement on page ...

Page 63: ...ttom of the optical drive bay on page 52 Replacing the solid state drive in the hard disk drive bay To replace the storage converter with the solid state drive installed in it you might follow the steps of replacing the hard disk drive See Replacing the hard disk drive on page 48 To replace the solid state drive in the storage converter do the following 1 Remove the four screws that secure the sol...

Page 64: ...ttom of the optical drive bay do the following 1 Remove all media from the drives and turn off all attached devices and the computer Then disconnect all power cords from electrical outlets and disconnect all cables that are connected to the computer 2 Remove the computer cover See Removing the computer cover on page 40 3 Remove the front bezel See Removing and reinstalling the front bezel on page ...

Page 65: ...re 27 Removing the solid state drive bracket 7 Remove the four screws that secure the solid state drive to the bracket Then slide the drive as shown to remove it from the bracket Figure 28 Removing the solid state drive from the bracket 8 Take the new solid state drive out of the static protective package Chapter 5 Installing or replacing hardware 53 ...

Page 66: ... Then install the four screws to secure the new solid state drive to the bracket Figure 29 Installing the solid state drive into the bracket 10 Carefully slide the solid state drive bracket downward until it is secured by the three retaining clips 1 on the bottom of the optical drive bay Figure 30 Installing the solid state drive bracket 54 ThinkCentre M73 User Guide ...

Page 67: ...rts replacement on page 81 Installing or replacing the optical drive Attention Do not open your computer or attempt any repair before reading and understanding the Important safety information on page v This section provides instructions on how to install or replace the optical drive Note The optical drive is only available in some models To replace the optical drive do the following 1 Turn off th...

Page 68: ... that secure the optical drive Figure 32 Removing the optical drive screws 7 Slightly press the drive bay assembly clip 1 inward and pivot the drive bay assembly downward as shown Figure 33 Lowering the drive bay assembly 56 ThinkCentre M73 User Guide ...

Page 69: ...he front of the computer Figure 34 Removing the optical drive 9 Slide the new optical drive into the optical drive bay from the front of the computer Figure 35 Installing a new optical drive Chapter 5 Installing or replacing hardware 57 ...

Page 70: ...the system board on page 13 Then locate an available four wire power connector and connect it to the rear of the new optical drive Figure 37 Connecting a SATA optical drive What to do next To work with another piece of hardware go to the appropriate section To complete the installation or replacement go to Completing the parts replacement on page 81 Replacing the heat sink and fan assembly Attenti...

Page 71: ...ical outlets and disconnect all cables that are connected to the computer 2 Remove the computer cover See Removing the computer cover on page 40 3 Pivot the drive bay assembly upward Then pivot the two plastic retaining clips outward to remove the heat sink fan duct from the failing heat sink and fan assembly Figure 38 Removing the heat sink fan duct 4 Disconnect the heat sink and fan assembly cab...

Page 72: ...ly do not touch the thermal grease on the bottom of the heat sink and fan assembly 7 Place the new heat sink and fan assembly on the system board so that the four screws are aligned with the corresponding holes in the system board Make sure that you properly place the new heat sink and fan assembly so that you can easily connect the new heat sink and fan assembly cable to the microprocessor fan co...

Page 73: ... supply assembly Attention Do not open your computer or attempt any repair before reading and understanding the Important safety information on page v This section provides instructions on how to replace the power supply assembly Although there are no moving parts in your computer after the power cord has been disconnected the following warnings are required for your safety and proper Underwriters...

Page 74: ... 2 Remove the computer cover See Removing the computer cover on page 40 3 Remove the front bezel See Removing and reinstalling the front bezel on page 40 4 Pivot the drive bay assembly upward Then pivot the two plastic retaining clips outward to remove the heat sink fan duct from the failing heat sink and fan assembly Figure 41 Removing the heat sink fan duct 5 Disconnect the power supply assembly...

Page 75: ...ward to release the power supply assembly and then slide the power supply assembly to the front of the computer Lift the power supply assembly out of the computer Figure 42 Removing the power supply assembly 7 Make sure that the new power supply assembly is the correct replacement Chapter 5 Installing or replacing hardware 63 ...

Page 76: ... in the rear of the chassis Then install the three screws to secure the new power supply assembly in place Note Use only screws provided by Lenovo Figure 43 Installing the power supply assembly 9 Connect the new power supply assembly cables to all drives and the system board See Locating parts on the system board on page 13 64 ThinkCentre M73 User Guide ...

Page 77: ... section provides instructions on how to replace the microprocessor CAUTION The heat sink and microprocessor might be very hot Before you open the computer cover turn off the computer and wait several minutes until the computer is cool To replace the microprocessor do the following 1 Remove all media from the drives and turn off all attached devices and the computer Then disconnect all power cords...

Page 78: ...ssor and socket might look different from the one illustrated Touch only the edges of the microprocessor Do not touch the gold contacts on the bottom Do not drop anything onto the microprocessor socket while it is exposed The socket pins must be kept as clean as possible Figure 46 Removing the microprocessor 7 Ensure that the small handle is in the raised position and the microprocessor retainer i...

Page 79: ...See Replacing the heat sink and fan assembly on page 58 12 Reconnect all cables that were disconnected from the system board What to do next To work with another piece of hardware go to the appropriate section To complete the replacement go to Completing the parts replacement on page 81 Replacing the front audio and USB assembly Attention Do not open your computer or attempt any repair before read...

Page 80: ...ly to the bracket 9 Install the front audio and USB assembly bracket to the chassis and align the screw hole in the bracket with the corresponding hole in the chassis 10 Install the screw to secure the front audio and USB assembly bracket to the chassis 11 Pivot the drive bay assembly upward and reconnect the front USB and front audio cables to the system board See Locating parts on the system boa...

Page 81: ... on page 42 5 Remove the hard disk drive for easier access to the system fan assembly See Replacing the hard disk drive on page 48 6 Remove the heat sink fan duct See Replacing the heat sink and fan assembly on page 58 7 Note the cable routing and disconnect the system fan assembly cable from the system fan connector on the system board See Locating parts on the system board on page 13 8 The syste...

Page 82: ...he heat sink and fan assembly on page 58 12 Reinstall the hard disk drive See Replacing the hard disk drive on page 48 What to do next To work with another piece of hardware go to the appropriate section To complete the replacement go to Completing the parts replacement on page 81 Replacing the WiFi units Attention Do not open your computer or attempt any repair before reading and understanding th...

Page 83: ... page 40 3 If your computer comes with a WiFi card module that supports the Bluetooth function disconnect the Bluetooth cable from the WiFi adapter card Figure 51 Disconnecting the Bluetooth cable Note The Bluetooth cable connects the Bluetooth connector on the WiFi adapter card to the front USB connector on the system board to support the Bluetooth function 4 Remove the screw that secures the WiF...

Page 84: ...ecessary alternate moving each side of the card a small amount until it is removed from the card slot Removing the WiFi card module To remove the WiFi card module do the following 1 Remove the WiFi adapter card from the computer and then disconnect the front and rear WiFi antenna cables from the WiFi card module Figure 53 Removing the WiFi antenna cables 72 ThinkCentre M73 User Guide ...

Page 85: ...g the screws that secure the WiFi card module 3 Pull the WiFi card module out of the mini PCI Express slot to remove it from the WiFi adapter card Figure 55 Removing the WiFi card module Installing the WiFi units To install the WiFi units do the following Chapter 5 Installing or replacing hardware 73 ...

Page 86: ...stall the two screws to secure the WiFi card module to the WiFi adapter card Figure 56 Installing the WiFi card module 2 Connect the front antenna cable and rear antenna cable to the WiFi card module Figure 57 Connecting the WiFi antenna cables 74 ThinkCentre M73 User Guide ...

Page 87: ...piece of hardware go to the appropriate section To complete the installation or replacement go to Completing the parts replacement on page 81 Installing or removing the rear WiFi antenna Attention Do not open your computer or attempt any repair before reading and understanding the Important safety information on page v This section provides instructions on how to install or remove the rear WiFi an...

Page 88: ...on page 81 Removing the rear WiFi antenna To remove the rear WiFi antenna do the following 1 Turn off the computer and disconnect all power cords from electrical outlets 2 Straighten the rear WiFi antenna so that it can be more easily twisted 3 Hold the thicker end of the rear WiFi antenna and unscrew the WiFi antenna from the rear of the computer Figure 60 Removing the rear WiFi antenna What to d...

Page 89: ...ll or remove the front WiFi antenna Installing the front WiFi antenna To install the front WiFi antenna do the following 1 Turn off the computer and disconnect all power cords from electrical outlets 2 Remove the computer cover See Removing the computer cover on page 40 3 Remove the front bezel See Removing and reinstalling the front bezel on page 40 4 Peel off the paper that protects the stickers...

Page 90: ...ection To complete the installation or replacement go to Completing the parts replacement on page 81 Removing the front WiFi antenna To remove the front WiFi antenna do the following 1 Turn off the computer and disconnect all power cords from electrical outlets 2 Remove the computer cover See Removing the computer cover on page 40 3 Remove the front bezel See Removing and reinstalling the front be...

Page 91: ...tions on how to replace the keyboard To replace the keyboard do the following 1 Remove all media from the drives Then turn off all attached devices and the computer 2 Disconnect all power cords from electrical outlets 3 Disconnect the old keyboard cable from the computer 4 Connect a new keyboard to the appropriate connector on the computer Your keyboard might be connected to a PS 2 keyboard connec...

Page 92: ...ttached devices and the computer 2 Disconnect all power cords from electrical outlets 3 Disconnect the old mouse cable from the computer 4 Connect a new mouse to the appropriate connector on the computer Your mouse might be connected to a PS 2 mouse connector 1 or a USB connector 2 Depending on where you want to connect your mouse see Locating connectors controls and indicators on the front of you...

Page 93: ...stall the front bezel align the three tabs on the front bezel with the corresponding holes in the chassis and pivot the front bezel inwards until it snaps into position 5 Position the computer cover on the chassis so that the rail guides on the computer cover engage the rails on the chassis Then slide the computer cover to the front of the computer until it snaps into position and is closed Then i...

Page 94: ...You can obtain device drivers that are not preinstalled in your operating systems at http www lenovo com support Installation instructions are provided in readme files with the device driver files 82 ThinkCentre M73 User Guide ...

Page 95: ... screen c When the installation process completes the Enhanced Backup and Restore icon is activated 2 There are a variety of methods to choose from when considering how to recover in the event of a software or hardware related problem Some methods vary depending on the type of operating system that is installed 3 The product on the recovery media may be used only for the following purposes Restore...

Page 96: ...n the Please select boot device window opens release the F12 key 3 Select the desired startup device and press Enter The restore process begins 4 Follow the instructions on the screen to complete the operation Note After restoring your computer hard disk drive to the factory default state you might have to reinstall device drivers for some devices See Reinstalling device drivers on page 88 Perform...

Page 97: ...es you to locate files on your hard disk drive and transfer them to a network drive or other recordable media such as a USB device or a disc This solution is available even if you did not back up your files or if changes were made to the files since your last backup operation You can also rescue individual files from a Rescue and Recovery backup located on your local hard disk drive a USB device o...

Page 98: ...optical drives Creating a rescue medium This section provides instructions on how to create a rescue medium To create a rescue medium on the Windows 7 operating system do the following 1 From the Windows desktop click Start All Programs Lenovo ThinkVantage Tools Enhanced Backup and Restore The Rescue and Recovery program opens 2 In the Rescue and Recovery main window click the Launch advanced Resc...

Page 99: ...ollow the instructions on the screen to complete the installation Reinstalling preinstalled device drivers This section provides instructions on how to reinstall preinstalled device drivers Attention When you reinstall device drivers you are changing the current configuration of your computer Reinstall device drivers only when it is necessary to correct a problem with your computer To reinstall th...

Page 100: ...llation Reinstalling device drivers To reinstall a device driver for an option you installed refer to the documentation that comes with the option When you reinstall device drivers you are changing the current configuration of your computer Reinstall device drivers only when it is necessary to correct a problem with your computer For more information about reinstalling device drivers that came wit...

Page 101: ...e PC settings Update and recovery Recovery 2 In the Refresh your PC without affecting your files section click Get started Resetting your computer to the factory default settings You can reset your computer to the factory default settings Resetting the computer will reinstall the operating system and reinstall all the programs and settings that came with your computer Attention If you reset your c...

Page 102: ...ting system if Windows 8 or Windows 8 1 fails to start The Windows recovery environment on your computer is capable of operating independently from the Windows 8 or Windows 8 1 operating system This enables you to recover or repair the operating system even if the Windows 8 or Windows 8 1 operating system fails to start After two consecutive failed boot attempts the Windows recovery environment st...

Page 103: ... the Setup Utility program Press Enter when prompted to confirm the exit The error message will not be displayed again Press F2 to bypass the error message and log in to the operating system Note You have to enable the configuration change detection feature for the POST to detect the removal of the hard disk drive and memory module size decrease To enable the configuration change detection feature...

Page 104: ...sword deters unauthorized users from changing configuration settings If you are responsible for maintaining the configuration settings of several computers you might want to set an Administrator Password When an Administrator Password is set you are prompted to type a valid password each time you try to access the Setup Utility program The Setup Utility program cannot be accessed until a valid pas...

Page 105: ...acement on page 81 6 Turn on the computer and leave it on for approximately 10 seconds When you hear short beeps turn off the computer by holding the power switch for approximately five seconds 7 Repeat step 1 through step 3 8 Move the Clear CMOS Recovery jumper back to the standard position pin 1 and pin 2 9 Close the computer cover and connect the power cord See Completing the parts replacement ...

Page 106: ...quence and the Error Startup Sequence Read the information displayed on the right side of the screen 4 Press F10 to save and exit the Setup Utility program See Exiting from the Setup Utility program on page 96 Enabling ErP LPS compliance mode Lenovo computers meet the eco design requirements of the ErP Lot 3 regulation For more information go to http www lenovo com ecodeclaration You can enable Er...

Page 107: ... to save changes and exit the Setup Utility program Press Enter when prompted to confirm the exit ICE performance mode You can adjust the acoustic and thermal performance of your computer through the ICE Performance Mode menu Two choices are available Better Acoustic Performance default setting Better Thermal Performance By enabling Better Acoustic Performance your computer will run with less nois...

Page 108: ...ntelligent Cooling Engine ICE window is displayed 4 Select ICE Thermal Alert The ICE Thermal Alert window is displayed 5 Select Enabled or Disabled as desired 6 Press F10 to save changes and exit the Setup Utility program See Exiting from the Setup Utility program on page 96 Exiting from the Setup Utility program After you finish viewing or changing settings press Esc to return to the Setup Utilit...

Page 109: ...s are available in a TXT file that is included with the update files For most models you can download either an update program to create a system program update disc or an update program that can be run from the operating system Updating flashing the BIOS from a disc This section provides instructions on how to update flash the BIOS from a disc Note You can download a self starting bootable disc i...

Page 110: ...and turn off all attached devices and the computer Then disconnect all power cords from electrical outlets and disconnect all cables that are connected to the computer 2 Open the computer cover See Removing the computer cover on page 40 3 Locate the Clear CMOS Recovery jumper on the system board See Locating parts on the system board on page 13 4 Remove any cables that impede access to the Clear C...

Page 111: ...blems Obtain updated device drivers from Lenovo 1 Go to http www lenovo com support 2 Click Downloads and drivers 3 Select the machine type of your computer from the machine type list 4 Click the category of device for which you need the device driver 5 Click the appropriate device driver 6 Download and install the device driver Updating your operating system Microsoft makes updates available for ...

Page 112: ...es critical and recommended updates or all updates so the list you choose from contains only those update types that are of interest to you To open the System Update program see Accessing Lenovo programs on the Windows 7 operating system on page 5 or Accessing Lenovo programs on the Windows 8 or Windows 8 1 operating system on page 6 If the System Update program is not currently installed on your ...

Page 113: ...on the screen does not move smoothly with the optical mouse you might need to clean the mouse To clean an optical mouse do the following 1 Turn off your computer 2 Disconnect the mouse cable from the computer 3 Turn the mouse upside down to check the lens a If there is a smudge on the lens gently clean the area with a plain cotton tipped swab b If there is debris in the lens gently blow the debris...

Page 114: ...and any minor issues you might have experienced A log book can help you or a Lenovo technician determine if a problem is related to change in hardware change in software or some other action that might have taken place Create Product Recovery discs See Creating and using recovery media on page 83 for more information about using Product Recovery discs to restore the hard disk drive to the factory ...

Page 115: ... sure that it is switched on The power indicator on the front of the computer is on The computer voltage matches the voltage available at the electrical outlet for your country or region The monitor screen is blank Verify that The monitor signal cable is correctly connected to the monitor and to the appropriate monitor connector on the computer The monitor power cord is correctly connected to the ...

Page 116: ...older configuration settings do not solve the problem or have adverse effects To restore a captured configuration do the following For Windows 7 Click Start Control Panel System and Security System System Protection System Restore For Windows 8 or Windows 8 1 Open Control Panel and then click System and Security System System Protection System Restore Note For detailed information on how to open C...

Page 117: ...s on page 119 USB problems on page 120 Audio problems Select your symptom from the following list No audio in Windows on page 105 An audio disc or AutoPlay enabled disc does not automatically play when it is inserted into a drive on page 106 Sound comes from one external speaker only on page 106 No audio in DOS applications or games on page 106 No audio in Windows Symptom No audio in Windows Actio...

Page 118: ...er only Actions Ensure that the speaker cable is inserted completely into the connector on the computer Make sure the cable that attaches the left speaker to the right speaker is securely connected Double click the speaker icon in the Windows notification area A master volume control window opens Verify that the Balance settings are set correctly If these actions do not correct the problem you mig...

Page 119: ...sc you might have a problem with your CD or DVD drive or the cabling to your CD or DVD drive Make sure that the power cable and signal cable are securely connected to the drive Unable to use a startable bootable recovery medium such as the Product Recovery CD to start your computer Symptom Unable to use a startable bootable recovery medium such as the Product Recovery CD to start your computer Act...

Page 120: ...ovie Actions Check the volume control settings on your computer and on your speakers Make sure that the disc surface is clean and not scratched Check all cable connections to and from the speakers Use the DVD menu for the video to select a different audio track If these actions do not correct the problem run the Lenovo Solution Center program If you need technical assistance see Chapter 11 Getting...

Page 121: ...list All or some keys on the keyboard do not work on page 109 The mouse or pointing device does not work on page 110 The pointer on the screen does not move smoothly with the mouse on page 110 The fingerprint reader does not work on page 110 The wireless keyboard does not work on page 110 All or some keys on the keyboard do not work Symptom All or some keys on the keyboard do not work Actions Veri...

Page 122: ...actions do not correct the problem run the Lenovo Solution Center program If you need technical assistance see Chapter 11 Getting information help and service on page 121 The pointer on the screen does not move smoothly with the mouse Symptom The pointer on the screen does not move smoothly with the mouse Action Erratic movement of the mouse pointer is generally caused by a buildup of dirt oils an...

Page 123: ...works when you turn on the computer but goes blank after some period of computer inactivity Symptom The monitor works when you turn on the computer but goes blank after some period of computer inactivity Action The computer is probably set for energy savings with the power management feature If the power management feature is enabled disabling it or changing the settings might solve the problem If...

Page 124: ...open Control Panel and click Hardware and Sound Adjust screen resolution Advanced Settings Then click the Monitor tab and select a new refresh rate Note For detailed information on how to open Control Panel on Windows 8 and Windows 8 1 see Accessing Control Panel on the Windows 8 or Windows 8 1 operating system on page 20 See your operating system documentation or help for further information on m...

Page 125: ...e using the correct device driver On the Windows 7 operating system do the following 1 Click Start Control Panel 2 Click Hardware and Sound 3 Click Device Manager If you are prompted for an administrator password or confirmation type the password or provide confirmation 4 If an exclamation mark is displayed next to an adapter name under Network adapters you might not be using the correct driver or...

Page 126: ...If your computer is a Gigabit Ethernet model and you use a speed of 1000 Mbps the connection fails or errors occur Actions Use Category 5 wiring and make sure that the network cable is securely connected Connect to a 1000 BASE T hub switch not 1000 BASE X If your computer is a Gigabit Ethernet model it cannot connect to the network at 1000 Mbps Instead it connects at 100 Mbps Symptom If your compu...

Page 127: ...enovo hardware options that do not have their own troubleshooting information Select your symptom from the following list An option that was just installed does not work on page 115 An option that previously worked does not work now on page 115 An option that was just installed does not work Symptom An option that was just installed does not work Action Verify that The option is designed for your ...

Page 128: ...ou can take Insufficient free hard disk drive space Symptom Insufficient free hard disk drive space The Windows operating system will slow down and might produce errors if the hard disk drive gets too full To check the amount of free space on the Windows 7 operating system do the following 1 Click Start Computer 2 Right click your C drive entry and then click Properties The amount of free disk spa...

Page 129: ...pplication If you need assistance see the help system for your e mail application Excessive number of fragmented files Symptom Excessive number of fragmented files Action Run the Windows Disk Defragmenter program Note Depending on the size of the hard disk drive and amount of data currently stored on the hard disk drive the disk defragmentation process might take up to several hours to complete On...

Page 130: ... see Chapter 7 Using the Setup Utility program on page 91 If the problem persists run the tests described in the documentation that comes with your printer If you cannot correct the problem have the computer serviced See Chapter 11 Getting information help and service on page 121 Serial port problems Use this information to troubleshoot the serial port and devices attached to the serial port Sympt...

Page 131: ...omputer has the minimum memory requirements needed to use the software See the information supplied with the software to verify memory requirements If you just installed an adapter or memory you might have a memory address conflict The software is designed to operate on your computer Other software works on your computer The software you are using works correctly on another computer If you receive...

Page 132: ...vo Solution Center program If the USB device came with its own diagnostics run those diagnostics against the USB device If you need technical assistance see Chapter 11 Getting information help and service on page 121 Lenovo Solution Center The Lenovo Solution Center program enables you to troubleshoot and resolve computer problems It combines diagnostic tests system information collection security...

Page 133: ...upport On the Windows 8 or Windows 8 1 operating system move the pointer to the top right or bottom right corner of the screen to display the charms Then click Settings Help Safety and Warranty The Safety Warranty and Setup Guide that is provided with your computer contains information on safety setup warranty and notices Read and understand all safety information before using this product Lenovo ...

Page 134: ...m that help you identify hardware problems You can also get the latest technical information and download device drivers and updates from Lenovo Support Web site at http www lenovo com support Calling for service During the warranty period you can get help and information by telephone through the Customer Support Center The following services are available during the warranty period Problem determ...

Page 135: ...vice providers authorized to perform warranty service Service methods and procedures vary by country and some services might not be available in all countries International Warranty Service is delivered through the method of service such as depot carry in or on site service that is provided in the servicing country Service centers in certain countries might not be able to service all models of a p...

Page 136: ...124 ThinkCentre M73 User Guide ...

Page 137: ...ublication Lenovo may make improvements and or changes in the product s and or the program s described in this publication at any time without notice The products described in this document are not intended for use in implantation or other life support applications where malfunction may result in injury or death to persons The information contained in this document does not affect or change Lenovo...

Page 138: ...re logo ThinkCentre ThinkVantage Microsoft Windows and Windows Media are trademarks of the Microsoft group of companies DisplayPort is a Trademark of the Video Electronics Standards Association Linux is a registered trademark of Linus Torvalds Other company product or service names may be trademarks or service marks of others 126 ThinkCentre M73 User Guide ...

Page 139: ...tion This equipment generates uses and can radiate radio frequency energy and if not installed and used in accordance with the instructions may cause harmful interference to radio communications However there is no guarantee that interference will not occur in a particular installation If this equipment does cause harmful interference to radio or television reception which can be determined by tur...

Page 140: ...äglichkeit Dieses Produkt entspricht den Schutzanforderungen der EU Richtlinie 2004 108 EG früher 89 336 EWG zur Angleichung der Rechtsvorschriften über die elektromagnetische Verträglichkeit in den EU Mitgliedsstaaten und hält die Grenzwerte der EN 55022 Klasse B ein Um dieses sicherzustellen sind die Geräte wie in den Handbüchern beschrieben zu installieren und zu betreiben Des Weiteren dürfen a...

Page 141: ...s which connect to the power mains with rated current less than or equal to 20 A per phase Lenovo product service information for Taiwan Keyboard and mouse compliance statement for Taiwan Eurasian compliance mark Brazil regulatory notice Ouvir sons com mais de 85 decibéis por longos períodos pode provocar danos ao sistema auditivo Mexico regulatory notice Advertencia En Mexico la operación de este...

Page 142: ...r computer and the country or region where the computer was purchased you might have received additional printed regulatory notices All regulatory notices are available on the Lenovo Support Web site in electronic format To access electronic copies of the documentation go to http www lenovo com support and click User Guides and Manuals 130 ThinkCentre M73 User Guide ...

Page 143: ...and recovery of WEEE and to minimize any potential effects of EEE on the environment and human health due to the presence of hazardous substances For additional WEEE information go to http www lenovo com recycling Recycling information for Japan Collecting and recycling a disused Lenovo computer or monitor If you are a company employee and need to dispose of a Lenovo computer or monitor that is th...

Page 144: ...puter at home and need to dispose of a lithium battery you must comply with local ordinances and regulations Recycling information for Brazil Declarações de Reciclagem no Brasil Descarte de um Produto Lenovo Fora de Uso Equipamentos elétricos e eletrônicos não devem ser descartados em lixo comum mas enviados à pontos de coleta autorizados pelo fabricante do produto para que sejam encaminhados e pr...

Page 145: ...o indicate that they are to be collected separately and recycled at end of life The label on the battery may also include a chemical symbol for the metal concerned in the battery Pb for lead Hg for mercury and Cd for cadmium Users of batteries and accumulators must not dispose of batteries and accumulators as unsorted municipal waste but use the collection framework available to customers for the ...

Page 146: ...134 ThinkCentre M73 User Guide ...

Page 147: ...ardous substances in electrical and electronic equipment RoHS recast or RoHS 2 For more information about Lenovo progress on RoHS go to http www lenovo com social_responsibility us en RoHS_Communication pdf China RoHS Turkish RoHS The Lenovo product meets the requirements of the Republic of Turkey Directive on the Restriction of the Use of Certain Hazardous Substances in Electrical and Electronic ...

Page 148: ...Ukraine RoHS India RoHS RoHS compliant as per E Waste Management Handling Rules 2011 136 ThinkCentre M73 User Guide ...

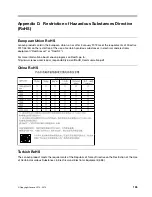
Page 149: ...Appendix E China Energy Label Copyright Lenovo 2013 2014 137 ...

Page 150: ...138 ThinkCentre M73 User Guide ...

Page 151: ...Reduced electrical consumption contributes to potential financial savings a cleaner environment and the reduction of greenhouse gas emissions For more information about ENERGY STAR go to http www energystar gov Lenovo encourages you to make efficient use of energy an integral part of your day to day operations To help in this endeavor set the following power management features to take effect when...

Page 152: ...140 ThinkCentre M73 User Guide ...

Page 153: ...on 10 device drivers 82 devices handling static sensitive 39 diagnostics program using 122 diagnostics troubleshooting 103 DisplayPort connector 11 documentation using 122 drivers device 82 drives bays 14 specifications 14 E environment operating 5 Ethernet 2 Ethernet connector 11 exiting Setup Utility 96 expansion 3 external options installing 39 F failure recovering from POST BIOS 98 features 1 ...

Page 154: ...on self test POST 97 Power On Password 92 programs updating system 97 purchasing additional services 123 R rear connectors 10 rear WiFi antenna installing removing 75 recovering from a POST BIOS update failure 98 software 83 recovery boot block 98 operations backup and 84 problems solving 88 recovery media creating and using 83 removing reinstalling front bezel 40 replacing battery 47 hard disk dr...

Page 155: ...g 68 T temporary startup device 94 the BIOS updating flashing 97 98 trademarks 126 troubleshooting basic 103 troubleshooting diagnostics 103 U updating flashing the BIOS 97 system programs 97 updating flashing the BIOS 98 USB 2 0 connector 11 USB 3 0 connector 11 using a rescue medium creating and 86 diagnostic program 122 documentation 122 other services 123 passwords 91 Setup Utility 91 V VGA co...

Page 156: ...144 ThinkCentre M73 User Guide ...

Page 157: ......

Page 158: ......

Reviews: