
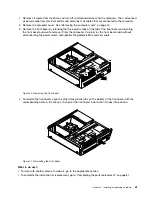
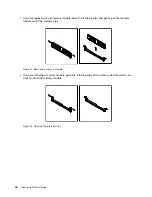
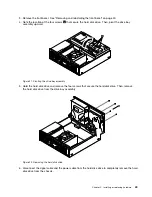

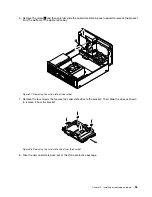
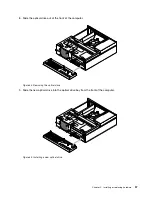

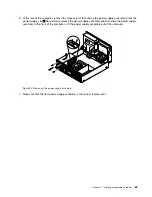
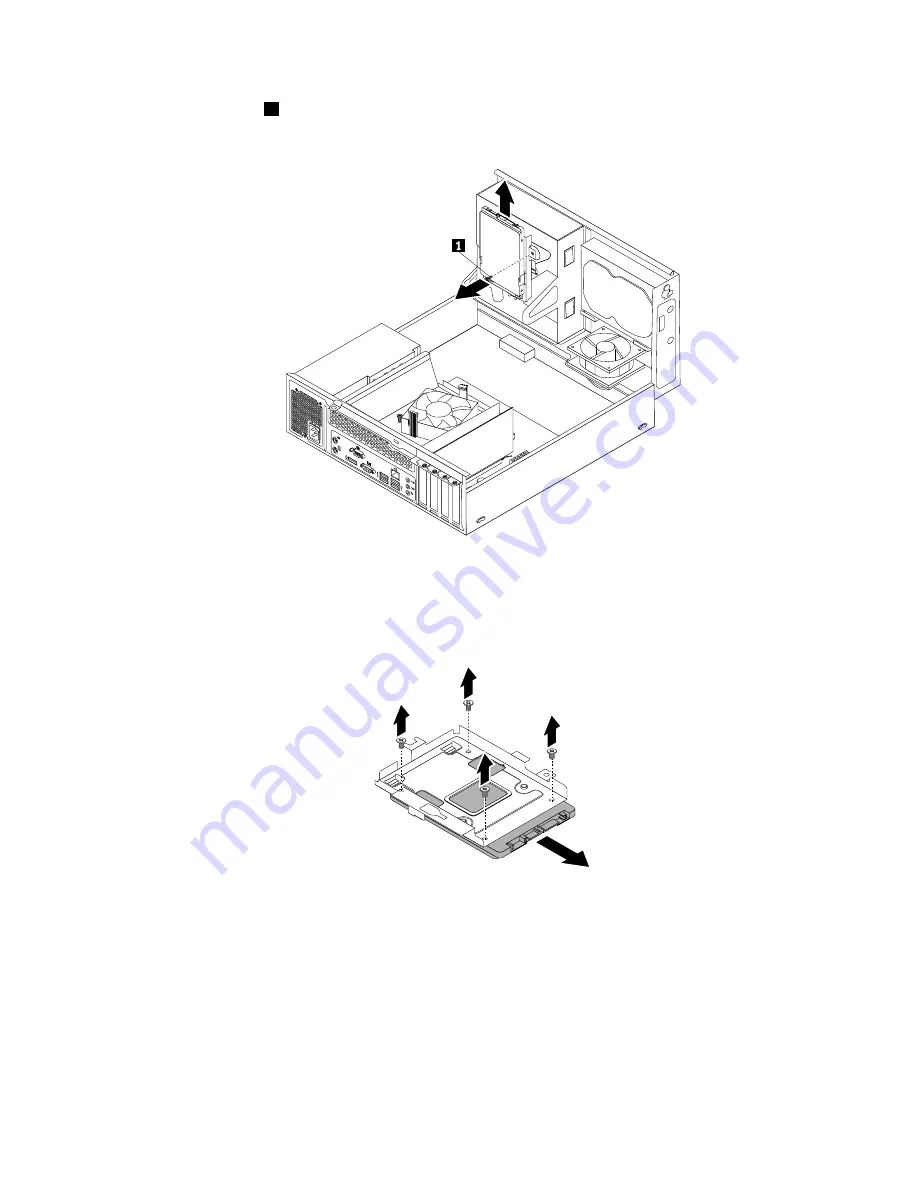
6. Remove the screw
1
and then carefully slide the solid-state drive bracket upward to remove the bracket
from the bottom of the optical drive bay.
Figure 27. Removing the solid-state drive bracket
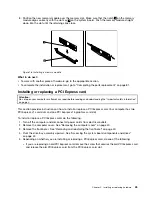
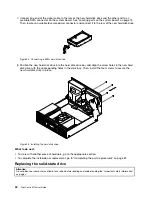
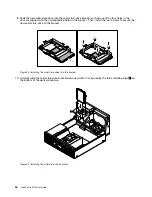
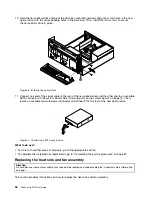
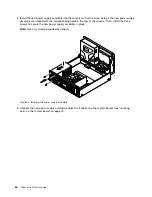
7. Remove the four screws that secure the solid-state drive to the bracket. Then, slide the drive as shown
to remove it from the bracket.
Figure 28. Removing the solid-state drive from the bracket
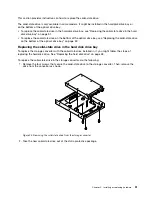
8. Take the new solid-state drive out of the static-protective package.
Chapter 5
.
Installing or replacing hardware
53
Summary of Contents for 10B4
Page 1: ...ThinkCentre M73 User Guide Machine Types 10B4 10B5 10B6 and 10B7 ...
Page 6: ...iv ThinkCentre M73 User Guide ...
Page 12: ...x ThinkCentre M73 User Guide ...
Page 28: ...16 ThinkCentre M73 User Guide ...
Page 38: ...26 ThinkCentre M73 User Guide ...
Page 50: ...38 ThinkCentre M73 User Guide ...
Page 136: ...124 ThinkCentre M73 User Guide ...
Page 146: ...134 ThinkCentre M73 User Guide ...
Page 149: ...Appendix E China Energy Label Copyright Lenovo 2013 2014 137 ...
Page 150: ...138 ThinkCentre M73 User Guide ...
Page 152: ...140 ThinkCentre M73 User Guide ...
Page 156: ...144 ThinkCentre M73 User Guide ...
Page 157: ......
Page 158: ......


