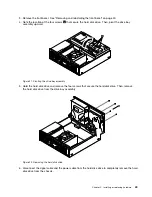

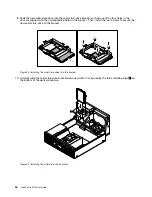
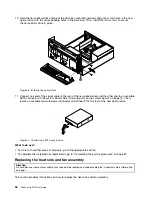

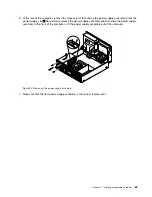
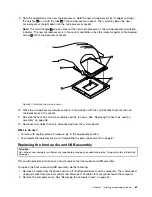

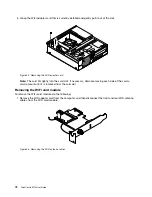


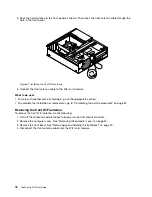
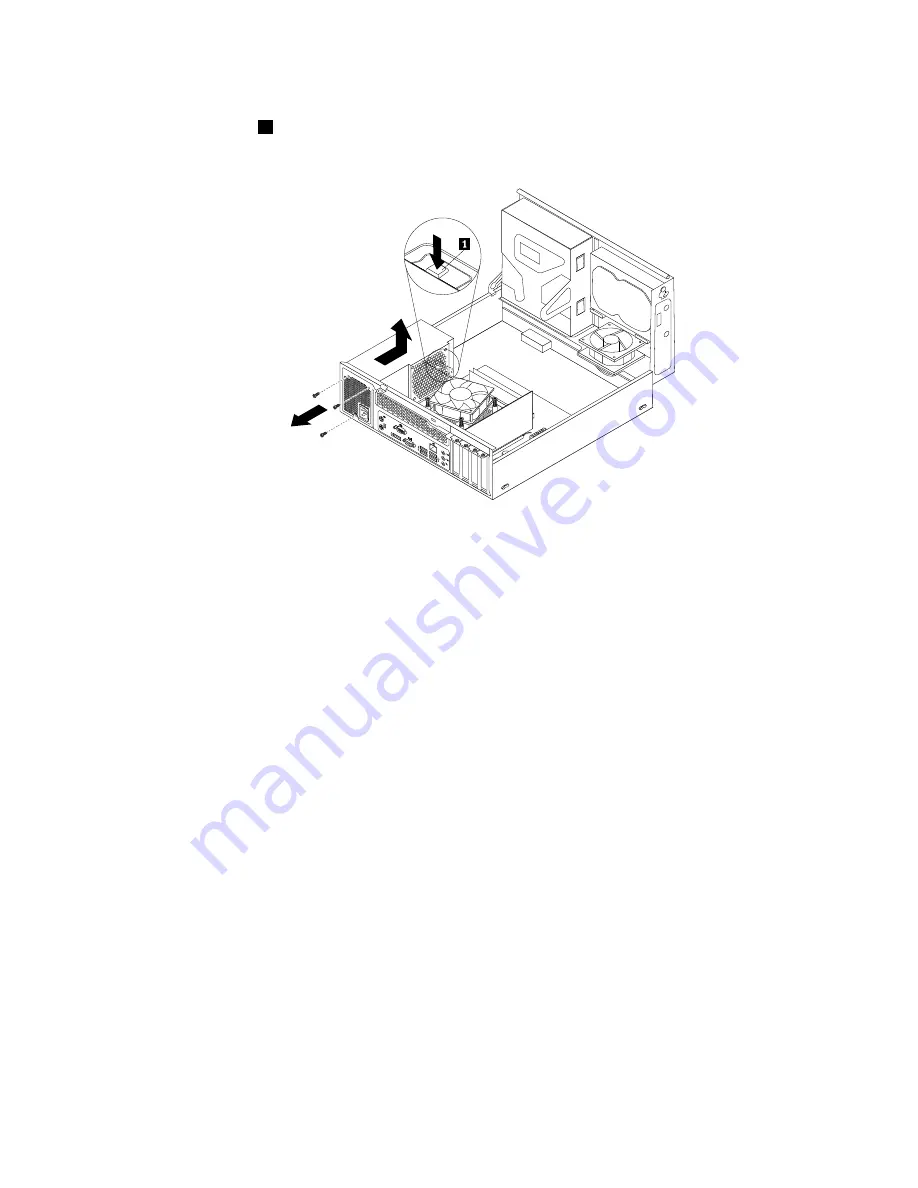
6. At the rear of the computer, remove the three screws that secure the power supply assembly. Press the
power supply clip
1
downward to release the power supply assembly and then slide the power supply
assembly to the front of the computer. Lift the power supply assembly out of the computer.
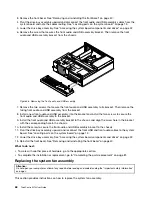
Figure 42. Removing the power supply assembly
7. Make sure that the new power supply assembly is the correct replacement.
Chapter 5
.
Installing or replacing hardware
63
Summary of Contents for 10B4
Page 1: ...ThinkCentre M73 User Guide Machine Types 10B4 10B5 10B6 and 10B7 ...
Page 6: ...iv ThinkCentre M73 User Guide ...
Page 12: ...x ThinkCentre M73 User Guide ...
Page 28: ...16 ThinkCentre M73 User Guide ...
Page 38: ...26 ThinkCentre M73 User Guide ...
Page 50: ...38 ThinkCentre M73 User Guide ...
Page 136: ...124 ThinkCentre M73 User Guide ...
Page 146: ...134 ThinkCentre M73 User Guide ...
Page 149: ...Appendix E China Energy Label Copyright Lenovo 2013 2014 137 ...
Page 150: ...138 ThinkCentre M73 User Guide ...
Page 152: ...140 ThinkCentre M73 User Guide ...
Page 156: ...144 ThinkCentre M73 User Guide ...
Page 157: ......
Page 158: ......


