


Note:
Do not let the thermal grease on the bottom of the heat sink and fan assembly get in contact
with anything.
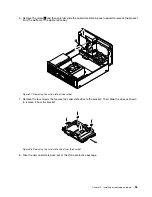
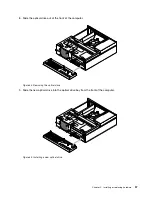
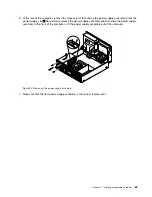
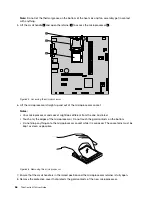
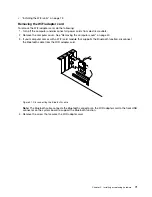
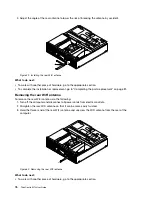
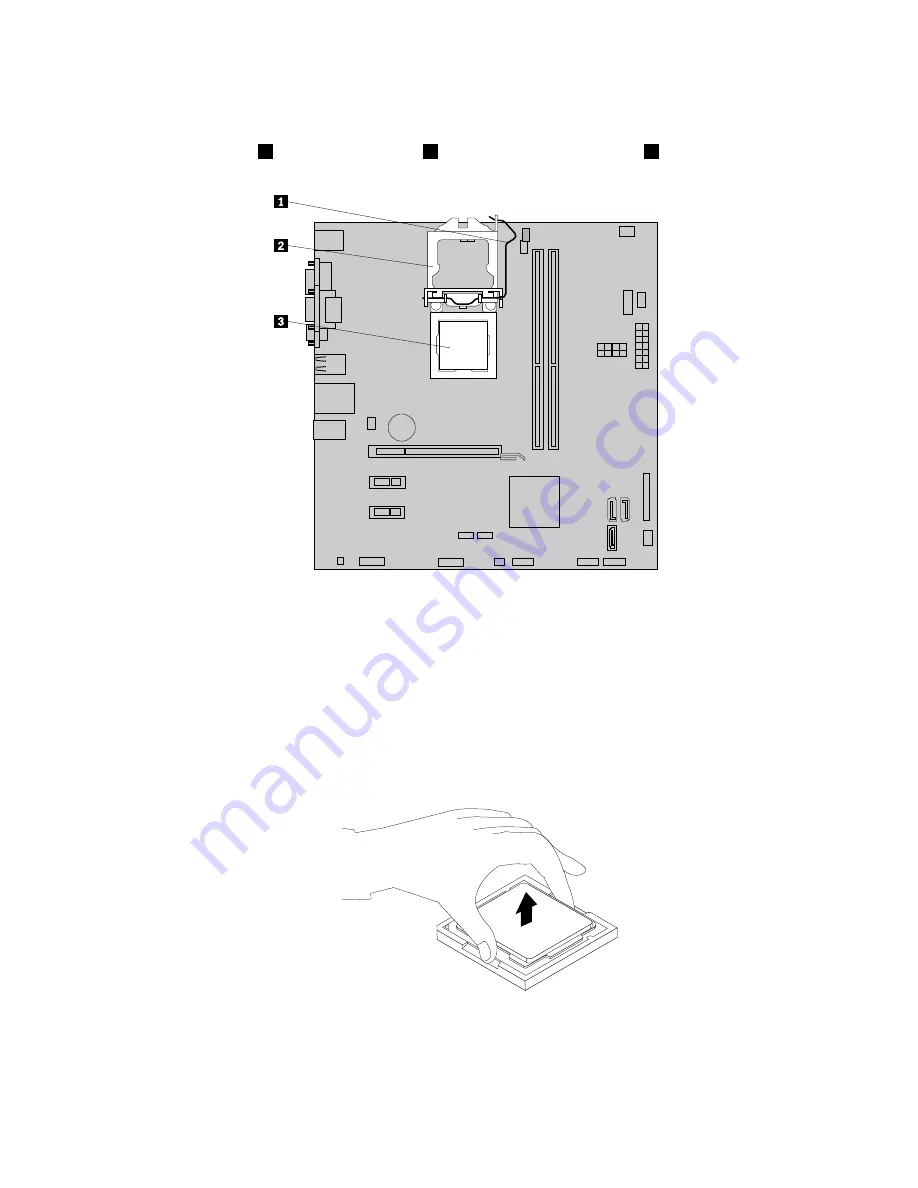
5. Lift the small handle
1
and open the retainer
2
to access the microprocessor
3
.
Figure 45. Accessing the microprocessor
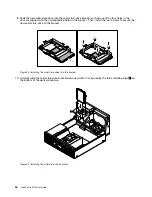
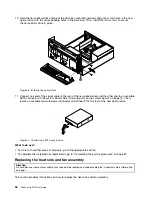
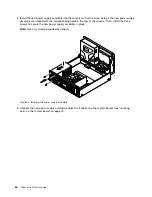
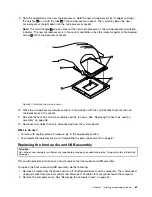
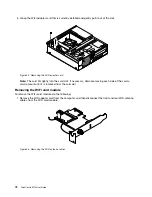
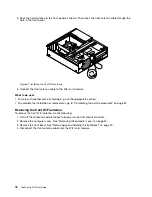
6. Lift the microprocessor straight up and out of the microprocessor socket.
Notes:
• Your microprocessor and socket might look different from the one illustrated.
• Touch only the edges of the microprocessor. Do not touch the gold contacts on the bottom.
• Do not drop anything onto the microprocessor socket while it is exposed. The socket pins must be
kept as clean as possible.
Figure 46. Removing the microprocessor
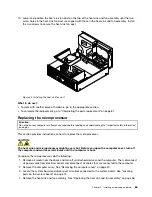
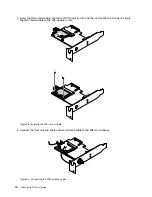
7. Ensure that the small handle is in the raised position and the microprocessor retainer is fully open.
8. Remove the protective cover that protects the gold contacts of the new microprocessor.
66
ThinkCentre M73 User Guide
Summary of Contents for 10B4
Page 1: ...ThinkCentre M73 User Guide Machine Types 10B4 10B5 10B6 and 10B7 ...
Page 6: ...iv ThinkCentre M73 User Guide ...
Page 12: ...x ThinkCentre M73 User Guide ...
Page 28: ...16 ThinkCentre M73 User Guide ...
Page 38: ...26 ThinkCentre M73 User Guide ...
Page 50: ...38 ThinkCentre M73 User Guide ...
Page 136: ...124 ThinkCentre M73 User Guide ...
Page 146: ...134 ThinkCentre M73 User Guide ...
Page 149: ...Appendix E China Energy Label Copyright Lenovo 2013 2014 137 ...
Page 150: ...138 ThinkCentre M73 User Guide ...
Page 152: ...140 ThinkCentre M73 User Guide ...
Page 156: ...144 ThinkCentre M73 User Guide ...
Page 157: ......
Page 158: ......


