


– Change the size of all the items on your screen.
1. Right-click an empty area of the desktop and then click
Display settings
➙
Display
.
2. Change the item size by following the on-screen instructions. For some applications, your
configuration might not take effect until you sign out and then sign in again.
– Change the size of the items on a Web page.
Press and hold Ctrl, and then press the plus-sign key (+) to enlarge or the minus-sign key (–) to reduce
the text size.
– Change the size of the items on the desktop or a window.
Note:
This function might not work on some windows.
If your mouse has a wheel, press and hold Ctrl, and then scroll the wheel to change the item size.
Industry-standard connectors
Your computer provides industry-standard connectors that enable you to connect assistive devices.
Documentation in accessible formats
Lenovo provides electronic documentation in accessible formats, such as properly tagged PDF files or
HyperText Markup Language (HTML) files. Lenovo electronic documentation is developed to ensure that
visually impaired users can read the documentation through a screen reader. Each image in the
documentation also includes adequate alternative text so that visually impaired users can understand the
image when they use a screen reader.
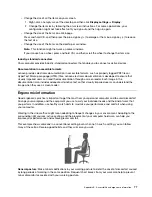
Ergonomic information
Good ergonomic practice is important to get the most from your personal computer and to avoid discomfort.
Arrange your workplace and the equipment you use to suit your individual needs and the kind of work that
you perform. In addition, use healthy work habits to maximize your performance and comfort when using
your computer.
Working in the virtual office might mean adapting to frequent changes in your environment. Adapting to the
surrounding light sources, active seating, and the placement of your computer hardware, can help you
improve your performance and achieve greater comfort.
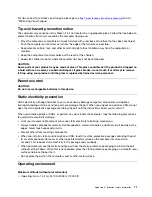
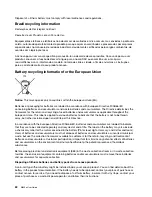
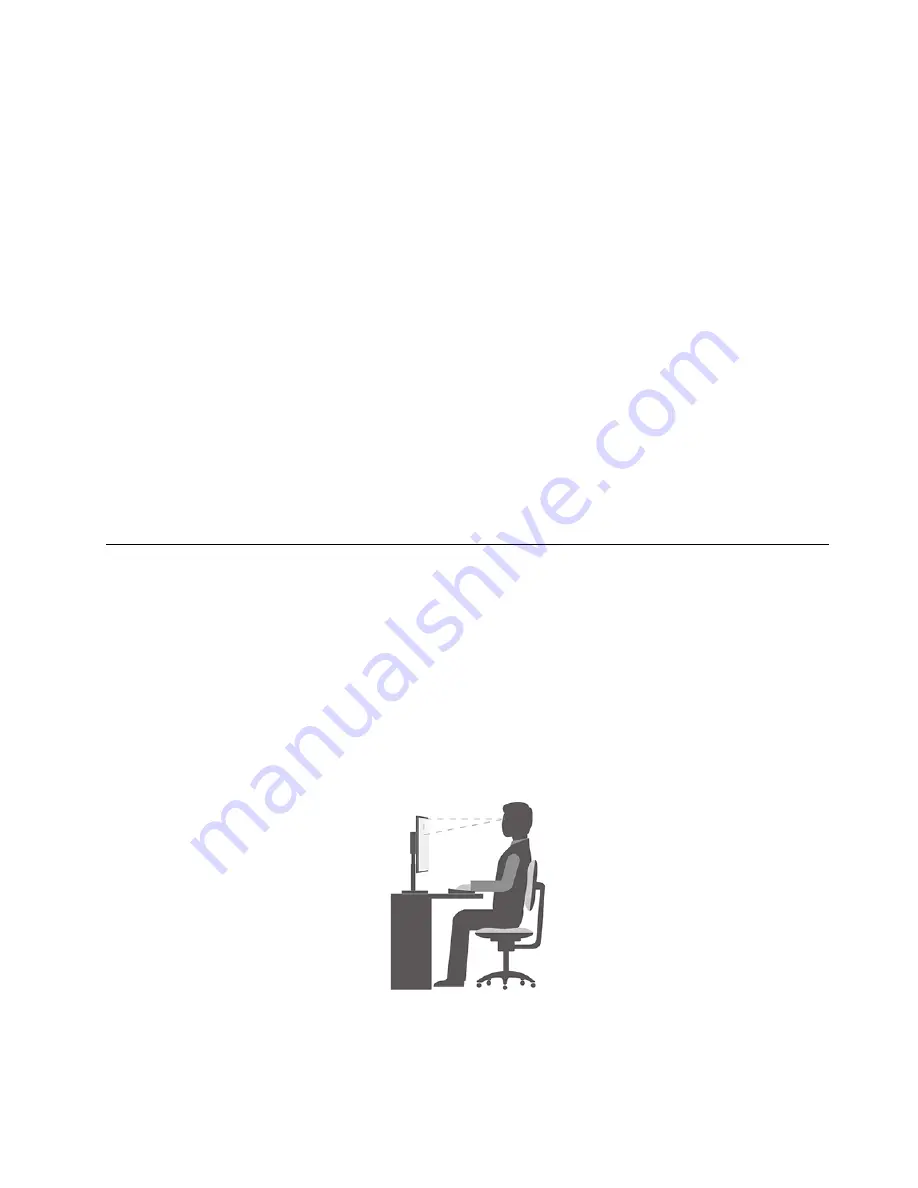
This example shows someone in a conventional setting. Even when not in such a setting, you can follow
many of these tips. Develop good habits, and they will serve you well.
General posture
: Make minor modifications in your working posture to deter the onset of discomfort caused
by long periods of working in the same position. Frequent short breaks from your work also help to prevent
minor discomfort associated with your working posture.
Appendix B. Accessibility and ergonomic information
77
Summary of Contents for 10YM
Page 1: ...M630e User Guide ...
Page 6: ...iv M630e User Guide ...
Page 12: ...7 M 2 Wi Fi card slot 8 M 2 solid state drive slot 9 Memory slot 6 M630e User Guide ...
Page 14: ...8 M630e User Guide ...
Page 22: ...16 M630e User Guide ...
Page 44: ...38 M630e User Guide ...
Page 62: ...56 M630e User Guide ...
Page 66: ...60 M630e User Guide ...
Page 80: ...74 M630e User Guide ...
Page 96: ...90 M630e User Guide ...
Page 99: ......
Page 100: ......


