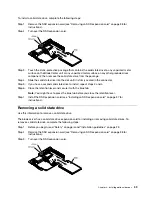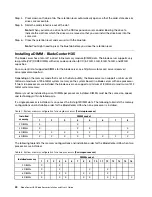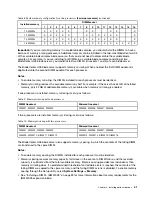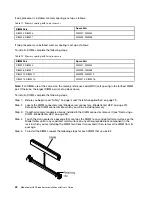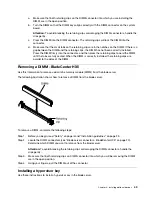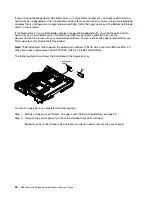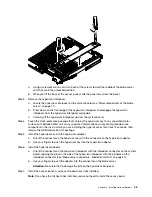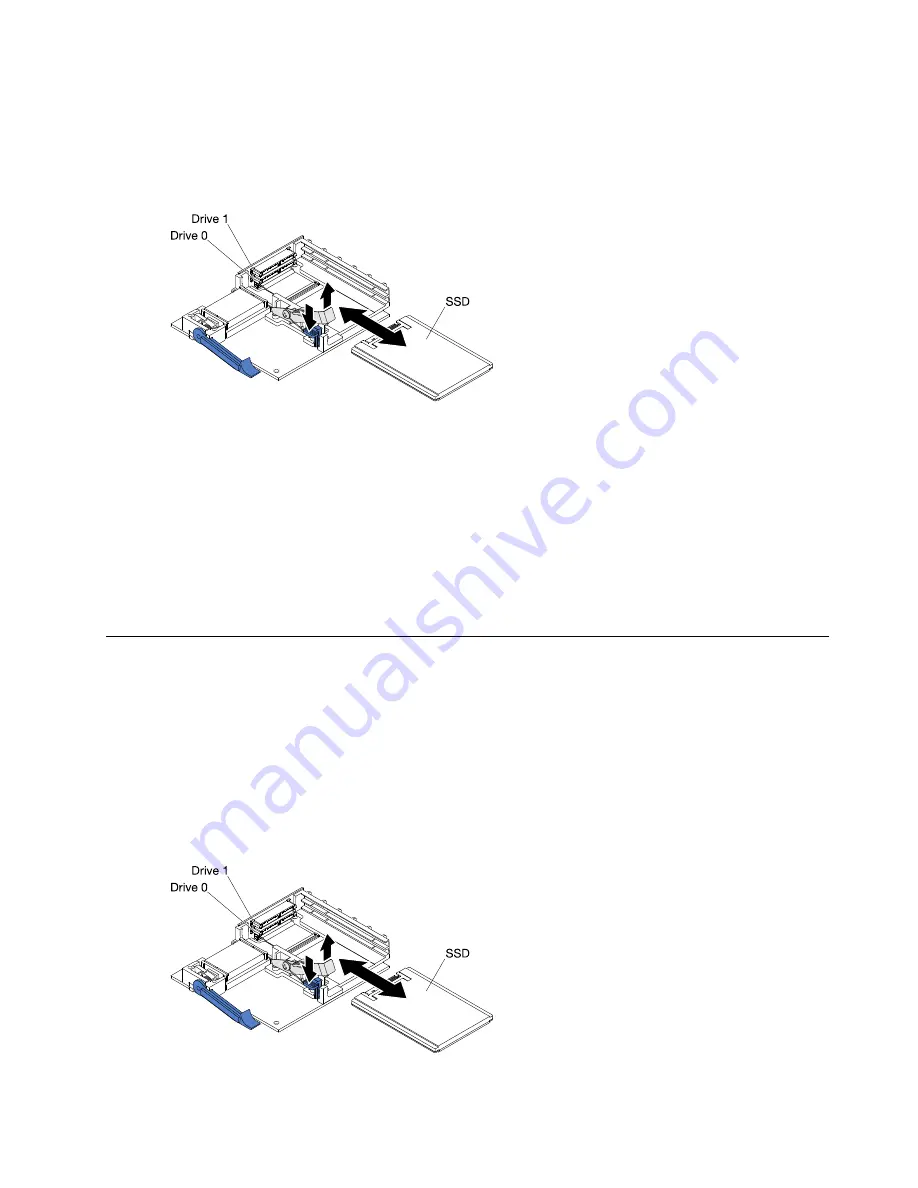
To install a solid state drive, complete the following steps:
Step 1. Remove the SSD expansion card (see “Removing an SSD expansion card” on page 38 for
instructions).
Step 2. Turn over the SSD expansion card.
Step 3. Touch the static-protective package that contains the solid state drive to any
unpainted
metal
surface on the BladeCenter unit or any
unpainted
metal surface on any other grounded rack
component; then, remove the solid state drive from the package.
Step 4. Slide the solid state drive into the slot until it is firmly seated in the connector.
Step 5. If you have a second solid state drive to install, repeat steps 3 and 4.
Step 6. Close the retention lever and secure it with the blue tab.
Note:
You might have to press the blue tab before you close the retention lever.
Step 7. Install the SSD expansion card (see “Installing an SSD expansion card” on page 37 for
instructions).
Removing a solid state drive
Use this information to remove a solid state drive.
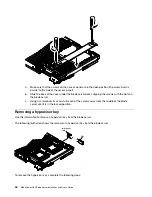
The blade server has a solid state drive expansion card for installing or removing solid state drives. To
remove a solid state drive, complete the following steps:
Step 1. Before you begin, read “Safety” on page iii and “Installation guidelines” on page 23.
Step 2. Remove the SSD expansion card (see “Removing an SSD expansion card” on page 38 for
instructions).
Step 3. Turn over the SSD expansion card.
.
39
Summary of Contents for 1909
Page 1: ...BladeCenter HX5 Blade Server Installation and User s Guide Machine Types 7873 7872 1910 1909 ...
Page 80: ...72 BladeCenter HX5 Blade ServerInstallation and User s Guide ...
Page 112: ...104 BladeCenter HX5 Blade ServerInstallation and User s Guide ...
Page 116: ...108 BladeCenter HX5 Blade ServerInstallation and User s Guide ...
Page 120: ...112 BladeCenter HX5 Blade ServerInstallation and User s Guide ...
Page 126: ...118 BladeCenter HX5 Blade ServerInstallation and User s Guide ...
Page 133: ...Taiwan Class A compliance statement Appendix B Notices 125 ...
Page 134: ...126 BladeCenter HX5 Blade ServerInstallation and User s Guide ...
Page 139: ......
Page 140: ...Part Number 00V9872 Printed in China 1P P N 00V9872 ...
Page 141: ... 1P00V9872 ...


