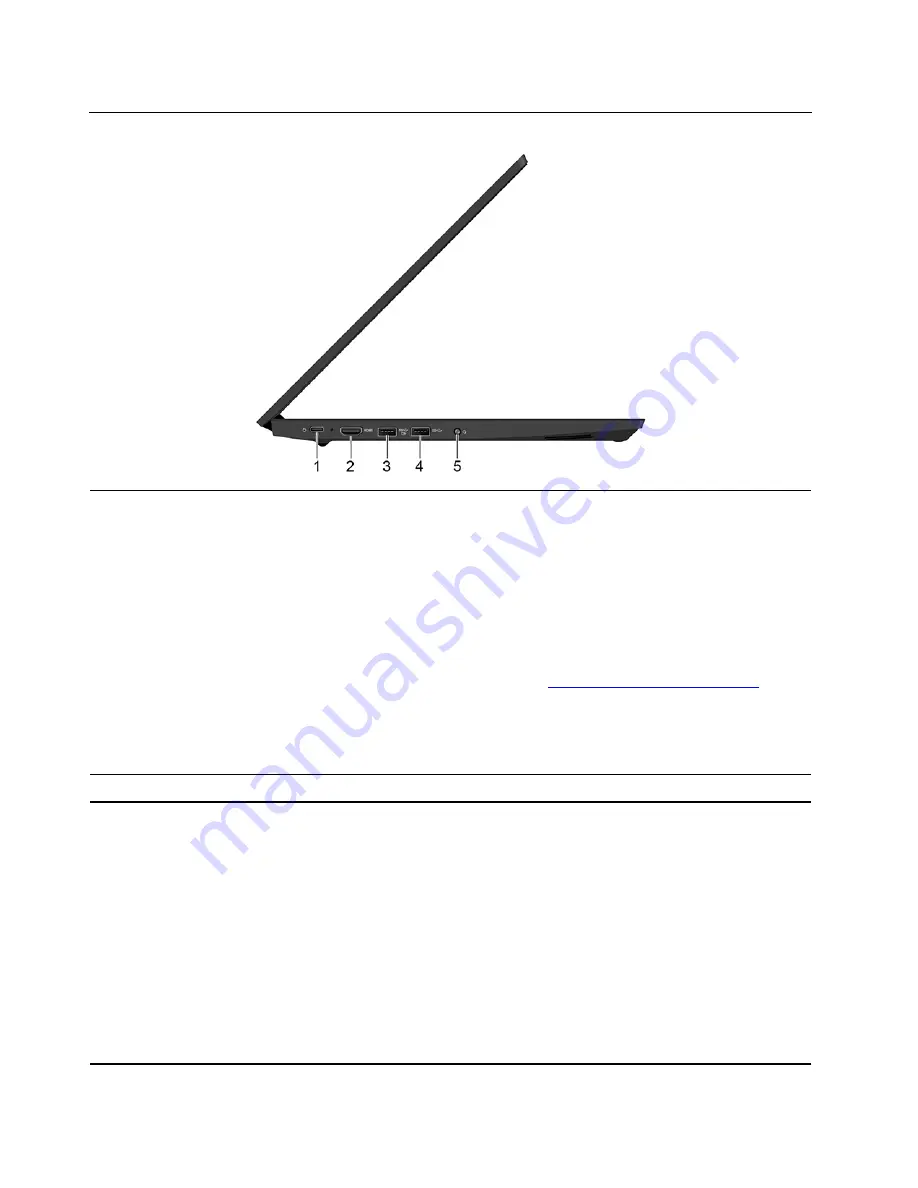
Left
1. USB-C
™
connector / power
connector
• Charge your computer.
• Charge USB-C compatible devices with the output voltage and current of 5 V
and 3 A.
• Transfer data at USB 3.1 speed, up to 5 Gbps.
• Connect to an external display:
– USB-C to VGA: 1920 x 1080 pixels, 60 Hz
– USB-C to DP: 3840 x 2160 pixels, 60 Hz
• Connect to USB-C accessories to help expand your computer functionality. To
purchase USB-C accessories, go to
https://www.lenovo.com/accessories
.
• Supply power to another computer using P-to-P (Peer to Peer) 2.0 charging
function. See “Charge the computer” on page 21.
Note:
When the battery power is below 10%, the USB-C accessories connected
to the USB-C connector might not work correctly.
2. HDMI
™
connector
Connect to a compatible digital audio device or video monitor, such as an HDTV.
3. Always On USB 3.1 connector
Gen 1
With the Always On USB feature enabled, the Always On USB 3.1 connector Gen
1 can charge a USB-compatible device when the computer is on, off, in sleep
mode, or in hibernation mode.
Notes:
• By default,
Always On USB
is enabled and
Charge in Battery Mode
is
disabled in UEFI BIOS.
• When the computer is off or in hibernation mode, and
Charge in Battery Mode
is disabled in UEFI BIOS, ensure that you have connected the computer to ac
power.
To enable the Always On USB feature, do the following:
1. Enter the BIOS menu. See “Enter the UEFI BIOS menu” on page 29.
2. Click
Config
➙
USB
➙
Always On USB
to enable the Always On USB
feature.
4
E590, R590 and E595 User Guide
Summary of Contents for 20NB
Page 1: ...E590 R590 and E595 User Guide ...
Page 6: ...iv E590 R590 and E595 User Guide ...
Page 34: ...28 E590 R590 and E595 User Guide ...
Page 40: ...34 E590 R590 and E595 User Guide ...
Page 84: ...78 E590 R590 and E595 User Guide ...
Page 96: ...90 E590 R590 and E595 User Guide ...
Page 102: ...96 E590 R590 and E595 User Guide ...
Page 105: ......
Page 106: ......


