General checkout
This chapter presents following information:
v
“What to do first” on page 44
v
“Checkout guide” on page 45
– “Diagnostics using PC-Doctor for DOS” on page 45
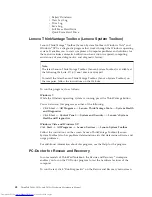
– “Lenovo ThinkVantage Toolbox (Lenovo System Toolbox)” on page 48
– “PC-Doctor for Rescue and Recovery” on page 48
– “FRU tests” on page 49
v
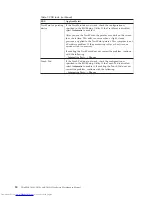
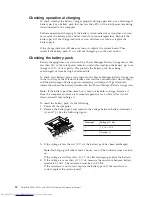
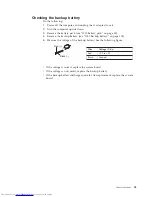
“Power system checkout” on page 51
The descriptions in this chapter apply to any ThinkPad model that supports the
PC-Doctor
®
for DOS diagnostics program. Some descriptions might not apply to
your particular computer.
Before you go to the checkout guide, be sure to read the following important notes.
Important notes:
v
Only certified trained personnel should service the computer.
v
Before replacing any FRU, read the entire page on removing and replacing
FRUs.
v
When you replace FRUs, use new nylon-coated screws.
v
Be extremely careful during such write operations as copying, saving, or
formatting.
Drives in the computer that you are servicing sequence might
have been altered. If you select an incorrect drive, data or programs might be
overwritten.
v
Replace a FRU only with another FRU of the correct model.
When you
replace a FRU, make sure that the model of the machine and the FRU part
number are correct by referring to the FRU parts list.
v
A FRU should not be replaced because of a single, unreproducible failure.
Single failures can occur for a variety of reasons that have nothing to do with
a hardware defect, such as cosmic radiation, electrostatic discharge, or
software errors. Consider replacing a FRU only when a problem recurs. If you
suspect that a FRU is defective, clear the error log and run the test again. If
the error does not recur, do not replace the FRU.
v
Be careful not to replace a nondefective FRU.
© Copyright Lenovo 2009, 2010
43
Summary of Contents for 2808C5U
Page 1: ...ThinkPad T400s T410s and T410si Hardware Maintenance Manual ...
Page 2: ......
Page 3: ...ThinkPad T400s T410s and T410si Hardware Maintenance Manual ...
Page 8: ...vi ThinkPad T400s T410s and T410si Hardware Maintenance Manual ...
Page 18: ...10 ThinkPad T400s T410s and T410si Hardware Maintenance Manual ...
Page 19: ...Safety information 11 ...
Page 26: ...18 ThinkPad T400s T410s and T410si Hardware Maintenance Manual ...
Page 27: ...Safety information 19 ...
Page 28: ...20 ThinkPad T400s T410s and T410si Hardware Maintenance Manual ...
Page 29: ...Safety information 21 ...
Page 30: ...22 ThinkPad T400s T410s and T410si Hardware Maintenance Manual ...
Page 31: ...Safety information 23 ...
Page 34: ...26 ThinkPad T400s T410s and T410si Hardware Maintenance Manual ...
Page 35: ...Safety information 27 ...
Page 37: ...Safety information 29 ...
Page 41: ...Safety information 33 ...
Page 42: ...34 ThinkPad T400s T410s and T410si Hardware Maintenance Manual ...
Page 43: ...Safety information 35 ...
Page 45: ...Safety information 37 ...
Page 46: ...38 ThinkPad T400s T410s and T410si Hardware Maintenance Manual ...
Page 62: ...54 ThinkPad T400s T410s and T410si Hardware Maintenance Manual ...
Page 78: ...70 ThinkPad T400s T410s and T410si Hardware Maintenance Manual ...
Page 82: ...74 ThinkPad T400s T410s and T410si Hardware Maintenance Manual ...
Page 86: ...78 ThinkPad T400s T410s and T410si Hardware Maintenance Manual ...
Page 90: ...82 ThinkPad T400s T410s and T410si Hardware Maintenance Manual ...
Page 127: ...Table 24 Removal steps of LCD unit continued 7 7 Removing and replacing a FRU 119 ...
Page 158: ...150 ThinkPad T400s T410s and T410si Hardware Maintenance Manual ...
Page 215: ......


