Power management
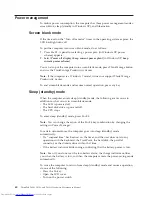
To reduce power consumption, the computer has three power management modes:
screen blank, sleep (standby in Windows XP), and hibernation.
Screen blank mode
If the time set on the “Turn off monitor” timer in the operating system expires, the
LCD backlight turns off.
To put the computer into screen blank mode, do as follows:
1.
Press Fn+F3. A panel for selecting a power plan (in Windows XP, power
scheme) appears.
2.
Select
Power off display (keep current power plan)
(in Windows XP,
keep
current power scheme
).
You can also put the computer into screen blank mode, press ThinkVantage button
and use the ThinkVantage Productivity Center.
Note:
If the computer is a Windows 7 model, it does not support ThinkVantage
Productivity Center.
To end screen blank mode and resume normal operation, press any key.
Sleep (standby) mode
When the computer enters sleep (standby) mode, the following events occur in
addition to what occurs in screen blank mode:
v
The LCD is powered off.
v
The hard disk drive is powered off.
v
The CPU stops.
To enter sleep (standby) mode, press Fn+F4.
Note:
You can change the action of the Fn+F4 key combination by changing the
settings in Power Manager.
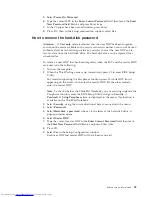
In certain circumstances, the computer goes into sleep (standby) mode
automatically:
v
If a “suspend time” has been set on the timer, and the user does not do any
operation with the keyboard, the TrackPoint, the hard disk, the parallel
connector, or the diskette drive within that time.
v
If the battery indicator blinks orange, indicating that the battery power is low.
Note:
Even if you do not set the low-battery alarm, the charge indicator notifies
you when the battery is low, and then the computer enters the power-saving mode
automatically.
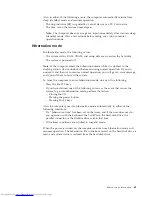
To cause the computer to return from sleep (standby) mode and resume operation,
do one of the following:
v
Press the Fn key.
v
Open the LCD cover.
v
Turn on the power switch.
60
ThinkPad T400s, T410s, and T410si Hardware Maintenance Manual
Summary of Contents for 2901A3U
Page 1: ...ThinkPad T400s T410s and T410si Hardware Maintenance Manual ...
Page 2: ......
Page 3: ...ThinkPad T400s T410s and T410si Hardware Maintenance Manual ...
Page 8: ...vi ThinkPad T400s T410s and T410si Hardware Maintenance Manual ...
Page 18: ...10 ThinkPad T400s T410s and T410si Hardware Maintenance Manual ...
Page 19: ...Safety information 11 ...
Page 26: ...18 ThinkPad T400s T410s and T410si Hardware Maintenance Manual ...
Page 27: ...Safety information 19 ...
Page 28: ...20 ThinkPad T400s T410s and T410si Hardware Maintenance Manual ...
Page 29: ...Safety information 21 ...
Page 30: ...22 ThinkPad T400s T410s and T410si Hardware Maintenance Manual ...
Page 31: ...Safety information 23 ...
Page 34: ...26 ThinkPad T400s T410s and T410si Hardware Maintenance Manual ...
Page 35: ...Safety information 27 ...
Page 37: ...Safety information 29 ...
Page 41: ...Safety information 33 ...
Page 42: ...34 ThinkPad T400s T410s and T410si Hardware Maintenance Manual ...
Page 43: ...Safety information 35 ...
Page 45: ...Safety information 37 ...
Page 46: ...38 ThinkPad T400s T410s and T410si Hardware Maintenance Manual ...
Page 62: ...54 ThinkPad T400s T410s and T410si Hardware Maintenance Manual ...
Page 78: ...70 ThinkPad T400s T410s and T410si Hardware Maintenance Manual ...
Page 82: ...74 ThinkPad T400s T410s and T410si Hardware Maintenance Manual ...
Page 86: ...78 ThinkPad T400s T410s and T410si Hardware Maintenance Manual ...
Page 90: ...82 ThinkPad T400s T410s and T410si Hardware Maintenance Manual ...
Page 127: ...Table 24 Removal steps of LCD unit continued 7 7 Removing and replacing a FRU 119 ...
Page 158: ...150 ThinkPad T400s T410s and T410si Hardware Maintenance Manual ...
Page 226: ...218 ThinkPad T400s T410s and T410si Hardware Maintenance Manual ...
Page 229: ......

