background image

20

User Guide

2.4 OneKey Antivirus

The 

OneKey Antivirus

 is independent of the operating system. It can process 

general virus scan and killing, and it can scan and kill viruses even when Windows 
cannot start and other antivirus software cannot work as a result of virus Infection. 
Therefore, it can restore your computer system when the operating system is 
damaged by a virus. 

2.4.1 Launch

Turn on the computer. When the 

Lenovo

 picture appears on the screen initially, 

press the 

F2

 key to launch 

Rescue System

. Then select 

OneKey Antivirus

.

2.4.2 Scan and Kill Viruses

There are two options to scan and kill viruses:
1)  Scan all partitions of the disk consecutively and kill the detected viruses.
2)  Only scan the operating system partition (usually drive C) and kill viruses on it.

To perform the scan and kill viruses, do the following:
1.  Use Alt plus optional character or the Tab key to select the option to start 

scanning and killing viruses. 

2.  Wait while the software is scanning and killing viruses. Try to avoid interruption 

of the process.

3.  If you need to stop scanning or killing viruses in the middle of the process, click 

the corresponding stop button to stop the virus killing process. Or click the 
corresponding cancel button to continue scanning.

4.  The software will report the results of a scan upon the completion of virus 

scanning and killing, and it will list all viruses killed and quarantined.

5.  Click the corresponding button to display the files which are infected with 

viruses and quarantined.

In the quarantined zone, you can clear, delete and recover the infected files.

2.4.3 Update

To ensure that the OneKey Antivirus functions normally and is able to detect the
latest viruses, the virus definitions need to be updated continuously.

2.4.3.1 Launch

In the 

OneKey Antivirus

 main interface, select the corresponding button to start 

updating virus definitions.

31037821_3000 C3_UG_EN_V1.1.indd   20

2009.5.11   1:52:36 PM

Summary of Contents for 3000 C3 Series

Page 1: ...Version 1 1 2009 5 User Guide 3000 C3 Series 3000 C3 31037821 31037821_3000 C3_UG_FM_EN_V1 1 i1 1 2009 5 11 2 05 16 PM ...

Page 2: ...oduct for the latest safety information Reading and understanding this safety information reduces the risk of personal injury or damage to your product Danger Be aware of extremely hazardous or lethal situations Attention Be aware of possible damage to programs devices or data Note Pay attention to this important information Copyright Lenovo 2009 All rights reserved 31037821_3000 C3_UG_EN_V1 1 ind...

Page 3: ...31037821_3000 C3_UG_EN_V1 1 indd 2 2009 5 11 1 52 44 PM ...

Page 4: ... Using the Rescue System 15 2 1 Installing Drivers and Software Shipped with Your Computer 16 2 2 OneKey Recovery 17 2 3 File Management 18 2 4 OneKey Antivirus 20 Chapter 3 Using the Computer Software 23 3 1 Power2Go Burning Discs 24 3 2 WinDVD 25 3 3 Trend Micro Internet Security 26 Chapter 4 System Maintenance and Recovery 27 4 1 Restoring the System 28 4 2 Backup status and configuration 28 4 3...

Page 5: ...1 5 1 Troubleshooting Display Problems 32 5 2 Troubleshooting Audio Problems 33 5 3 Troubleshooting Software Problems 33 5 4 Troubleshooting Problems with Optical Drives and Hard Disks 34 5 5 Special considerations for troubleshooting Windows 35 31037821_3000 C3_UG_EN_V1 1 indd 2 2009 5 11 1 52 44 PM ...

Page 6: ... hardware introduction ÿ Information on computer connections Note The descriptions in this chapter might vary from your computer depending on computer models and configurations User Guide 1 Using the Computer Hardware 31037821_3000 C3_UG_EN_V1 1 indd 1 2009 5 11 1 51 54 PM ...

Page 7: ...n Power button Brightness up button Camera LCD On Off 1 2 Left and right view of the computer Attention Be sure not to block any air vents on the computer Blocked air vents may cause thermal problems 1 2 3 31037821_3000 C3_UG_EN_V1 1 indd 2 2009 5 11 1 51 57 PM ...

Page 8: ...onnector USB ports 4 TV tuner Select models only IEEE 1394 connector PS2 Keyboard connector Headphone connector Ethernet connector Microphone connector Note Before you buy an antitheft device be sure it is compatible with the security cable slot on your computer 31037821_3000 C3_UG_EN_V1 1 indd 3 2009 5 11 1 52 01 PM ...

Page 9: ...ty to the computer it is not a removable part Attention 1 The computer stand must remain installed at all times to ensure maximum system stability 2 Make sure the angle of the computer is at least 12 degrees from the vertical otherwise the computer will be unstable and could fall over To open the computer stand do the following 31037821_3000 C3_UG_EN_V1 1 indd 4 2009 5 11 1 52 03 PM ...

Page 10: ...nect the equipment to an electrical outlet to ensure that the required voltage and frequency match the available power source If your computer uses an AC adapter Note Use only the Lenovo provided AC adapter approved for use with this device Use of another AC adapter may cause a fire or explosion 1 5 2 Connect the keyboard cable to the appropriate keyboard connector PS2 connector or USB connector 1 ...

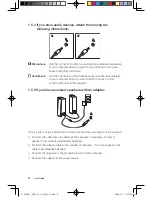
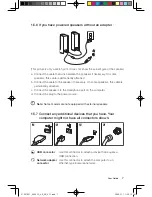
Page 11: ... to music or other sounds without disturbing anyone 1 5 5 If you have powered speakers with an adapter This picture is only a sketch print it does not show the actual figure of the speaker a Connect the cable that runs between the speakers if necessary On some speakers this cable is permanently attached b Connect the adapter cable to the speaker if necessary On some speakers this cable is permanent...

Page 12: ...le is permanently attached c Connect the speakers to the Headphone port on the computer d Connect the plug to the power source Note Some models are not equipped with external speakers 1 5 7 Connect any additional devices that you have Your computer might not have all connectors shown 1 2 3 4 1394 USB connector Use this connector to attach a device that requires a USB connection Network adapter con...

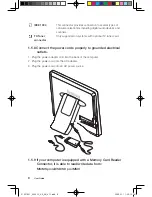
Page 13: ... card 1 5 8 Connect the power cords properly to grounded electrical outlets 1 Plug the power adapter cord into the back of the computer 2 Plug the power cord into the AC adapter 3 Plug the power cord into an AC power source 1 5 9 If your computer is equipped with a Memory Card Reader Connector it is able to read write data from MS MS pro xD SD SD pro MMC 31037821_3000 C3_UG_EN_V1 1 indd 8 2009 5 1...

Page 14: ... to turn on the computer Note The LCD ON OFF indicator will be light when you press the button If you press the wrong button the screen might be turned off Then you need to turn on the screen again Don t insert 3 inch optical disk into the drive slot or the disk might not be ejected 31037821_3000 C3_UG_EN_V1 1 indd 9 2009 5 11 1 52 12 PM ...

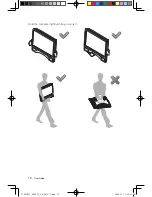
Page 15: ...10 User Guide Hold the computer tightly when you carry it 31037821_3000 C3_UG_EN_V1 1 indd 10 2009 5 11 1 52 25 PM ...

Page 16: ... software designed for the Lenovo home PC with integrated Lenovo core technology and you can also use any other installed programs on the computer F2 Your computer has the Lenovo Rescue System installed To learn more about this program turn on the computer and when the Lenovo logo appears press the F2 key and the Lenovo Rescue System will open 31037821_3000 C3_UG_EN_V1 1 indd 11 2009 5 11 1 52 30 ...

Page 17: ...dels are equipped with remote control The remote control only shipped with some types of computers works with the remote control receiver on the chassis Adjust the angle of the remote control properly 31037821_3000 C3_UG_EN_V1 1 indd 12 2009 5 11 1 52 30 PM ...

Page 18: ... Details Guide This function is not available in Microsoft Windows operating systems Shows live TV on the currently selected channel Displays the Recorded TV page in Windows Media Center Play Pause Stop Record Fast Forward Rewind Skip Replay 31037821_3000 C3_UG_EN_V1 1 indd 13 2009 5 11 1 52 33 PM ...

Page 19: ...ts Windows Media Center Turns volume up down Previous next channel Mute DVD menu Power supply standby 0 9 Number or Letter buttons key key CLEAR Clear ENTER Enter 31037821_3000 C3_UG_EN_V1 1 indd 14 2009 5 11 1 52 34 PM ...

Page 20: ...neKey Recovery With this operation all of the existing data on drive C will be lost whereas the content and format of the other partitions of the hard disk drive will remain unchanged If you want to install an operating system with the Windows Vista Recovery DVD and back it up with OneKey Recovery you must format the C partition in NTFS format and install the operating system on the C partition Ot...

Page 21: ...unction in the rescue system provides a way for the user to conveniently install the drivers and software shipped with the computer It can install all drivers and software shipped with the computer automatically and it also can selectively install some of the drivers and software as required by the user Method 1 Automatic Installation Turn on the computer When the screen displays the Lenovo pictur...

Page 22: ...2 If a Windows operating system is not preinstalled in your computer the OneKey Recovery function will instead contain the following two functions Create base backup Without factory backup the Lenovo OneKey Recovery enables you to back up all data of the current system partition manually after installing the operating system and common software Upon completion of base backup you can use the Recove...

Page 23: ...yboard to start recovery if you are sure you want to recover 4 Please wait during the process of system recovery Do not interrupt the operation during the recovery process 5 After the system is recovered successfully the software prompts to restart the computer Restart the computer and enter the system 2 3 File Management With the File Management module you may access the critical data in director...

Page 24: ...the main interface to configure the password The default password is blank Set a password when you access the File Backup for the first time If you don t want to set a password access the system directly and operate accordingly 2 3 4 Search File management provides a search function and backs up the searched files Input the file or file type to search for and click the search icon on the bottom to star...

Page 25: ...er or the Tab key to select the option to start scanning and killing viruses 2 Wait while the software is scanning and killing viruses Try to avoid interruption of the process 3 If you need to stop scanning or killing viruses in the middle of the process click the corresponding stop button to stop the virus killing process Or click the corresponding cancel button to continue scanning 4 The softwar...

Page 26: ...e updated successfully the software will show that the update has been completed successfully 2 4 3 3 Obtaining the Latest Virus Package from a Flash Disk 1 First make a flash disk of OneKey Antivirus in the Windows system Connect a flash disk to the USB connector and click Start All Programs Lenovo Download USB update package 2 Save the latest virus definitions to the flash disk Making an upgrade flas...

Page 27: ... in floppy disks flash disks or CDs You can install and use anti virus software under the Windows system to scan such media 3 In the process of cleaning viruses do not power off the computer Otherwise it may damage the files in the hard disk drive 31037821_3000 C3_UG_EN_V1 1 indd 22 2009 5 11 1 52 36 PM ...

Page 28: ...se features are subject to the actual software that was shipped with the computer model that you purchased Note Lenovo Veriface and Lenovo healthcare software can only be used with the Lenovo PC Bright Eye Camera on some Lenovo consumer LCD monitors which can be compatible with this type of camera User Guide 23 31037821_3000 C3_UG_EN_V1 1 indd 23 2009 5 11 1 52 38 PM ...

Page 29: ...o be recorded onto their appropriate data music or video icon 3 1 2 Starting the Burner Software 1 Choose All Programs Lenovo Power2Go Power2Go from the Start menu to launch the burner program 2 Choose a task for the burner from the task list Then start the burner to record files 3 You can choose the medium to burn from the disc type and then click the OK icon to access the burner interface 4 Selec...

Page 30: ...unch the player Click the icon to obtain more information about WinDVD The WinDVD player includes the following basic buttons Play Move backward within the current track Pause Move forward within the current track Track list Stop Go to the previous track Eject Go to the next track Mute Volume 31037821_3000 C3_UG_EN_V1 1 indd 25 2009 5 11 1 52 39 PM ...

Page 31: ... as required 3 4 3 Upgrade In the main interface of Trend Micro Internet Security click the update icon to upgrade the virus definitions of the software Note Connect to the Internet before upgrade 3 4 4 Configure Scanning of the Specified Disk In the main interface of Trend Micro Internet Security select Custom Scan from more options You can select the disks that you want to scan in the scan targets ...

Page 32: ...2 3 4 5 Chapter System Maintenance and Recovery This chapter contains the following topics ÿ Daily Maintenance and Tools Instructions User Guide 27 31037821_3000 C3_UG_EN_V1 1 indd 27 2009 5 11 1 52 40 PM ...

Page 33: ... latest date when the system was running properly Click Next to continue 3 The system will start restoration When all processes run to completion the system displays a message informing you that the restore operation has completed successfully 4 2 Backup status and configuration For security purposes you can back up the system status before you install additional software or otherwise modify system...

Page 34: ...e icon for the hard disk drive HDD that you want to reorganize then select Properties from the pop up menu 2 Go to the Tools tab from disk Properties and select Defragment Now 3 Select the time and scheme to be used by the defragging program then start the defragmenting program Depending on the amount of defragmentation on the hard disk drive this procedure can take a long time sometimes more than...

Page 35: ...the speakers and the mouse You can use a vacuum cleaner to clean in otherwise inaccessible corners To clean the keyboard thoroughly shut down the computer and scrub it gently with a wet cloth Do not use the keyboard until it is dry Do not do any of the following Allow water to enter the computer Use a heavily dampened cloth Spray water directly onto the surface of the monitor or inside of computer...

Page 36: ... ÿ Troubleshooting and Problem Resolution Note The description of the TV Tuner card in this manual is only used for the machines which have the TV Tuner card It does not apply to those machines that do not have a TV Tuner card User Guide 31 31037821_3000 C3_UG_EN_V1 1 indd 31 2009 5 11 1 52 42 PM ...

Page 37: ...n or no image is displayed on the monitor Troubleshooting and problem resolution Check that the LCD screen has been turned on If not press the LCD On Off button to turn on the LCD If still cannot solve the problem contact to Lenovo Customer Service Problem You need to change display property settings Setting display background and icon properties 1 Right click the desktop anywhere except over an i...

Page 38: ...s side panel headphone connector Problem No sound from headphones Troubleshooting and problem resolution Check the headphone cable connection Ensure that the headphone cable is securely inserted into the headphone connector Adjust the windows volume control Click or double click the speaker icon in the lower right corner of your screen Ensure that the volume is turned up and that the sound is not ...

Page 39: ...is unable to read a CD DVD Troubleshooting and problem resolution 1 Check to determine if there is an optical drive icon in the resource manager of the operating system If not restart your computer If there is still no icon contact Lenovo Service Otherwise continue with the next step of this procedure 2 Confirm that the CD DVD has been properly placed in the drive If not reload the CD or DVD Otherw...

Page 40: ...ding of totals 5 5 Special considerations for troubleshooting Windows Record the following information that may later be useful in troubleshooting system problems 1 The serial number of the software The serial number was shipped with the computer and was provided separately by the manufacturer The Help Center is unable to retrieve this number 2 The drivers for this computer model only support the ...

Page 41: ...36 User Guide 31037821_3000 C3_UG_EN_V1 1 indd 36 2009 5 11 1 52 43 PM ...

Reviews: