
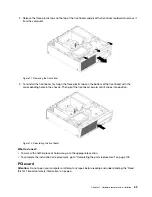
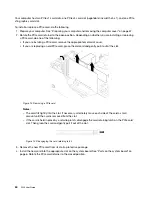
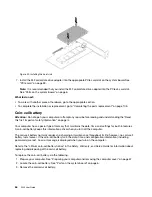

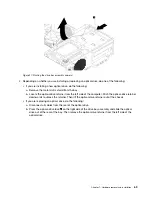

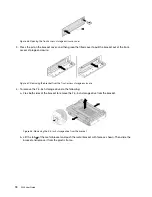
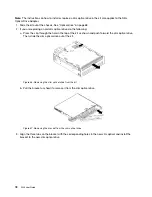

Figure 21. Removing the old coin-cell battery
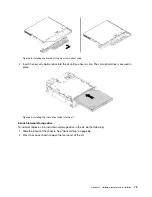
4. Install a new coin-cell battery.
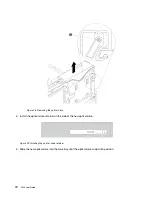
Figure 22. Installing a new coin-cell battery
5. Reinstall the computer cover and connect the cables. See “Completing the parts replacement” on page
105.
Note:
When the computer is turned on for the first time after replacing the coin-cell battery, an error
message might be displayed. This is normal after replacing the coin-cell battery.
6. Turn on the computer and all attached devices.
7. Use the Setup Utility program to set the date, time, and any passwords. See “Using the Setup Utility
What to do next:
• To work with another piece of hardware, go to the appropriate section.
• To complete the installation or replacement, go to “Completing the parts replacement” on page 105.
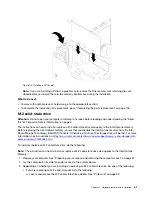
Memory module
Attention:
Do not open your computer or attempt any repair before reading and understanding the “Read
this first: Important safety information” on page iii.
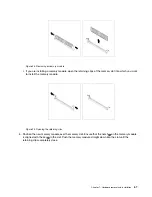
Your computer has four memory slots for installing or replacing DDR4 UDIMMs that provide up to a
maximum of 64 GB system memory.
When installing or replacing a memory module, use 4 GB, 8 GB, or 16 GB DDR4 UDIMMs in any combination
up to a maximum of 64 GB. Do not mix any combination of ECC UDIMMs and non-ECC UDIMMs into the
same computer.
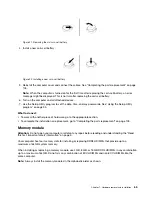
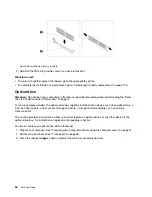
Note:
Always install the memory modules in the alphabetic order as shown.
Hardware removal and installation
65
Summary of Contents for 30BG
Page 1: ...P320 User Guide Machine Types 30BJ 30BK and 30BS ...
Page 12: ...x P320 User Guide ...
Page 28: ...16 P320 User Guide ...
Page 40: ...28 P320 User Guide ...
Page 46: ...34 P320 User Guide ...
Page 56: ...44 P320 User Guide ...
Page 120: ...108 P320 User Guide ...
Page 124: ...112 P320 User Guide ...
Page 126: ...114 P320 User Guide ...
Page 128: ...116 P320 User Guide ...
Page 136: ...124 P320 User Guide ...
Page 140: ...4 Follow the instructions on the screen 128 P320 User Guide ...
Page 142: ...130 P320 User Guide ...
Page 144: ...132 P320 User Guide ...
Page 145: ......
Page 146: ......


