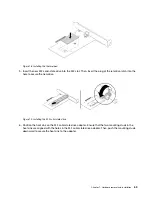

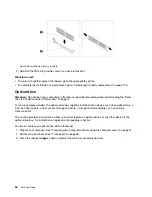

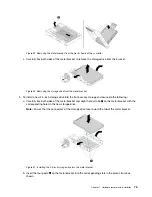
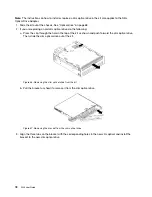
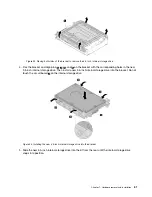
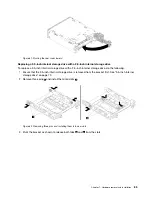


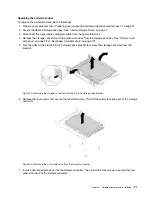
Figure 44. Installing the converter with the 2.5-inch storage drive into the plastic bracket
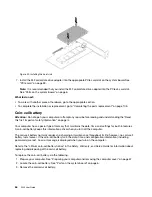
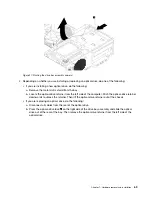
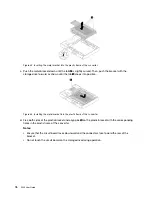
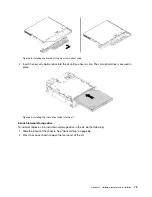
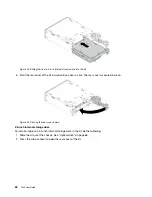
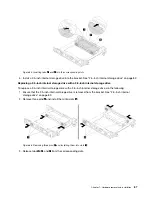
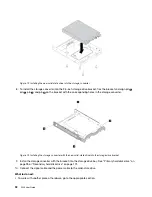
6. Slide the plastic bracket with the new 2.5-inch storage drive into the front-access storage enclosure until
it snaps into position. Press the notch to secure the enclosure cover and lock the enclosure cover with
the key.
Figure 45. Installing the bracket with the 2.5-inch storage drive into the front-access storage enclosure
What to do next:
• To work with another piece of hardware, go to the appropriate section.
• To complete the installation or replacement, go to “Completing the parts replacement” on page 105.
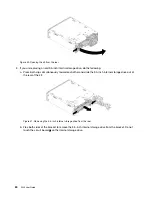
Device in the Multi-drive Conversion Kit
Attention:
Do not open your computer or attempt any repair before reading and understanding the “Read
this first: Important safety information” on page iii.
The Multi-drive Conversion Kit (hereafter referred to as kit) might be equipped with either one or both of the
following components:
• Slim optical drive
• Internal storage drive (such as hard disk drive, solid-state drive, or hybrid drive)
Slim optical drive
To install or replace a slim optical drive in the kit, do the following:
Hardware removal and installation
77
Summary of Contents for 30BG
Page 1: ...P320 User Guide Machine Types 30BJ 30BK and 30BS ...
Page 12: ...x P320 User Guide ...
Page 28: ...16 P320 User Guide ...
Page 40: ...28 P320 User Guide ...
Page 46: ...34 P320 User Guide ...
Page 56: ...44 P320 User Guide ...
Page 120: ...108 P320 User Guide ...
Page 124: ...112 P320 User Guide ...
Page 126: ...114 P320 User Guide ...
Page 128: ...116 P320 User Guide ...
Page 136: ...124 P320 User Guide ...
Page 140: ...4 Follow the instructions on the screen 128 P320 User Guide ...
Page 142: ...130 P320 User Guide ...
Page 144: ...132 P320 User Guide ...
Page 145: ......
Page 146: ......


