


• To complete the installation or replacement, go to “Completing the parts replacement” on page 105.
Heat sink and fan assembly
Attention:
Do not open your computer or attempt any repair before reading and understanding the “Read
this first: Important safety information” on page iii.
CAUTION:
Avoid contact with hot components inside the computer. During operation, some components
become hot enough to burn the skin. Before you open the computer cover, turn off the computer,
disconnect power, and wait approximately 10 minutes for the components to cool.
To replace the heat sink and fan assembly, do the following:
1. Prepare your computer. See “Preparing your computer and removing the computer cover” on page 57.
2. Lay the computer on its side for easier access to the system board.
3. Locate the heat sink and fan assembly. See “Parts on the system board” on page 6.
4. Disconnect the heat sink and fan assembly cable from the microprocessor fan connector on the system
board. See “Parts on the system board” on page 6.
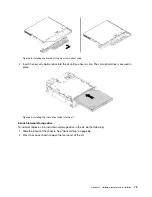
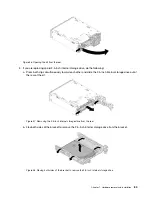
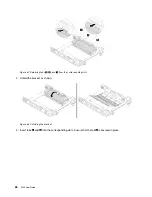
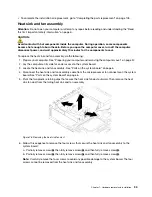
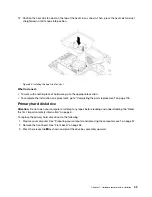
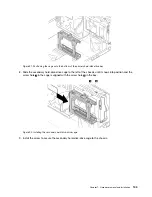
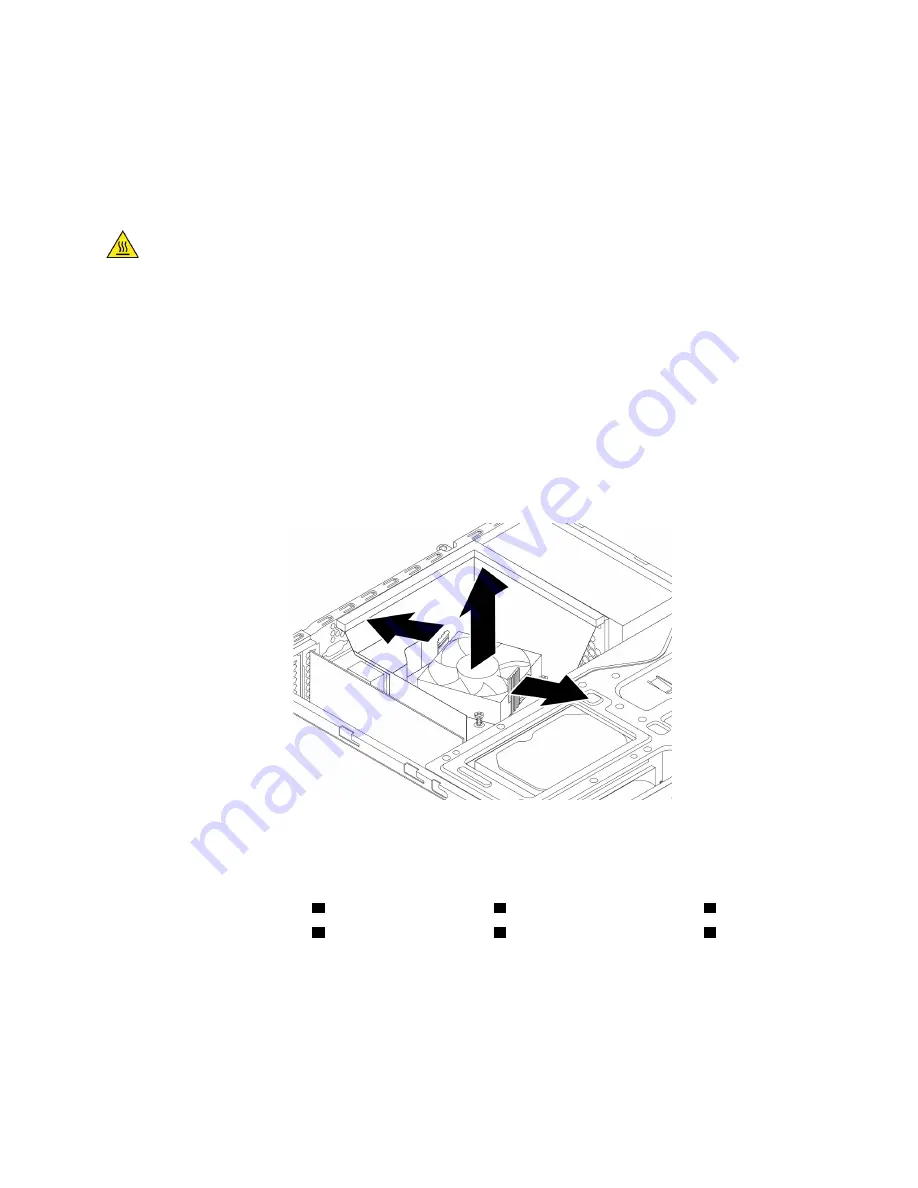
5. Pivot the two plastic retaining clips that secure the heat sink fan duct outward. Then remove the heat
sink fan duct from the failing heat sink and fan assembly.
Figure 76. Removing the heat sink fan duct
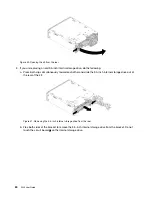
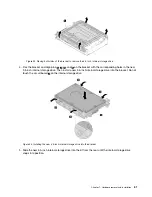
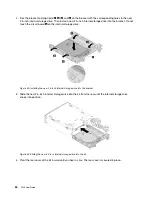
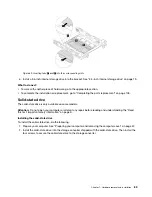
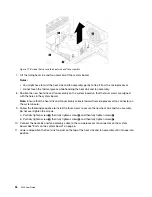
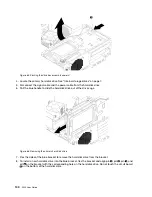
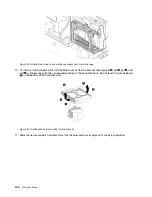
6. Follow this sequence to remove the four screws that secure the heat sink and fan assembly to the
system board:
a. Partially remove screw
1
, then fully remove screw
2
, and then fully remove screw
1
.
b. Partially remove screw
3
, then fully remove screw
4
, and then fully remove screw
3
.
Note:
Carefully remove the four screws to avoid any possible damage to the system board. The four
screws cannot be removed from the heat sink and fan assembly.
Hardware removal and installation
93
Summary of Contents for 30BG
Page 1: ...P320 User Guide Machine Types 30BJ 30BK and 30BS ...
Page 12: ...x P320 User Guide ...
Page 28: ...16 P320 User Guide ...
Page 40: ...28 P320 User Guide ...
Page 46: ...34 P320 User Guide ...
Page 56: ...44 P320 User Guide ...
Page 120: ...108 P320 User Guide ...
Page 124: ...112 P320 User Guide ...
Page 126: ...114 P320 User Guide ...
Page 128: ...116 P320 User Guide ...
Page 136: ...124 P320 User Guide ...
Page 140: ...4 Follow the instructions on the screen 128 P320 User Guide ...
Page 142: ...130 P320 User Guide ...
Page 144: ...132 P320 User Guide ...
Page 145: ......
Page 146: ......


