7.
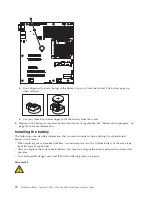
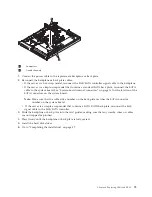
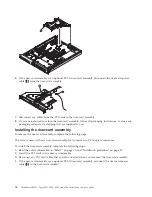
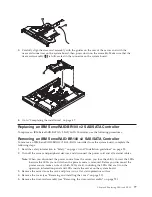
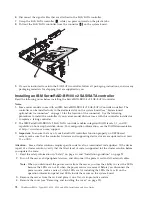
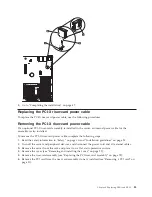
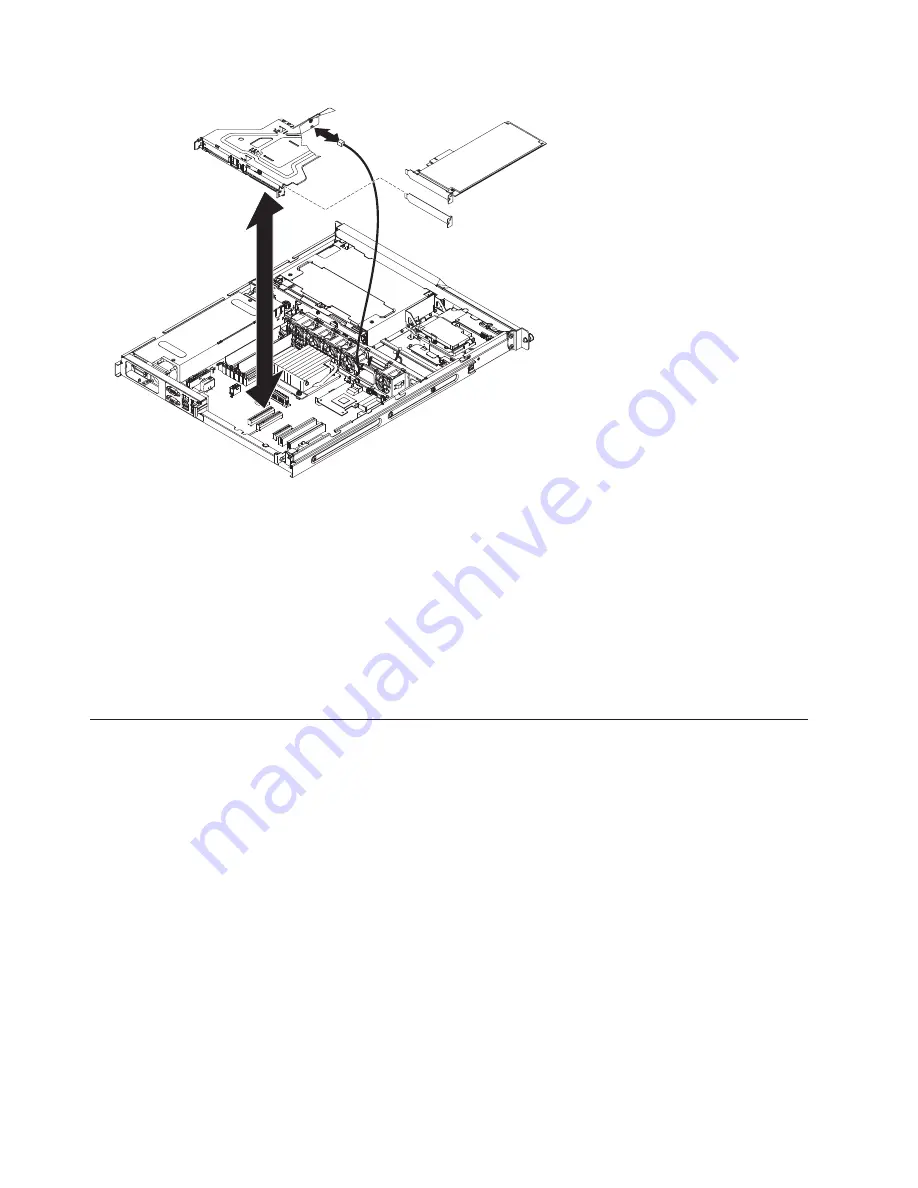
Disconnect the riser-card power cable from the PCI-X riser card.
8.
If you are instructed to return the PCI-X riser-card power cable, follow all packaging instructions, and
use any packaging materials for shipping that are supplied to you.
Installing the PCI-X riser-card power cable
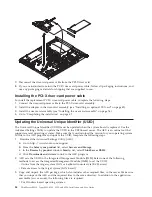
To install the replacement PCI-X riser-card power cable, complete the following steps.
1.
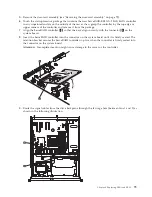
Connect the riser-card power cable to the PCI-X riser-card assembly.
2.
Install the adapter in the riser-card assembly (see “Installing an optional PCI card” on page 42).
3.
Install the riser-card assembly (see “Installing the riser-card assembly” on page 76).
4.
Go to “Completing the installation” on page 47.
Updating the Universal Unique Identifier (UUID)
The Universal Unique Identifier (UUID) must be updated when the system board is replaced. Use the
Advanced Settings Utility to update the UUID in the UEFI-based server. The ASU is an online tool that
supports several operating systems. Make sure that you download the version for your operating system.
To link to the ASU program and update the UUID, complete the following steps:
1.
Download the Advanced Settings Utility (ASU):
a.
Go to: http://www.lenovo.com/support.
b.
From the
Select your product
list, select
Servers and Storage
.
c.
In the
Browse by product
window
Family:
list, select
ThinkServer RS210
.
d.
Click
Downloads and drivers
to link to the ASU program.
2.
ASU sets the UUID in the Integrated Management Module (IMM). Select one of the following
methods to access the Integrated Management Module (IMM) to set the UUID:
v
Online from the target system (LAN or keyboard console style (KCS) access)
v
Remote access to the target system (LAN based)
3.
Copy and unpack the ASU package, which also includes other required files, to the server. Make sure
that you unpack the ASU and the required files to the same directory. In addition to the application
executable (asu or asu64), the following files are required:
v
For Windows based operating systems:
84
ThinkServer RS210, Types 6531, 6532, 6533, and 6534: Installation and User Guide
Summary of Contents for 653417U
Page 1: ...Installation and User Guide ThinkServer RS210 Machine Types 6531 6532 6533 and 6534 ...
Page 2: ......
Page 3: ...ThinkServer RS210 Types 6531 6532 6533 and 6534 Installation and User Guide ...
Page 8: ...vi ThinkServer RS210 Types 6531 6532 6533 and 6534 Installation and User Guide ...
Page 16: ...xiv ThinkServer RS210 Types 6531 6532 6533 and 6534 Installation and User Guide ...
Page 20: ...4 ThinkServer RS210 Types 6531 6532 6533 and 6534 Installation and User Guide ...
Page 22: ...6 ThinkServer RS210 Types 6531 6532 6533 and 6534 Installation and User Guide ...
Page 40: ...24 ThinkServer RS210 Types 6531 6532 6533 and 6534 Installation and User Guide ...
Page 66: ...50 ThinkServer RS210 Types 6531 6532 6533 and 6534 Installation and User Guide ...
Page 128: ...112 ThinkServer RS210 Types 6531 6532 6533 and 6534 Installation and User Guide ...
Page 160: ...144 ThinkServer RS210 Types 6531 6532 6533 and 6534 Installation and User Guide ...
Page 164: ...148 ThinkServer RS210 Types 6531 6532 6533 and 6534 Installation and User Guide ...
Page 173: ...Chinese Class A warning statement Korean Class A warning statement Appendix B Notices 157 ...
Page 174: ...158 ThinkServer RS210 Types 6531 6532 6533 and 6534 Installation and User Guide ...
Page 179: ......
Page 180: ...Printed in USA ...

