Contents
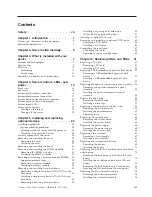
Safety . . . . . . . . . . . . . . . vii
Chapter 1. Introduction . . . . . . . . 1
Notices and statements in this document .
.
.
.
. 2
Related documentation .
.
.
.
.
.
.
.
.
.
. 2
Chapter 2. Server setup roadmap . . . . 5
Chapter 3. What is included with your
server
. . . . . . . . . . . . . . . 7
Features and technologies .
.
.
.
.
.
.
.
.
. 7
Specifications .
.
.
.
.
.
.
.
.
.
.
.
.
. 9
Software
.
.
.
.
.
.
.
.
.
.
.
.
.
.
. 11
EasyStartup .
.
.
.
.
.
.
.
.
.
.
.
. 11
EasyManage .
.
.
.
.
.
.
.
.
.
.
.
. 11
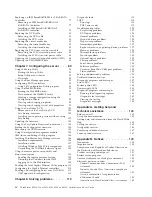
Reliability, availability, and serviceability
.
.
.
. 12
Chapter 4. Server controls, LEDs, and
power . . . . . . . . . . . . . . . 13
Front view.
.
.
.
.
.
.
.
.
.
.
.
.
.
. 13
Rear view .
.
.
.
.
.
.
.
.
.
.
.
.
.
. 14
System-board internal connectors .
.
.
.
.
.
. 16
System-board external connectors .
.
.
.
.
.
. 17
System-board optional-device connectors
.
.
.
. 18
System-board switches and jumpers .
.
.
.
.
. 20
System-board LEDs.
.
.
.
.
.
.
.
.
.
.
. 21
Server power features .
.
.
.
.
.
.
.
.
.
. 22
Turning on the server .
.
.
.
.
.
.
.
.
. 22
Turning off the server .
.
.
.
.
.
.
.
.
. 22
Chapter 5. Installing and replacing
optional devices
. . . . . . . . . . 25
Installation guidelines .
.
.
.
.
.
.
.
.
.
. 25
System reliability guidelines .
.
.
.
.
.
.
. 26
Working inside the server with the power on .
. 26
Handling static-sensitive devices .
.
.
.
.
. 26
Major components of the server
.
.
.
.
.
.
. 28
Removing and installing the cover.
.
.
.
.
.
. 29
Removing the cover
.
.
.
.
.
.
.
.
.
. 29
Installing the cover .
.
.
.
.
.
.
.
.
.
. 29
Removing and installing the bezel .
.
.
.
.
.
. 30
Removing and installing the DIMM air baffle .
.
. 31
Removing the DIMM air baffle .
.
.
.
.
.
. 31
Installing the DIMM air baffle .
.
.
.
.
.
. 31
Replacing or installing a memory module (DIMM)
32
Supported memory types .
.
.
.
.
.
.
.
. 32
Removing a memory module
.
.
.
.
.
.
. 35
Installing a memory module.
.
.
.
.
.
.
. 36
Removing and installing hard disk drives .
.
.
. 38
Removing a simple-swap Serial ATA (SATA) hard
disk drive .
.
.
.
.
.
.
.
.
.
.
.
.
. 38
Installing a simple-swap Serial ATA (SATA) hard
disk drive .
.
.
.
.
.
.
.
.
.
.
.
.
. 38
Removing a hot-swap hard disk drive
.
.
.
. 39
Installing a hot-swap hard disk drive .
.
.
.
. 40
IDs for hot-swap hard disk drives .
.
.
.
.
. 41
Installing an optional PCI card .
.
.
.
.
.
.
. 42
Removing and installing an optional DVD drive .
. 45
Removing a DVD drive .
.
.
.
.
.
.
.
. 45
Installing a DVD drive
.
.
.
.
.
.
.
.
. 46
Completing the installation .
.
.
.
.
.
.
.
. 47
Connecting the cables .
.
.
.
.
.
.
.
.
. 48
Updating the server configuration .
.
.
.
.
. 49
Chapter 6. Replacing CRUs and FRUs
51
Replacing a PCI card .
.
.
.
.
.
.
.
.
.
. 51
Removing a PCI card .
.
.
.
.
.
.
.
.
. 51
Installing a PCI card .
.
.
.
.
.
.
.
.
. 52
Replacing a USB embedded hypervisor flash device 52
Removing a USB embedded hypervisor flash
device .
.
.
.
.
.
.
.
.
.
.
.
.
.
. 52
Installing a USB embedded hypervisor flash
device .
.
.
.
.
.
.
.
.
.
.
.
.
.
. 53
Replacing the operator information panel assembly
53
Removing the operator information panel
assembly .
.
.
.
.
.
.
.
.
.
.
.
.
. 53
Installing the operator information panel
assembly .
.
.
.
.
.
.
.
.
.
.
.
.
. 54
Replace the drive cage.
.
.
.
.
.
.
.
.
.
. 55
Removing the drive cage .
.
.
.
.
.
.
.
. 55
Installing a drive cage .
.
.
.
.
.
.
.
.
. 57
Replacing a microprocessor and heat sink .
.
.
. 58
Removing the microprocessor .
.
.
.
.
.
. 58
Installing the microprocessor
.
.
.
.
.
.
. 60
Thermal grease .
.
.
.
.
.
.
.
.
.
.
. 61
Replacing the system board .
.
.
.
.
.
.
.
. 62
Removing the system board .
.
.
.
.
.
.
. 62
Installing the system board .
.
.
.
.
.
.
. 64
Replacing the power supply .
.
.
.
.
.
.
.
. 64
Removing the power supply.
.
.
.
.
.
.
. 65
Installing the power supply .
.
.
.
.
.
.
. 66
Replacing a fan assembly .
.
.
.
.
.
.
.
.
. 67
Removing a fan assembly
.
.
.
.
.
.
.
. 67
Installing a fan assembly .
.
.
.
.
.
.
.
. 68
Replacing the system-board battery .
.
.
.
.
. 69
Removing the battery .
.
.
.
.
.
.
.
.
. 69
Installing the battery .
.
.
.
.
.
.
.
.
. 70
Replacing the SAS/SATA hard disk drive back plate
or backplane .
.
.
.
.
.
.
.
.
.
.
.
.
. 72
Removing the backplane or back plate (3.5-inch
drives) .
.
.
.
.
.
.
.
.
.
.
.
.
.
. 72
Installing the backplane or back plate (3.5-inch
drives) .
.
.
.
.
.
.
.
.
.
.
.
.
.
. 72
Removing the SAS backplane (2.5-inch drives).
. 74
Installing the SAS backplane (2.5-inch drives) .
. 75
Replacing the PCI riser-card assembly
.
.
.
.
. 75
Removing the riser-card assembly .
.
.
.
.
. 75
Installing the riser-card assembly .
.
.
.
.
. 76
© Lenovo 2008, 2009. Portions © IBM Corp. 2007, 2009.
iii
Summary of Contents for 653417U
Page 1: ...Installation and User Guide ThinkServer RS210 Machine Types 6531 6532 6533 and 6534 ...
Page 2: ......
Page 3: ...ThinkServer RS210 Types 6531 6532 6533 and 6534 Installation and User Guide ...
Page 8: ...vi ThinkServer RS210 Types 6531 6532 6533 and 6534 Installation and User Guide ...
Page 16: ...xiv ThinkServer RS210 Types 6531 6532 6533 and 6534 Installation and User Guide ...
Page 20: ...4 ThinkServer RS210 Types 6531 6532 6533 and 6534 Installation and User Guide ...
Page 22: ...6 ThinkServer RS210 Types 6531 6532 6533 and 6534 Installation and User Guide ...
Page 40: ...24 ThinkServer RS210 Types 6531 6532 6533 and 6534 Installation and User Guide ...
Page 66: ...50 ThinkServer RS210 Types 6531 6532 6533 and 6534 Installation and User Guide ...
Page 128: ...112 ThinkServer RS210 Types 6531 6532 6533 and 6534 Installation and User Guide ...
Page 160: ...144 ThinkServer RS210 Types 6531 6532 6533 and 6534 Installation and User Guide ...
Page 164: ...148 ThinkServer RS210 Types 6531 6532 6533 and 6534 Installation and User Guide ...
Page 173: ...Chinese Class A warning statement Korean Class A warning statement Appendix B Notices 157 ...
Page 174: ...158 ThinkServer RS210 Types 6531 6532 6533 and 6534 Installation and User Guide ...
Page 179: ......
Page 180: ...Printed in USA ...


