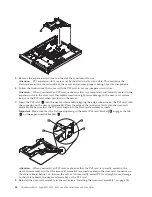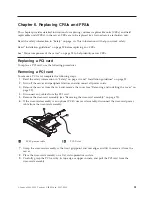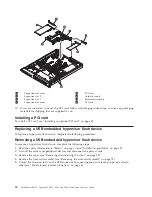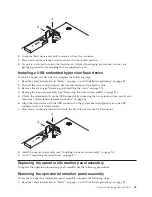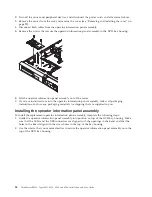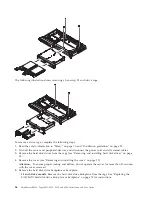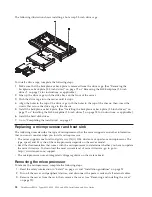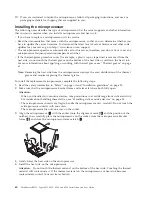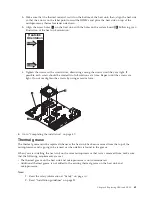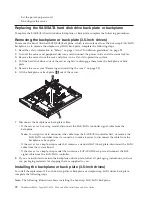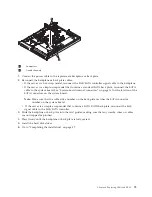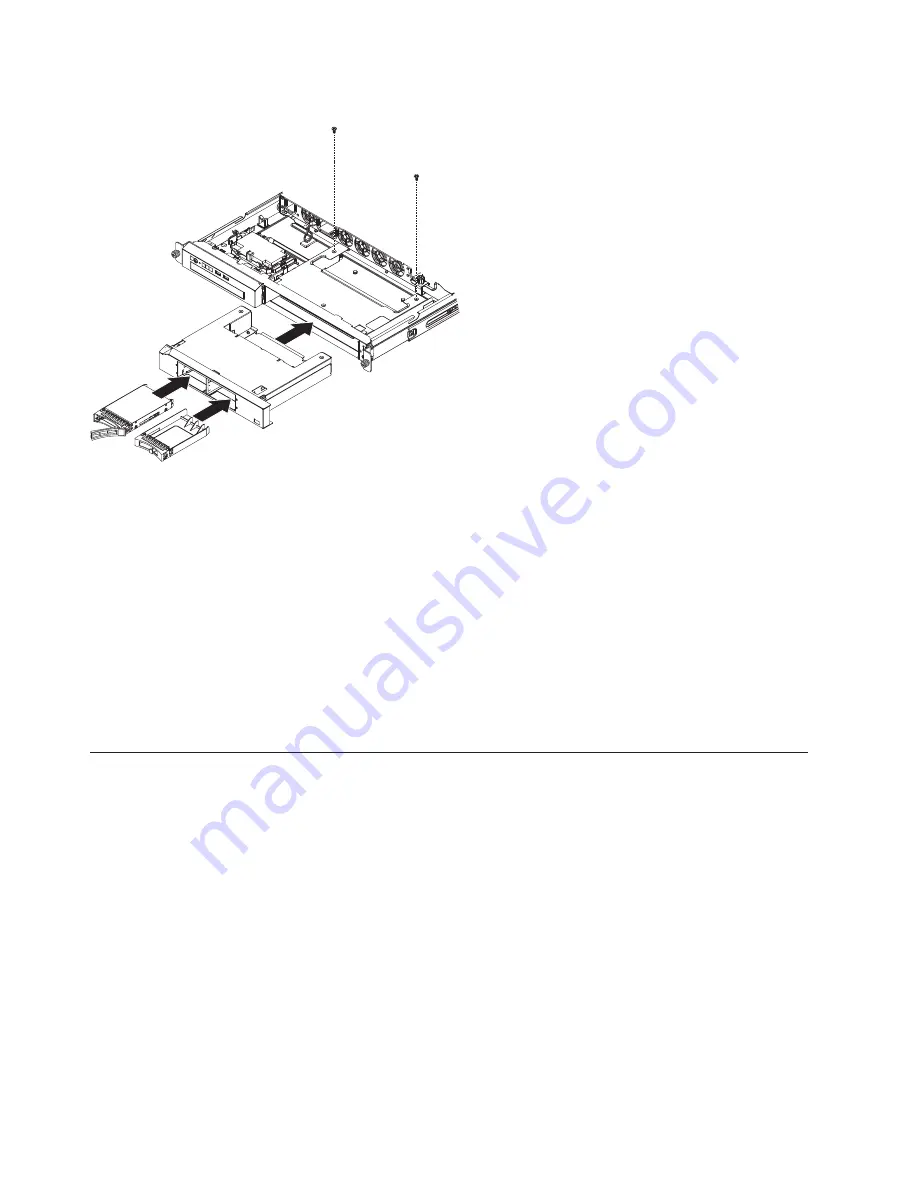
The following illustration shows installing a hot-swap 2.5-inch drive cage.
To install a drive cage, complete the following steps:
1.
Make sure that the backplane or back plate is removed from the drive cage. (See “Removing the
backplane or back plate (3.5-inch drives)” on page 72 or “Removing the SAS backplane (2.5-inch
drives)” on page 74 for instructions, as applicable.)
2.
Line up the drive cage with the drive bays on the front of the server.
3.
Push the drive cage into the server until it stops.
4.
Align the holes in the top of the drive cage with the holes in the top of the chassis; then, insert the
screws that secure the drive cage to the chassis.
5.
Install the backplane or back plate. (See “Installing the backplane or back plate (3.5-inch drives)” on
page 72 or “Installing the SAS backplane (2.5-inch drives)” on page 75 for instructions, as applicable.)
6.
Install the hard disk drives.
7.
Go to “Completing the installation” on page 47.
Replacing a microprocessor and heat sink
The following notes describe the type of microprocessor that the server supports and other information
that you must consider when you install a microprocessor:
v
The server supports one Intel land grid array (LGA) 1156 dual-core or quad-core microprocessor. The
type, speed, and L3 cache of the microprocessor depends on the server model.
v
Read the documentation that comes with the microprocessor to determine whether you have to update
the server firmware. To download the most current level of server firmware, go to go to
http://www.lenovo.com/support.
v
The microprocessor uses an integrated voltage regulator on the system board.
Removing the microprocessor
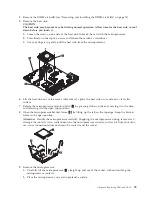
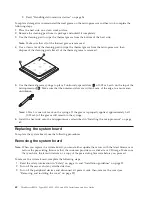
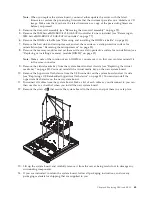
To remove the microprocessor, complete the following steps.
1.
Read the safety information in “Safety” on page vii and “Installation guidelines” on page 25.
2.
Turn off the server and peripheral devices, and disconnect the power cords and all external cables.
3.
Remove the server from the rack; then, remove the cover (see “Removing and installing the cover”
on page 29).
58
ThinkServer RS210, Types 6531, 6532, 6533, and 6534: Installation and User Guide
Summary of Contents for 653417U
Page 1: ...Installation and User Guide ThinkServer RS210 Machine Types 6531 6532 6533 and 6534 ...
Page 2: ......
Page 3: ...ThinkServer RS210 Types 6531 6532 6533 and 6534 Installation and User Guide ...
Page 8: ...vi ThinkServer RS210 Types 6531 6532 6533 and 6534 Installation and User Guide ...
Page 16: ...xiv ThinkServer RS210 Types 6531 6532 6533 and 6534 Installation and User Guide ...
Page 20: ...4 ThinkServer RS210 Types 6531 6532 6533 and 6534 Installation and User Guide ...
Page 22: ...6 ThinkServer RS210 Types 6531 6532 6533 and 6534 Installation and User Guide ...
Page 40: ...24 ThinkServer RS210 Types 6531 6532 6533 and 6534 Installation and User Guide ...
Page 66: ...50 ThinkServer RS210 Types 6531 6532 6533 and 6534 Installation and User Guide ...
Page 128: ...112 ThinkServer RS210 Types 6531 6532 6533 and 6534 Installation and User Guide ...
Page 160: ...144 ThinkServer RS210 Types 6531 6532 6533 and 6534 Installation and User Guide ...
Page 164: ...148 ThinkServer RS210 Types 6531 6532 6533 and 6534 Installation and User Guide ...
Page 173: ...Chinese Class A warning statement Korean Class A warning statement Appendix B Notices 157 ...
Page 174: ...158 ThinkServer RS210 Types 6531 6532 6533 and 6534 Installation and User Guide ...
Page 179: ......
Page 180: ...Printed in USA ...

