background image

ThinkCentre
Hardware Maintenance Manual

Machine Types: 0864, 0889, 5023, 7099, 7844, and 7846

Summary of Contents for 7099U1U

Page 1: ...ThinkCentre Hardware Maintenance Manual Machine Types 0864 0889 5023 7099 7844 and 7846 ...

Page 2: ......

Page 3: ...ThinkCentre Hardware Maintenance Manual Machine Types 0864 0889 5023 7099 7844 and 7846 ...

Page 4: ...ervices have been developed exclusively at private expense and are sold to governmental entities as commercial items as defined by 48 C F R 2 101 with limited and restricted rights to use reproduction and disclosure LIMITED AND RESTRICTED RIGHTS NOTICE If products data computer software or services are delivered pursuant a General Services Administration GSA contract use reproduction or disclosure...

Page 5: ...vice 41 Selecting a temporary startup device 41 Viewing or changing the startup device sequence 41 Exiting the Setup Utility program 42 Chapter 7 Symptom to FRU index 43 Hard disk drive boot error 43 Power Supply Problems 43 Diagnostic error codes 43 Beep symptoms 61 POST error codes 62 Miscellaneous error messages 63 Undetermined problems 65 Chapter 8 Replacing FRUs Machine Types 0864 7099 and 78...

Page 6: ...g the parts replacement 132 Chapter 10 FRU lists 135 Machine type 0864 135 Machine type 0889 150 Machine type 7099 165 Machine type 7844 180 Machine type 7846 196 Chapter 11 Additional service information 209 Security features 209 Hardware controlled passwords 209 Operating system password 209 Vital Product Data 209 BIOS levels 209 Updating flashing the BIOS from a disc 209 Updating flashing the B...

Page 7: ...ésent document avant d exécuter les instructions Lesen Sie unbedingt alle Hinweise vom Typ ACHTUNG oder VORSICHT in dieser Dokumentation bevor Sie irgendwelche Vorgänge durchführen Leggere le istruzioni introdotte da ATTENZIONE e PERICOLO presenti nel manuale prima di eseguire una qualsiasi delle istruzioni Certifique se de ler todas as instruções de cuidado e perigo neste manual antes de executar...

Page 8: ...arts RoHS compliant ThinkCentre parts have unique FRU part numbers Before or after June 2006 failed RoHS compliant parts must always be replaced using RoHS compliant FRUs so only the FRUs identified as compliant in the system hardware maintenance manual or direct substitutions for those FRUs can be used Products marketed before June 2006 Products marketed after June 2006 Current or original part R...

Page 9: ...that other people will not trip over it Do not wear loose clothing that can be trapped in the moving parts of a machine Ensure that your sleeves are fastened or rolled up above your elbows If your hair is long fasten it Insert the ends of your necktie or scarf inside clothing or fasten it with a nonconductive clip approximately 8 centimeters 3 inches from the end Do not wear jewelry chains metal f...

Page 10: ...re must be a complete circuit to cause an electric shock By observing the above rule you may prevent a current from passing through your body When using a tester set the controls correctly and use the approved probe leads and accessories for that tester Stand on suitable rubber mats obtained locally if necessary to insulate you from grounds such as metal floor strips and machine frames Observe the...

Page 11: ...inspection guide The intent of this inspection guide is to assist you in identifying potentially unsafe conditions on these products Each machine as it was designed and built had required safety items installed to protect users and service personnel from injury This guide addresses only those items However good judgment should be used to identify potential safety hazards due to attachment of featu...

Page 12: ...art Wear a grounded wrist strap against your skin to eliminate static on your body Prevent the part from touching your clothing Most clothing is insulative and retains a charge even when you are wearing a wrist strap Use the black side of a grounded work mat to provide a static free work surface The mat is especially useful when handling ESD sensitive devices Select a grounding system such as thos...

Page 13: ...rocedures Connect and disconnect cables as described in the following tables when installing moving or opening covers on this product or attached devices To Connect To Disconnect 1 Turn everything OFF 2 First attach all cables to devices 3 Attach signal cables to connectors 4 Attach power cords to outlet 5 Turn device ON 1 Turn everything OFF 2 First remove power cords from outlet 3 Remove signal ...

Page 14: ...cts contain an embedded Class 3A or Class 3B laser diode Note the following Laser radiation when open Do not stare into the beam do not view directly with optical instruments and avoid direct exposure to the beam 18 kg 37 lbs 32 kg 70 5 lbs 55 kg 121 2 lbs CAUTION Use safe practices when lifting CAUTION The power control button on the device and the power switch on the power supply do not turn off...

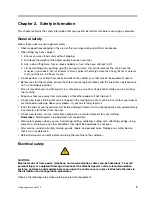
Page 15: ...Chapter 2 Safety information 9 ...

Page 16: ... 18 kg 37 lbs 32 kg 70 5 lbs 55 kg 121 2 lbs 1 2 PERIGO 10 ThinkCentre Hardware Maintenance Manual ...

Page 17: ... ou abrir tampas deste produto ou de dispositivos conectados Para Conectar Para Desconectar 1 DESLIGUE Tudo 2 Primeiramente conecte todos os cabos aos dispositivos 3 Conecte os cabos de sinal aos conectores 4 Conecte os cabos de alimentação às tomadas 5 LIGUE os dispositivos 1 DESLIGUE Tudo 2 Primeiramente remova os cabos de alimentação das tomadas 3 Remova os cabos de sinal dos conectores 4 Remov...

Page 18: ...ção a laser quando aberto Não olhe diretamente para o feixe a olho nu ou com instrumentos ópticos e evite exposição direta ao feixe 18 kg 37 lbs 32 kg 70 5 lbs 55 kg 121 2 lbs CUIDADO Utilize procedimentos de segurança para levantar equipamentos CUIDADO O botão de controle de alimentação do dispositivo e o botão para ligar desligar da fonte de alimentação não desligam a corrente elétrica fornecida...

Page 19: ...Chapter 2 Safety information 13 ...

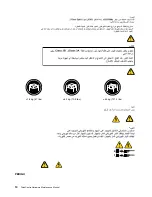
Page 20: ...1 2 14 ThinkCentre Hardware Maintenance Manual ...

Page 21: ...Chapter 2 Safety information 15 ...

Page 22: ...ilisez qu une seule main pour connecter ou déconnecter les câbles d interface Ne mettez jamais un équipement sous tension en cas d incendie ou d inondation ou en présence de dommages matériels Avant de retirer les carters de l unité mettez celle ci hors tension et déconnectez ses cordons d alimentation ainsi que les câbles qui la relient aux réseaux aux systèmes de télécommunication et aux modems ...

Page 23: ...inappropriée Ne pas la jeter à l eau l exposer à des températures supérieures à 100 C chercher à la réparer ou à la démonter Ne pas mettre la pile à la poubelle Pour la mise au rebut se reporter à la réglementation en vigueur ATTENTION Si des produits à laser tels que des unités de CD ROM de DVD ROM des unités à fibres optiques ou des émetteurs sont installés prenez connaissance des informations s...

Page 24: ...en anliegen Aus Sicherheitsgründen Bei Gewitter an diesem Gerät keine Kabel anschließen oder lösen Ferner keine Installations Wartungs oder Rekonfigurationsarbeiten durchführen Gerät nur an eine Schutzkontaktsteckdose mit ordnungsgemäß geerdetem Schutzkontakt anschließen Alle angeschlossenen Geräte ebenfalls an Schutzkontaktsteckdosen mit ordnungsgemäß geerdetem Schutzkontakt anschließen Die Signa...

Page 25: ...hiumbatterie nur durch eine Batterie mit der Teilenummer 45C1566 oder eine gleichwertige vom Hersteller empfohlene Batterie ersetzen Enthält das System ein Modul mit einer Lithiumbatterie dieses nur durch ein Modul desselben Typs und von demselben Hersteller ersetzen Die Batterie enthält Lithium und kann bei unsachgemäßer Verwendung Handhabung oder Entsorgung explodieren Die Batterie nicht mit Was...

Page 26: ...nien beim Anheben der Maschine beachten ACHTUNG Mit dem Netzschalter an der Einheit und am Netzteil wird die Stromversorgung für die Einheit nicht unterbrochen Die Einheit kann auch mit mehreren Netzkabeln ausgestattet sein Um die Stromversorgung für die Einheit vollständig zu unterbrechen müssen alle zum Gerät führenden Netzkabel vom Netz getrennt werden 1 2 20 ThinkCentre Hardware Maintenance Ma...

Page 27: ...Chapter 2 Safety information 21 ...

Page 28: ...legare qualsiasi cavo oppure effettuare l installazione la manutenzione o la riconfigurazione del prodotto durante un temporale Collegare tutti i fili elettrici a una presa di alimentazione correttamente cablata e dotata di messa a terra Collegare alle prese elettriche appropriate tutte le apparecchiature che verranno utilizzate per questo prodotto 22 ThinkCentre Hardware Maintenance Manual ...

Page 29: ...ndo si sostituisce la batteria al litio utilizzare solo il Numero parte 45C1566 o un tipo di batteria equivalente consigliato dal produttore Se sul sistema è presente un modulo che contiene una batteria al litio sostituirlo solo con un tipo di modulo dello stesso tipo della stessa casa di produzione La batteria contiene litio e può esplodere se usata maneggiata o smaltita in modo non corretto Non ...

Page 30: ...55 kg 121 2 lbs ATTENZIONE Prestare attenzione nel sollevare l apparecchiatura ATTENZIONE Il pulsante di controllo dell alimentazione presente sull unità e l interruttore dell alimentatore non disattivano l alimentazione corrente fornita all unità E possibile che l unità disponga di più cavi di alimentazione Per disattivare l alimentazione dall unità accertarsi che tutti i cavi di alimentazione si...

Page 31: ...Chapter 2 Safety information 25 ...

Page 32: ...ste producto durante una tormenta eléctrica Conecte todos los cables de alimentación a tomas de corriente debidamente cableadas y conectadas a tierra Cualquier equipo que se conecte a este producto también debe conectarse a tomas de corriente debidamente cableadas Siempre que sea posible utilice una sola mano para conectar o desconectar los cables de señal No encienda nunca un equipo cuando hay se...

Page 33: ...ya una batería de litio utilice solamente una batería número de pieza 45C1566 u otra de tipo equivalente recomendada por el fabricante Si su sistema dispone de un módulo que contiene una batería de litio reemplácelo sólo con el mismo tipo de módulo del mismo fabricante La batería contiene litio y puede explotar si no se utiliza manipula o desecha correctamente No debe Arrojarla al agua o sumergirl...

Page 34: ... PRECAUCIÓN Adopte procedimientos seguros al levantar el equipo PRECAUCIÓN El botón de control de alimentación del dispositivo y el interruptor de alimentación de la fuente de alimentación no desconectan la corriente eléctrica suministrada al dispositivo Además el dispositivo podría tener más de un cable de alimentación Para suprimir toda la corriente eléctrica del dispositivo asegúrese de que tod...

Page 35: ... ThinkVantage Productivity Center program is only available on computers preinstalled with the Windows XP operating system from Lenovo The ThinkVantage Productivity Center program contains information sources and tools designed to make computing easy and secure It provides easy access to various technologies such as Client Security Solution available on some models Power Manager Product Recovery R...

Page 36: ...ou can find the following information Customer Replaceable Unit CRU installation or replacement instructions Downloads and drivers Parts information Publications Troubleshooting information Links to other useful sources of information Specifications This section lists the physical specifications for your computer 30 ThinkCentre Hardware Maintenance Manual ...

Page 37: ...h package Non operating 10 to 60 C 14 to 140 F without package Humidity Operating 20 to 80 10 per hour non condensing Non operating 20 to 90 10 per hour non condensing Altitude Operating 50 to 10 000 ft 15 2 to 3 048 m Non operating 50 to 35 000 ft 15 2 to 10 668 m Electrical input Input voltage Low range Minimum 100 V ac Maximum 127 V ac Input frequency range 50 to 60 Hz Voltage selection switch ...

Page 38: ...kage Non operating 10 to 60 C 14 to 140 F without package Humidity Operating 20 to 80 10 per hour non condensing Non operating 20 to 90 10 per hour non condensing Altitude Operating 50 to 10 000 ft 15 2 to 3 048 m Non operating 50 to 35 000 ft 15 2 to 10 668 m Electrical input Input voltage Low range Minimum 100 V ac Maximum 127 V ac Input frequency range 50 to 60 Hz Voltage selection switch setti...

Page 39: ...beep codes Look for readable instructions or a main menu on the display If you did not receive the correct response proceed to step 6 on page 33 If you do receive the correct response proceed to step 7 on page 33 6 Look at the following conditions and follow the instructions If you hear beep codes during POST go to Beep symptoms on page 61 If the computer displays a POST error go to POST error cod...

Page 40: ...are considered identical only if they 1 Are the exact machine type and models 2 Have the same BIOS level 3 Have the same adapters attachments in the same locations 4 Have the same address jumpers terminators cabling 5 Have the same software versions and levels 6 Have the same diagnostic diskettes version 7 Have the same configuration options set in the system 8 Have the same setup for operating sy...

Page 41: ... and view system information To run the Lenovo ThinkVantage Toolbox program on the Windows 7 operating system click Start All Programs Lenovo ThinkVantage Tools System Health and Diagnostics Follow the instructions on the screen To run the Lenovo ThinkVantage Toolbox program on the Windows XP operating system click Start All Programs ThinkVantage Lenovo ThinkVantage Toolbox Follow the instructions...

Page 42: ...ions on how to run the diagnostic program from the diagnostic disc that you created To run the diagnostic program from the diagnostic disc that you created do the following 1 Make sure your computer is turned off 2 Repeatedly press and release the F12 key when turning on the computer When the Startup Device Menu opens release the F12 key 3 Insert the diagnostic disc into the optical drive 4 Select...

Page 43: ...ts produce the following error code format Function Code Failure Type DeviceID Date ChkDigits Text Function Code Represents the feature or function within the computer Failure Type Represents the type of error encountered DeviceID Contains the component s unit ID that corresponds to a fixed disk drive removable media drive processor specific RIMM or a device on the PCI bus Date Contains the date w...

Page 44: ...n of completion status Provides messages that warn the user about a non recoverable process Important Make sure that all data is backed up before using the Quick or Full Erase functions To select the Quick Erase Hard Drive or Full Erase Hard Drive utility do the following 1 1 Select the UTILITY option on the toolbar and press Enter 2 Select either the QUICK ERASE or FULL ERASE HARD DISK option and...

Page 45: ...e a logo screen release the F1 key The Setup Utility program opens Note If a password has been set the Setup Utility program menu will not be displayed until you type the correct password For more information see Using passwords on page 39 Viewing or changing settings The Setup Utility program menu lists various items about the system configuration settings To view or change the settings start the...

Page 46: ...l computers you might want to set an administrator password For more information about how to set a password see Setting changing or deleting a password on page 40 After you have set an administrator password a password prompt is displayed each time you try to access the Setup Utility program You cannot access the Setup Utility program until a valid password is typed in If you have set both a powe...

Page 47: ...ss F10 to save the new settings and exit the Setup Utility program Notes a If you do not want to save the new settings select Exit Discard Changes and Exit b If you want to return to the default settings press F9 or select Exit Load Optimal Defaults Selecting a startup device If your computer does not start up from a device such as a hard disk drive or the disc in an optical drive as expected do o...

Page 48: ...w settings and exit the Setup Utility program Notes a If you do not want to save the new settings select Exit Discard Changes and Exit b If you want to return to the default settings press F9 or select Exit Load Optimal Defaults Exiting the Setup Utility program After you finish viewing or changing settings press Esc to return to the Setup Utility program main menu You might have to press Esc seve...

Page 49: ... drive is not in the boot sequence in configuration Check the configuration and ensure the start up drive is in the boot sequence No operating system installed on the boot drive Install an operating system on the boot drive The boot sector on the start up drive is corrupted The drive must be formatted Do the following 1 Attempt to back up the data on the failing hard disk drive 2 Using the operati...

Page 50: ...em board 000 034 XXX BIOS Buffer Allocation failure 1 Reboot the system 2 Flash the system See Updating flashing the BIOS from a disc on page 209 3 Run memory test 4 System board 000 035 XXX BIOS Reset Condition detected 1 Flash the system See Updating flashing the BIOS from a disc on page 209 2 System board 000 036 XXX BIOS Register error 1 Flash the system See Updating flashing the BIOS from a d...

Page 51: ... BIOS ACPI failure 1 Flash the system See Updating flashing the BIOS from a disc on page 209 2 System board 001 000 XXX System Test Passed No action 001 00X XXX System Error System board 001 01X XXX System Error System board 001 024 XXX System Addressing test failure System board 001 025 XXX System Checksum Value error 1 Flash the system See Updating flashing the BIOS from a disc on page 209 2 Sys...

Page 52: ... warning statement 4 Replace the component under test 001 198 XXX System test aborted 1 If a component is called out make sure it is connected and or enabled See Chapter 6 Using the Setup Utility on page 39 2 Flash the system and retest See Updating flashing the BIOS from a disc on page 209 3 Go to Undetermined problems on page 65 001 199 XXX System test failed cause unknown 1 Go to Undetermined p...

Page 53: ...282 XXX System IRQ15 failure 1 Device on IRQ15 2 System board 001 286 XXX 001 287 XXX 001 288 XXX System Timer failure System board 001 292 XXX System CMOS RAM error 1 Run Setup and re test 2 System board 001 293 XXX System CMOS Battery 1 CMOS battery 2 System board 001 298 XXX System RTC date time update failure 1 Flash the system See Updating flashing the BIOS from a disc on page 209 2 System bo...

Page 54: ... System board 005 195 XXX Video Test aborted by user Information only Re start the test if necessary 005 196 XXX Video test halt error threshold exceeded 1 Press F3 to review the log file 2 Re start the test to reset the log file 005 197 XXX Video test warning 1 Make sure the component that is called out is connected and or enabled See Chapter 6 Using the Setup Utility on page 39 2 Re run test 3 R...

Page 55: ...g flashing the BIOS from a disc on page 209 3 Go to Undetermined problems on page 65 006 199 XXX Diskette interface test failed cause unknown 1 Go to Undetermined problems on page 65 2 Flash the system and re test 3 Replace component under function test 006 25X XXX Diskette interface Error 1 Diskette drive cable 2 Diskette drive 3 System board 011 000 XXX Serial port Interface Test Passed No actio...

Page 56: ...g the BIOS from a disc on page 209 3 Replace component under function test 011 2XX XXX Serial port signal failure 1 External serial device 2 System board 014 000 XXX Parallel port Interface Test Passed No action 014 001 XXX Parallel port Presence 1 Remove external parallel device if present 2 Run setup enable port 3 System board 014 002 XXX 014 003 XXX Parallel port Timeout Parity error System boa...

Page 57: ... Test Passed No action 015 001 XXX USB port Presence 1 Remove USB device s and re test 2 System board 015 002 XXX USB port Timeout 1 Remove USB device s and re test 2 System board 015 015 XXX USB port External Loopback failure 1 Remove USB device s and re test 2 System board 015 027 XXX USB port Configuration Setup error 1 Flash the system See Updating flashing the BIOS from a disc on page 209 2 S...

Page 58: ...PCI Card Test Passed No action 018 0XX XXX PCI Card Failure 1 Riser card if installed 2 System board 018 195 XXX PCI Card Test aborted by user 1 PCI card 2 Information only Re start the test if necessary 018 196 XXX PCI Card test halt error threshold exceeded 1 Press F3 to review the log file 2 Re start the test to reset the log file 018 197 XXX PCI Card test warning 1 Make sure the component that...

Page 59: ...f a component is called out make sure it is connected and or enabled See Chapter 6 Using the Setup Utility on page 39 2 Flash the system and re test See Updating flashing the BIOS from a disc on page 209 3 Go to Undetermined problems on page 65 020 199 XXX PCI test failed cause unknown 1 Go to Undetermined problems on page 65 2 Flash the system and re test See Updating flashing the BIOS from a dis...

Page 60: ...e 39 2 Flash the system and re test See Updating flashing the BIOS from a disc on page 209 3 Go to Undetermined problems on page 65 025 199 XXX IDE interface test failed cause unknown 1 Go to Undetermined problems on page 65 2 Flash the system and re test See Updating flashing the BIOS from a disc on page 209 3 Replace component under function test 030 000 XXX SCSI interface Test Passed No action ...

Page 61: ...XXX RAID interface Failure 1 RAID signal cable 2 RAID device 3 RAID adapter card if installed 4 System board 035 195 XXX RAID interface Test aborted by user Information only Re start the test if necessary 035 196 XXX RAID interface test halt error threshold exceeded 1 Press F3 to review the log file 2 Re start the test to reset the log file 035 197 XXX RAID interface test warning 1 Make sure the c...

Page 62: ... the component under test 071 198 XXX Audio port test aborted 1 If a component is called out make sure it is connected and or enabled See Chapter 6 Using the Setup Utility on page 39 2 Flash the system and re test See Updating flashing the BIOS from a disc on page 209 3 Go to Undetermined problems on page 65 071 199 XXX Audio port test failed cause unknown 1 See Undetermined problems on page 65 2 ...

Page 63: ...ace Presence 1 Mouse 2 System board 086 032 XXX Mouse Port interface Device controller failure 1 Mouse 2 System board 086 035 XXX Mouse Port interface Reset 1 Mouse 2 System board 086 040 XXX Mouse Port interface IRQ failure 1 Run Setup 2 Mouse 3 System board 086 195 XXX Mouse Port interface Test aborted by user Information only Re start the test if necessary 086 196 XXX Mouse Port interface test ...

Page 64: ...termined problems on page 65 089 199 XXX Microprocessor test failed cause unknown 1 See Undetermined problems on page 65 2 Flash the system and re test See Updating flashing the BIOS from a disc on page 209 3 Replace component under function test 170 000 XXX Voltage Sensor s Test Passed No action 170 0XX XXX Voltage Sensor s failure 1 Flash system 2 System board 170 195 XXX Voltage Sensor s Test a...

Page 65: ...is called out is connected and or enabled See Chapter 6 Using the Setup Utility on page 39 2 Re run test 3 Replace the component that is called out in warning statement 4 Replace the component under test 175 198 XXX Thermal Sensor s test aborted 1 If a component is called out make sure it is connected and or enabled 2 Flash the system and re test See Updating flashing the BIOS from a disc on page ...

Page 66: ...or 1 Hard Disk Drive Cable 2 Check power supply voltages 3 Reseat the hard disk drive cable 4 Hard Disk drive IDE 5 System board 217 28X XXX 217 29X XXX Hard Disk Drive SCSI error 1 Hard Disk Drive Cable 2 Check power supply voltages 3 Reseat the hard disk drive cable 4 Hard Disk drive SCSI 5 SCSI adapter card 6 System board 220 000 XXX Hi Capacity Cartridge Drive Test Passed No action 220 XXX XXX...

Page 67: ...ess F10 to Save and exit 3 Perform a Boot block recovery See Recovering from a POST and BIOS update failure on page 210 1 long and 2 short beeps Monitor or video adapter card error Perform the following actions in order 1 Make sure the monitor is properly connected to the computer 2 Replace the video adapter card if present 3 Replace the system board 1 long and 9 short beeps BIOS ROM error Perform...

Page 68: ...icate that CMOS has become corrupt due to a weak CMOS battery CPU at nnnn nnnn is the running speed of the microprocessor Press Esc to skip memory test Pressing Esc skips the full memory test HARD DISK INSTALL FAILURE Cannot find or initialize the hard disk drive controller or the drive Make sure the hard disk drive is correctly installed If no hard disk drives are installed make sure the hard dis...

Page 69: ...PL 3 Network adapter Advise network administrator of new MAC address Computer will not perform a Wake on LAN if applicable 1 Check power supply and signal cable connections to network adapter 2 Ensure that the operating system settings are set to enable Wake on LAN 3 Ensure Wake on LAN feature is enabled in Setup Configuration see Starting the Setup Utility program on page 39 4 Ensure network admi...

Page 70: ...ter problems 1 Printer 2 System Board Program loads from the hard disk with a known good diagnostics diskette in the first 3 5 inch diskette drive 1 Run Setup and check Startup sequence 2 Diskette Drive 3 Diskette Drive Cable 4 System Board 5 Power Supply RPL computer cannot access programs from its own hard disk 1 If network administrator is using LCCM Hybrid RPL check startup sequence a First de...

Page 71: ... modules d Extended video memory e External Cache f External Cache RAM g Hard disk drive h Diskette drive 3 Turn on the power and the computer to re test the system 4 Repeat steps 1 through 3 until you find the failing device or adapter cards If all devices and adapter cards have been removed and the problem continues replace the system board See Replacing the system board on page 91 or Replacing ...

Page 72: ...66 ThinkCentre Hardware Maintenance Manual ...

Page 73: ...lace procedure for all FRUs Only the major FRUs are documented Locating connectors controls and indicators on the front of your computer Front connector control and indicator locations shows the locations of the connectors controls and indicators on the front of your computer Figure 1 Front connector control and indicator locations 1 Hard disk drive activity indicator 5 USB connector 2 Power indic...

Page 74: ...vailable in some models 7 Audio line out connector 2 Power cord connector 8 Audio line in connector 3 Serial port 9 PCI Express x16 graphics card slot 4 VGA monitor connector 10 PCI Express x1 card slots 2 5 USB connectors 4 11 PCI card slot 6 Microphone connector 12 Ethernet connector Locating components Figure 3 Component locations on page 69 shows the locations of the various components in your...

Page 75: ...le in some models 3 Optical drive 9 PCI Express x1 card slots 2 4 System board 10 PCI Express x16 graphics card slot 5 Hard disk drive 11 Power supply assembly 6 Battery Locating parts on the system board Figure 4 System board part locations on page 70 shows the locations of the parts on the system board Chapter 8 Replacing FRUs Machine Types 0864 7099 and 7846 69 ...

Page 76: ...ou can add drives to your computer to increase storage capacity and enable your computer to read other types of media Internal drives are installed in bays In this manual the bays are referred to as bay 1 bay 2 and so on When installing or replacing an internal drive it is important to note the type and size of the drive that you can install or replace in each bay and correctly connect the cables ...

Page 77: ... Safety and Warranty Guide go to http www lenovo com support This section provides instructions on how to remove the computer cover CAUTION Turn off the computer and wait three to five minutes to let the computer cool before removing the computer cover To remove the computer cover do the following 1 Remove all media from the drives Then turn off all attached devices and the computer 2 Disconnect a...

Page 78: ...ety and Warranty Guide go to http www lenovo com support This section provides instructions on how to remove and reinstall the front bezel To remove and reinstall the front bezel do the following 1 Remove all media from the drives and turn off all attached devices and the computer Then disconnect all power cords from electrical outlets and disconnect all cables that are connected to the computer 2...

Page 79: ...e right side of the front bezel with the corresponding holes in the chassis then pivot the front bezel inward until it snaps into position on the left side Figure 8 Reinstalling the front bezel 5 Go to Completing the parts replacement on page 94 Chapter 8 Replacing FRUs Machine Types 0864 7099 and 7846 73 ...

Page 80: ...d the computer Then disconnect all power cords from electrical outlets and disconnect all cables that are connected to the computer 2 Remove the computer cover See Removing the computer cover on page 71 3 At the rear of the computer remove the screw that secures the PCI card latch Figure 9 Removing the screw that secures the PCI card latch 4 Do one of the following If you are replacing a PCI card ...

Page 81: ...ts on the system board on page 69 to identify the types of PCI card slots 5 Remove the new PCI card from its static protective package 6 Install the new PCI card into the appropriate PCI card slot on the system board Then pivot the PCI card latch to the closed position to secure the PCI cards Chapter 8 Replacing FRUs Machine Types 0864 7099 and 7846 75 ...

Page 82: ...DDR3 SDRAM DIMMs that provide up to a maximum of 4 GB of system memory When installing or replacing a memory module use 1 GB or 2 GB DDR3 SDRAM DIMMs in any combination up to a maximum of 4 GB of system memory To install or replace a memory module do the following 1 Remove all media from the drives and turn off all attached devices and the computer Then disconnect all power cords from electrical o...

Page 83: ...h you want to install the memory module Figure 13 Opening the retaining clips of the memory slot 7 Position the new memory module over the memory slot Make sure that the notch 1 on the new memory module is aligned with the key 2 in the memory slot Then press the new memory module straight down into the memory slot until the retaining clips close and the new memory module snaps into position Chapte...

Page 84: ...er no battery lasts forever If the battery fails the date time and configuration information including passwords are lost An error message is displayed when you turn on the computer Before performing the following procedure be sure to read and understand the information about replacing and disposing of the battery in the Batteries and Lithium battery notice sections of the ThinkCentre Safety and W...

Page 85: ...eplacement on page 94 Replacing the power supply assembly Attention Do not open your computer or attempt any repair before reading and understanding the Important safety information in the ThinkCentre Safety and Warranty Guide that came with your computer To obtain a copy of the ThinkCentre Safety and Warranty Guide go to http www lenovo com support This section provides instructions on how to rep...

Page 86: ... Remove the computer cover See Removing the computer cover on page 71 3 Disconnect the power supply assembly cables from all drives and from the 24 pin power connector and 4 pin power connector on the system board See Locating parts on the system board on page 69 Note You might also need to release the power supply assembly cables from some cable clips or ties that secure the cables to the chassis...

Page 87: ... switch to 230 V 7 Install the new power supply assembly into the chassis so that the screw holes in the new power supply assembly are aligned with the corresponding holes in the rear of the chassis 8 Install the four screws to secure the new power supply assembly in place Note Use only screws provided by Lenovo 9 Connect the new power supply assembly cables to all drives and the system board See ...

Page 88: ...vent your access to the heat sink and fan assembly 6 Disconnect the heat sink and fan assembly cable from the microprocessor fan connector on the system board See Locating parts on the system board on page 69 7 Remove the four screws 1 that secure the heat sink and fan assembly to the system board Note Carefully remove the four screws from the system board to avoid any possible damage The four scr...

Page 89: ...nty Guide go to http www lenovo com support This section provides instructions on how to replace the microprocessor CAUTION The heat sink and microprocessor might be very hot Turn off the computer and wait three to five minutes to let the computer cool before removing the computer cover To replace the microprocessor do the following 1 Remove all media from the drives and turn off all attached devi...

Page 90: ...the socket You can either look for the small triangle 1 on one corner of the microprocessor or note the orientation of the notches 2 on the microprocessor This is important when installing the new microprocessor on the system board c Touch only the edges of the microprocessor Do not touch the gold contacts on the bottom d Do not drop anything onto the microprocessor socket while it is exposed The ...

Page 91: ...the corresponding beveled corner of the microprocessor socket 12 Lower the new microprocessor straight down into the microprocessor socket on the system board 13 Close the microprocessor retainer and lock it into position with the small handle to secure the new microprocessor in the socket 14 Reinstall the heat sink and fan assembly See Replacing the heat sink and fan assembly on page 81 15 Reinst...

Page 92: ...ords from electrical outlets and disconnect all cables that are connected to the computer 2 Remove the computer cover See Removing the computer cover on page 71 3 Remove the front bezel See Removing and reinstalling the front bezel on page 72 4 Disconnect the signal cable and the power cable from the rear of the optical drive 5 Remove the two screws that secure the optical drive Then slide the opt...

Page 93: ...o complete the replacement go to Completing the parts replacement on page 94 Replacing the hard disk drive Attention Do not open your computer or attempt any repair before reading and understanding the Important safety information in the ThinkCentre Safety and Warranty Guide that came with your computer To obtain a copy of the ThinkCentre Safety and Warranty Guide go to http www lenovo com support...

Page 94: ... drives on page 70 4 Disconnect the signal cable and the power cable from the rear of the hard disk drive 5 Remove the four screws that secure the hard disk drive Then slide the hard disk drive out of the chassis Figure 25 Removing the hard disk drive 6 Slide the new hard disk drive into the hard disk drive bay and align the screw holes in the new hard disk drive with the corresponding holes in th...

Page 95: ...omplete the installation or replacement go to Completing the parts replacement on page 94 Replacing the card reader Attention Do not open your computer or attempt any repair before reading and understanding the Important safety information in the ThinkCentre Safety and Warranty Guide that came with your computer To obtain a copy of the ThinkCentre Safety and Warranty Guide go to http www lenovo co...

Page 96: ...r is aligned with the corresponding hole in the chassis 7 Install the screw to secure the new card reader in place 8 Connect the new card reader cable to the USB connector on the system board and properly route the cable of the new card reader See Locating parts on the system board on page 69 9 Reinstall the front bezel See Removing and reinstalling the front bezel on page 72 10 To complete the re...

Page 97: ...ssis 7 Position the new front audio and USB assembly to the chassis so that the screw hole in the new front audio and USB assembly is aligned with the corresponding hole in the chassis 8 Install the screw to secure the new front audio and USB assembly in place 9 Connect the new front audio and USB assembly cables to the system board See Locating parts on the system board on page 69 10 Reinstall th...

Page 98: ...cables from the system board See Locating parts on the system board on page 69 6 Remove all memory modules and PCI cards that are currently installed See Installing or replacing a memory module on page 76 and Installing or replacing a PCI card on page 74 7 Carefully take note of the location of all cable connections on the system board and disconnect all the cables See Locating parts on the system...

Page 99: ... See Replacing the heat sink and fan assembly on page 81 16 Reconnect all remaining cables to the system board See Locating parts on the system board on page 69 17 Reinstall the front bezel See Removing and reinstalling the front bezel on page 72 18 Reinstall the computer cover 19 Go to Completing the parts replacement on page 94 The failing system board must be returned with a microprocessor sock...

Page 100: ...n page 68 for the locations of the various components in your computer 2 If you have removed the front bezel reinstall it See Removing and reinstalling the front bezel on page 72 3 Properly route the cables and keep them clear of the hinges and sides of the computer chassis to avoid interference with closing the computer cover 4 Position the computer cover on the chassis so that the rail guides on...

Page 101: ...tors and parts on the rear of your computer on page 68 7 Depending on the parts you installed or replaced you might need to confirm the updated information in the Setup Utility program See Chapter 6 Using the Setup Utility on page 39 Note In most areas of the world Lenovo requires the return of the defective Customer Replaceable Units CRUs Information about this will come with the new CRUs or will...

Page 102: ...96 ThinkCentre Hardware Maintenance Manual ...

Page 103: ...lace procedure for all FRUs Only the major FRUs are documented Locating connectors controls and indicators on the front of your computer Front connector control and indicator locations shows the locations of the connectors controls and indicators on the front of your computer Figure 34 Front connector control and indicator locations 1 Optical drive eject close button 5 USB connector 2 Power switch...

Page 104: ...nnector 7 Audio line in connector 2 VGA monitor connector 8 PCI Express x16 graphics card slot 3 Serial port 9 PCI Express x1 card slots 2 4 USB connectors 4 10 PCI card slot 5 Microphone connector 11 Ethernet connector 6 Audio line out connector 12 Voltage selection switch Locating components Figure 36 Component locations on page 99 shows the locations of the various components in your computer T...

Page 105: ... assembly 7 Hard disk drive 3 Memory modules 2 8 Battery 4 System board 9 PCI Express x16 graphics card available in some models 5 Optical drive Locating parts on the system board Figure 37 System board part locations on page 100 shows the locations of the parts on the system board Chapter 9 Replacing FRUs Machine Types 0889 5023 and 7844 99 ...

Page 106: ...ou can add drives to your computer to increase storage capacity and enable your computer to read other types of media Internal drives are installed in bays In this manual the bays are referred to as bay 1 bay 2 and so on When installing or replacing an internal drive it is important to note the type and size of the drive that you can install or replace in each bay and correctly connect the cables ...

Page 107: ... Safety and Warranty Guide go to http www lenovo com support This section provides instructions on how to remove the computer cover CAUTION Turn off the computer and wait three to five minutes to let the computer cool before removing the computer cover To remove the computer cover do the following 1 Remove all media from the drives Then turn off all attached devices and the computer 2 Disconnect a...

Page 108: ...o com support This section provides instructions on how to remove and reinstall the front bezel To remove and reinstall the front bezel do the following 1 Remove all media from the drives and turn off all attached devices and the computer Then disconnect all power cords from electrical outlets and disconnect all cables that are connected to the computer 2 Remove the computer cover See Removing the...

Page 109: ...tabs on the bottom of the front bezel with the corresponding holes in the chassis Then pivot the front bezel inward until it snaps into position Figure 41 Reinstalling the front bezel 5 Go to Completing the parts replacement on page 132 Chapter 9 Replacing FRUs Machine Types 0889 5023 and 7844 103 ...

Page 110: ...ing 1 Remove all media from the drives and turn off all attached devices and the computer Then disconnect all power cords from electrical outlets and disconnect all cables that are connected to the computer 2 Remove the computer cover to access the system board components See Removing the computer cover on page 101 3 Remove the front bezel See Removing and reinstalling the front bezel on page 102 ...

Page 111: ... disconnect all power cords from electrical outlets and disconnect all cables that are connected to the computer 2 Remove the computer cover See Removing the computer cover on page 101 3 Do one of the following If you are replacing a PCI card remove the screw that secure the old PCI card and release the old PCI card from the PCI card slot Then carefully remove the old PCI card from the chassis as ...

Page 112: ...e 104 Figure 44 Removing the PCI card If you are installing a PCI card remove the appropriate PCI card slot cover See Locating parts on the system board on page 99 to identify the types of PCI card slots 4 Remove the new PCI card from its static protective package 5 Install the new PCI card into the appropriate PCI card slot on the system board Then install the screw to secure the new PCI card in ...

Page 113: ...y slots for installing or replacing DDR3 SDRAM DIMMs that provide up to a maximum of 4 GB of system memory When installing or replacing a memory module use 1 GB or 2 GB DDR3 SDRAM DIMMs in any combination up to a maximum of 4 GB of system memory To install or replace a memory module do the following 1 Remove all media from the drives and turn off all attached devices and the computer Then disconne...

Page 114: ...a memory module open the retaining clips of the memory slot into which you want to install the memory module Figure 47 Opening the retaining clips of the memory slot 8 Position the new memory module over the memory slot Make sure that the notch 1 on the new memory module is aligned with the key 2 in the memory slot Then press the new memory module straight down into the memory slot until the retai...

Page 115: ...ughout its life however no battery lasts forever If the battery fails the date time and configuration information including passwords are lost An error message is displayed when you turn on the computer Before performing the following procedure be sure to read and understand the information about replacing and disposing of the battery in the Batteries and Lithium battery notice sections of the Thi...

Page 116: ... replacement on page 132 Replacing the heat sink and fan assembly Attention Do not open your computer or attempt any repair before reading and understanding the Important safety information in the ThinkCentre Safety and Warranty Guide that came with your computer To obtain a copy of the ThinkCentre Safety and Warranty Guide go to http www lenovo com support This section provides instructions on ho...

Page 117: ... screws that secure the heat sink and fan assembly in the following sequence Note Carefully remove the four screws from the system board to avoid any possible damage The four screws are integrated parts of the heat sink and fan assembly and they cannot be removed from the heat sink and fan assembly a Loosen screw 1 then completely remove screw 3 from the system board and then completely remove scr...

Page 118: ...9 Install the four screws in the following sequence to secure the new heat sink and fan assembly in place a Tighten screw 1 a small amount then fully install screw 3 and then fully install screw 1 as shown in Screws that secure the heat sink and fan assembly b Tighten screw 2 a small amount then fully install screw 4 and then fully install screw 2 as shown in Screws that secure the heat sink and f...

Page 119: ...ocessor might be very hot Turn off the computer and wait three to five minutes to let the computer cool before removing the computer cover To replace the microprocessor do the following 1 Remove all media from the drives and turn off all attached devices and the computer Then disconnect all power cords from electrical outlets and disconnect all cables that are connected to the computer 2 Remove th...

Page 120: ...he orientation of the microprocessor in the socket You can either look for the small triangle 1 on one corner of the microprocessor or note the orientation of the notches 2 on the microprocessor This is important when installing the new microprocessor on the system board c Touch only the edges of the microprocessor Do not touch the gold contacts on the bottom d Do not drop anything onto the microp...

Page 121: ...on one corner of the microprocessor with the corresponding beveled corner of the microprocessor socket 10 Lower the new microprocessor straight down into the microprocessor socket on the system board 11 Close the microprocessor retainer and lock it into position with the small handle to secure the new microprocessor in the socket 12 Reinstall the heat sink and fan assembly See Replacing the heat s...

Page 122: ...er supply or any part that has the following label attached Hazardous voltage current and energy levels are present inside any component that has this label attached There are no serviceable parts inside these components If you suspect a problem with one of these parts contact a service technician To replace the power supply assembly do the following 1 Remove all media from the drives and turn off...

Page 123: ...se the power supply assembly cables from some cable clips or ties that secure the cables to the chassis Make sure that you note the cable routing before disconnecting the cables 6 At the rear of the computer remove the three screws that secure the power supply assembly Press the release button 1 slide the power supply assembly a little bit forward and then remove the power supply assembly from the...

Page 124: ...l outlet If necessary use a ballpoint pen to slide the voltage selection switch to the correct position If the voltage supply range in your local country or region is 100 127 V ac set the voltage selection switch to 115 V If the voltage supply range in your local country or region is 200 240 V ac set the voltage selection switch to 230 V 8 Install the new power supply assembly into the chassis so ...

Page 125: ...les are routed properly See Cable routing For a clear illustration of the cable routing some components are not shown here 11 Position the heat sink fan duct on the top of the heat sink and fan assembly so that the four screw holes in the heat sink fan duct are aligned with the corresponding holes in the heat sink and fan assembly Then install the four screws to secure the heat sink fan duct in pl...

Page 126: ...To replace the optical drive do the following 1 Remove all media from the drives and turn off all attached devices and the computer Then disconnect all power cords from electrical outlets and disconnect all cables that are connected to the computer 2 Remove the computer cover See Removing the computer cover on page 101 3 Remove the front bezel See Removing and reinstalling the front bezel on page ...

Page 127: ...essing the system board components and drives on page 104 8 Slide the optical drive out of the front of the computer Figure 61 Removing the optical drive 9 Slide the new optical drive into the optical drive bay from the front of the computer Chapter 9 Replacing FRUs Machine Types 0889 5023 and 7844 121 ...

Page 128: ...ws to secure the new optical drive in place Figure 63 Installing the two screws to secure the optical drive 11 Connect one end of the signal cable to the rear of the new optical drive and the other end to an available SATA connector on the system board See Locating parts on the system board on page 99 Then locate an available five wire power connector and connect it to the rear of the new optical ...

Page 129: ...connected to the computer 2 Remove the computer cover See Removing the computer cover on page 101 3 Remove the front bezel See Removing and reinstalling the front bezel on page 102 4 Lay the computer on its side for easier access to the system board Pivot the drive bay assembly upward to gain access to the system board See Accessing the system board components and drives on page 104 5 Disconnect t...

Page 130: ...ard on the new system board See Installing or replacing a memory module on page 107 and Installing or replacing a PCI card on page 105 15 Reconnect all remaining cables to the system board See Locating parts on the system board on page 99 16 Lower the drive bay assembly See Accessing the system board components and drives on page 104 17 Reinstall the front bezel See Removing and reinstalling the f...

Page 131: ...f the ThinkCentre Safety and Warranty Guide go to http www lenovo com support This section provides instructions on how to replace the hard disk drive To replace the hard disk drive do the following 1 Remove all media from the drives and turn off all attached devices and the computer Then disconnect all power cords from electrical outlets and disconnect all cables that are connected to the compute...

Page 132: ...ble and the power cable from the rear of the hard disk drive to completely remove it from the chassis Figure 69 Removing the hard disk drive 6 Connect one end of the signal cable to the rear of the new hard disk drive and the other end to an available SATA connector on the system board See Locating parts on the system board on page 99 Then locate an available five wire power connector and connect ...

Page 133: ...lace Figure 71 Installing the hard disk drive 8 To complete the replacement go to Completing the parts replacement on page 132 Replacing the card reader Attention Do not open your computer or attempt any repair before reading and understanding the Important safety information in the ThinkCentre Safety and Warranty Guide that came with your computer To obtain a copy of the ThinkCentre Safety and Wa...

Page 134: ...9 6 Release the card reader cable from the cable clip that secures the cable to the chassis 7 Lower the drive bay assembly See Accessing the system board components and drives on page 104 8 Remove the screw that secures the card reader Then remove the card reader from the chassis Figure 72 Removing the card reader 9 Position the new card reader to the chassis so that the screw hole in the new card...

Page 135: ...ge 102 4 Disconnect the front audio and USB assembly cables from the front USB connector and the front audio connector on the system board See Locating parts on the system board on page 99 5 Pivot the drive bay assembly upward to gain access to all the internal cables See Accessing the system board components and drives on page 104 6 Release the front audio and USB assembly cables from the cable c...

Page 136: ...the front fan assembly do the following 1 Remove all media from the drives and turn off all attached devices and the computer Then disconnect all power cords from electrical outlets and disconnect all cables that are connected to the computer 2 Remove the computer cover See Removing the computer cover on page 101 3 Remove the front bezel See Removing and reinstalling the front bezel on page 102 4 ...

Page 137: ...with the corresponding holes in the chassis and then push the rubber mounts through the holes Then carefully pull on the tips of the rubber mounts from the bottom side until the new front fan assembly is secured in place Note The new front fan assembly will have four new rubber mounts attached Chapter 9 Replacing FRUs Machine Types 0889 5023 and 7844 131 ...

Page 138: ...pleting the installation or replacement for all parts you need to reinstall the computer cover and reconnect cables To reinstall the computer cover and reconnect cables to your computer do the following 1 Make sure that all components have been reassembled correctly and that no tools or loose screws are left inside your computer See Locating components on page 98 for the locations of the various c...

Page 139: ...moving and reinstalling the front bezel on page 102 5 Position the computer cover on the chassis so that the rail guides on the bottom of the computer cover engage the rails Then slide the computer cover to the front of the computer until it snaps into position and is closed Then install the two screws to secure the computer cover Figure 77 Reinstalling the computer cover Chapter 9 Replacing FRUs ...

Page 140: ...ts on the rear of your computer on page 98 8 Depending on the parts you installed or replaced you might need to confirm the updated information in the Setup Utility program See Chapter 6 Using the Setup Utility on page 39 Note In most areas of the world Lenovo requires the return of the defective Customer Replaceable Units CRUs Information about this will come with the new CRUs or will come a few ...

Page 141: ...or 3 16GHz 1333MHz FSB 6M L2 E 0 Stepping 65W models E6G E7G E9G C9V G5T Q2A 45C7735 N 2 Microprocessor Core 2 Duo E8400 Processor 3 0GHz 1333MHz FSB 6M L2 E 0 Stepping 65W models B8G B8B B9B E5G B6G B6V C2V C3V 45C7736 N 2 Microprocessor Core 2 Duo E7600 Processor 3 06GHz 1066MHz FSB 3M L2 R 0 Stepping 65W models D4A D5A C7V H9A Q1A 71Y3486 N 2 Microprocessor Core 2 Duo E7500 Processor 2 93GHz 10...

Page 142: ...B 2M L2 R 0 Stepping 65W models H8T Q4A L6B KIB 03T6009 N 2 Microprocessor E5700 Processor 3 0GHz 800Mhz FSB 2M L2 R 0 Stepping 65W models Q3A H4V H5V H6V H7V L1B L2B L3B L4B 03T6007 N 2 Microprocessor E3500 Processor 2 7GHz 800MHz FSB 1M L2 R 0 Stepping 65W models 03T6008 N 3 Memory module 1GB PC3 8500 1066MHz DDR3 UDIMM models A1B A2A A2B A5B A6B A7B B1B B2B B3B B7A F4A F4T D2A D3A D4A D5A D6A D...

Page 143: ...E1Q B4Q D3Q G1Q G2Q G3Q G4Q H1B H8T H9A Q1A Q2A H2Q H3Q H4V H5V H6V H7V L1B L2B L3B L4B 45K0409 2 6 Hard disk drive SATA 500GB 7200RPM 3Gb 16M models B8G B8B B9B D9G E3G E4G E5G E6G E7G E8G E9G D2A C8G C8V G5T Q3A Q4A Q5G L6B L9A KIB 41X5582 2 6 Hard disk drive SATA 500GB 7200RPM 3Gb 16M models B8G B8B B9B D9G E3G E4G E5G E6G E7G E8G E9G D2A C8G C8V G5T Q3A Q4A Q5G L6B L9A KIB 45K0410 2 7 Battery ...

Page 144: ...els 57Y4781 1 Arabic French models 57Y4782 1 Belgium French models 57Y4783 1 Belgium English models 57Y4784 1 Brazilian Portuguese models 57Y4785 1 Bulgarian models 57Y4786 1 Chinese US models 57Y4787 1 Czech ABB models 57Y4788 1 Danish models 57Y4789 1 Dutch models 57Y4790 1 French models 57Y4791 1 French Canadian models 57Y4792 1 French Canadian models 57Y4793 1 German models 57Y4794 1 Greek mod...

Page 145: ... 41A5041 1 PS 2 Full Belgium French models 41A5042 1 PS 2 Full Belgium English models 41A5043 1 PS 2 Full Brazilian Portuguese models 41A5044 1 PS 2 Full Bulgarian models 41A5045 1 PS 2 Full Chinese US models 41A5046 1 PS 2 Full Czech ABB models 41A5047 1 PS 2 Full Danish models 41A5048 1 PS 2 Full Dutch models 41A5049 1 PS 2 Full French models 41A5050 1 PS 2 Full French Canadian models 41A5051 1 ...

Page 146: ...5074 1 PS 2 Full UK English models 41A5075 1 PS 2 Full US European models 41A5076 1 PS 2 Full Slovenian models 41A5077 1 0864 Keyboards Slim USB FRU CRU US English models 45J4884 1 Arabic models 54Y8300 1 Arabic French models 54Y8301 1 Belgium French models 54Y8302 1 Belgium English models 54Y8303 1 Brazilian Portuguese models 54Y8304 1 Bulgarian models 54Y8305 1 Traditional Chinese models 54Y8306...

Page 147: ...US English models A2A A3G A9G B1A B8G D7G D8G D9G E1G E2G E3G E4G E5G E6G E7G E8G E9G F1G B4G B5G B6G B7A F2A F3A F4A D2A D3A D4A D5A D6A C7A C8G A9Q E1Q B4Q D3Q G1Q G2Q G3Q G4Q H1B H9A Q1A Q2A Q3A Q4A H2Q H3Q Q5G L9A 41A5289 1 Arabic models 41A5290 1 Arabic French models 41A5291 1 Belgium French models 41A5292 1 Belgium English models A3G A9G B8G D7G D8G D9G E1G E2G E3G E4G E5G E6G E7G E8G E9G F1...

Page 148: ...0 1 Korean models 41A5311 1 LA Spanish models 41A5312 1 Norwegian models A3G A9G B8G D7G D8G D9G E1G E2G E3G E4G E5G E6G E7G E8G E9G F1G B4G B5G B6G C8G Q5G 41A5313 1 Polish models A3G A9G B8G D7G D8G D9G E1G E2G E3G E4G E5G E6G E7G E8G E9G F1G B4G B5G B6G C8G Q5G 41A5314 1 Portuguese models A3G A9G B8G D7G D8G D9G E1G E2G E3G E4G E5G E6G E7G E8G E9G F1G B4G B5G B6G C8G Q5G 41A5315 1 Romanian mode...

Page 149: ... D4A D5A D6A C1V C2V C3V C4V C5V C6V C7A C7V C8G C8V C9V D1V F6V A9Q E1Q B4Q D3Q G1Q G2Q G3Q G4Q G5T H1B H8T H9A Q1A Q2A Q3A Q4A H2Q H3Q H4V H5V H6V H7V Q5G L1B L2B L3B L4B L6B L9A KIB 41U3013 1 Optical wheel mouse 400DPI USB models A1B A2A A2B A3G A3B A3V A4B A4V A5B A6B A7B A8B A8V A9G A9B A9V B1A B1B B2B B3B B8G B8B B9B F5B F5V D7G D8G D9G E1G E2G E3G E4G E5G E6G E7G E8G E9G F1G F1V B4G B5G B6G...

Page 150: ... H8T H9A Q1A Q2A Q3A Q4A L9A 41R3185 1 Power cord China models 41R3257 1 Power cord Japan models 41R3249 1 Power cord Brazil models 41R3271 1 Power cord Brazil models 43N9044 1 Power cord LA High Volt APU models 41R3177 1 Power cord Australia New Zealand models 41R3197 1 Power cord Korea models 41R3261 1 Power cord Hong Kong UK Ireland Singapore Malaysia Brunei models A1B A2B A3B A4B A5B A6B A7B A...

Page 151: ...C8G 89Y8715 1 Polish models A3G A9G B8G E8G E9G F1G B4G B5G B6G C8G 89Y8711 1 Hebrew models A3G A9G B8G E8G E9G F1G B4G B5G B6G C8G 89Y8706 1 Greek models A3G A9G B8G E8G E9G F1G B4G B5G B6G C8G 89Y8704 1 Turkish models A3G A9G B8G E8G E9G F1G B4G B5G B6G C8G 89Y8720 1 Slovenian models A3G A9G B8G E8G E9G F1G B4G B5G B6G C8G 89Y8717 1 Romanian models A3G A9G B8G E8G E9G F1G B4G B5G B6G C8G 89Y8714...

Page 152: ...G 03T5571 1 Slovenian models A3G A9G B8G E8G E9G F1G B4G B5G B6G C8G 03T5568 1 Romanian models A3G A9G B8G E8G E9G F1G B4G B5G B6G C8G 03T5565 1 Hungarian models A3G A9G B8G E8G E9G F1G B4G B5G B6G C8G 03T5559 1 Czech models A3G A9G B8G E8G E9G F1G B4G B5G B6G C8G 03T5553 1 Slovakian models A3G A9G B8G E8G E9G F1G B4G B5G B6G C8G 03T5567 1 Serbian Latin models A3G A9G B8G E8G E9G F1G B4G B5G B6G C...

Page 153: ... models 89Y8783 1 English for India models 89Y8785 1 German models 89Y8787 1 Hebrew models 89Y8788 1 Romanian models 89Y8792 1 Windows 7 Home Premium 32 with MS Office Starter 2010 FRU CRU French models 03T5588 1 Korea models 03T5592 1 Spanish models 03T5594 1 English models 03T5595 1 Italian models 03T5591 1 C L CORE WE EN FR GR IT NL SP models 03T5597 1 C L Nordics EN DK FI NO SV models 03T5596 ...

Page 154: ...1 C L CORE WE EN FR GR IT NL SP models 03T5620 1 C L Nordics EN DK FI NO SV models 03T5619 1 C L Hong Kong Chinese models 03T5621 1 Chinese Traditional Taiwan models 03T5609 1 English for India models 03T5610 1 German models 03T5612 1 Hebrew models 03T5613 1 Romanian models 03T5616 1 Windows 7 Professional 64 Recovery Discs FRU CRU US English models D7G D8G D9G E3G E5G E6G 89Y8805 1 French models ...

Page 155: ... EN DK FI NO SV models 03T5606 1 Brazilian Portuguese models 03T5599 1 English for India models 03T5600 1 XP Professional 32 FRU CRU Arabic English models 89Y8645 1 Chinese Traditional models 89Y8646 1 Czech models 89Y8647 1 French models 89Y8648 1 Greek models 89Y8649 1 Hebrew models 89Y8650 1 Hong Kong models 89Y8651 1 Hungarian models 89Y8652 1 Japanese models 89Y8653 1 Korea models 89Y8654 1 D...

Page 156: ...2 Microprocessor Core 2 Duo E7400 Processor 2 8GHz 1066MHz FSB 3M L2 R 0 VT Stepping 65W models D8B D8V B7V D7G D9V 71Y9889 N 2 Microprocessor Core 2 Duo E6600 Processor 3 06GHz 1066MHz FSB 2M L2 R 0 Stepping 65W models 89Y0198 N 2 Microprocessor Core 2 Duo E6500 Processor 2 93GHz 1066MHz FSB 2M L2 R 0 Stepping 65W models 71Y6250 N 2 Microprocessor Core 2 Duo E6300 Processor 2 8GHz 1066MHz FSB 2M ...

Page 157: ...7B D3B D4U D4F D4S D4B E6J F5J F6J F9J D1G F2G E8J E9J K4G 46R3322 2 4 Memory module 2GB PC3 8500 1066MHz DDR3 UDIMM models A5B A5V B2B B2V B4G B4B B5B D8B D8V C9G D1G D2G D3G D4G D5G D6G D7G A1G A1B A2G A2B A3G A4G C6A C8A B6V B7V B8V B9V C1V C2V C3V C4V D9V E1T E2T E3T E5T E8A E9V F1V F2G F3G F4G F5G F9B G1B G3B G4B 46R3323 2 4 Memory module 1GB PC3 10600 1333MHz DDR3 UDIMM models 64Y6648 2 4 Me...

Page 158: ...6A E7A E8A E9V F1V F2G F3G F4G F5G F7B F8B F9B G1B G3B G4B 45C1566 1 The FRUs listed in the following tables are not illustrated 0889 FRUs FRU CRU Cable front I O cable_NC all models 54Y9910 2 Cable LED switch cable all models 54Y9916 2 Rear I O shield all models 45K6088 2 2 USB ports via bracket and cable to USB header on board LP bracket LI200mm all models 42Y8006 2 AVC 65W cooler ODM ECS all mo...

Page 159: ... D7G A1G A2G A3G A4G F2G F3G F4G F5G 41A5297 1 Danish models B4G C9G D1G D2G D3G D4G D5G D6G D7G A1G A2G A3G A4G F2G F3G F4G F5G 41A5298 1 Dutch models B4G C9G D1G D2G D3G D4G D5G D6G D7G A1G A2G A3G A4G F2G F3G F4G F5G 41A5299 1 French models B4G C9G D1G D2G D3G D4G D5G D6G D7G A1G A2G A3G A4G F2G F3G F4G F5G 41A5300 1 French Canadian models 41A5301 1 French Canadian models 41A5302 1 German model...

Page 160: ... 41A5321 1 Swedish Finnish models B4G C9G D1G D2G D3G D4G D5G D6G D7G A1G A2G A3G A4G F2G F3G F4G F5G 41A5322 1 Swiss French German models B4G C9G D1G D2G D3G D4G D5G D6G D7G A1G A2G A3G A4G F2G F3G F4G F5G 41A5323 1 Thailand models E1T E2T E3T E5T 41A5324 1 Turkish models B4G C9G D1G D2G D3G D4G D5G D6G D7G A1G A2G A3G A4G F2G F3G F4G F5G 41A5325 1 Turkish models B4G C9G D1G D2G D3G D4G D5G D6G D...

Page 161: ...57Y4801 1 Korean models 57Y4802 1 LA Spanish models 57Y4803 1 Norwegian models 57Y4804 1 Polish models 57Y4805 1 Portuguese models 57Y4806 1 Romanian models 57Y4807 1 Romanian models 57Y4808 1 Russian Cyrillic models 57Y4809 1 Serbian Cyrillic models 57Y4810 1 Slovak models 57Y4811 1 Spanish models 57Y4812 1 Swedish Finnish models 57Y4813 1 Swiss French German models 57Y4814 1 Thailand models 57Y4...

Page 162: ...arian models 41A5056 1 PS 2 Full Iceland models 41A5057 1 PS 2 Full Italy models 41A5058 1 PS 2 Full Japanese models 41A5059 1 PS 2 Full Korean models 41A5060 1 PS 2 Full LA Spanish models 41A5061 1 PS 2 Full Norwegian models 41A5062 1 PS 2 Full Polish models 41A5063 1 PS 2 Full Portuguese models 41A5064 1 PS 2 Full Romanian models 41A5065 1 PS 2 Full Russian Cyrillic models 41A5066 1 PS 2 Full Se...

Page 163: ...ek models 54Y8314 1 Greek US models 54Y8315 1 Hebrew models 54Y8316 1 Hungarian models 54Y8317 1 Iceland models 54Y8318 1 Italian models 54Y8319 1 Japanese models 54Y8320 1 Korean models 54Y8321 1 LA Spanish models 54Y8322 1 Norwegian models 54Y8323 1 Polish models 54Y8324 1 Portuguese models 54Y8325 1 Romanian models 54Y8326 1 Russian Cyrillic models 54Y8327 1 Serbian Cyrillic models 54Y8328 1 Sl...

Page 164: ... DVI D connection adapter FH PCB update all models 03T6005 1 0889 Power Cords Primary FRU CRU Power cord US models A6A A7S B1A B3A B4A B5A A1U A1F C2U C2F C2S D7S D7D C8A C5A E2S E2D E3S E3D E4S E4D F3A F4A F5A F6A E5U E5F E6U E6F G3U A1S A1D G4T G5T H5S H5D K8T K9S K9A L1A H8S H8D H8A A5U A5F A5S A5D A5G 41R3184 1 Power cord China models 41R3256 1 Power cord Japan models F7J F8J F9J A9J H3J H4J 4...

Page 165: ...V B9V C1V C2V C3V C4V D9V E9V F1V 41R3197 1 Power cord Korea models 41R3261 1 Power cord Hong Kong UK Ireland Singapore Malaysia Brunei models A5B A6B A7B A8B A9B B1B B2B B3B B4B B5B D8B A1B A2B F7B F8B F9B G1B G3B G4B 41R3225 1 Power cord Taiwan models 41R3279 1 Power cord Italy models 41R3233 1 Power cord Indonesia Laos Cambodia and Vietnam models models E6A E7A E8A 41R3209 1 Power cord Denmark ...

Page 166: ...D1G D3G D5G D7G A1G A2G A3G A4G A3G A4G 89Y8717 1 Romanian models B4G D1G D3G D5G D7G A1G A2G A3G A4G A3G A4G 89Y8714 1 Hungarian models B4G D1G D3G D5G D7G A1G A2G A3G A4G A3G A4G 89Y8707 1 Czech models B4G D1G D3G D5G D7G A1G A2G A3G A4G A3G A4G 89Y8701 1 Slovakian models B4G D1G D3G D5G D7G A1G A2G A3G A4G A3G A4G 89Y8716 1 Serbian Latin models B4G D1G D3G D5G D7G A1G A2G A3G A4G A3G A4G 89Y871...

Page 167: ...5G D7G A1G A2G A3G A4G A3G A4G 03T5559 1 Czech models B4G D1G D3G D5G D7G A1G A2G A3G A4G A3G A4G 03T5553 1 Slovakian models B4G D1G D3G D5G D7G A1G A2G A3G A4G A3G A4G 03T5567 1 Serbian Latin models B4G D1G D3G D5G D7G A1G A2G A3G A4G A3G A4G 03T5570 1 English for India models 03T5554 1 Brazilian Portuguese models 03T5551 1 0889 Windows 7 Home Basic 32 Recovery Discs FRU CRU English models 89Y878...

Page 168: ... Premium 32 with MS Office Starter 2010 FRU CRU French models 03T5588 1 Korea models 03T5592 1 Spanish models 03T5594 1 English models 03T5595 1 Italian models 03T5591 1 C L CORE WE EN FR GR IT NL SP models 03T5597 1 C L Nordics EN DK FI NO SV models 03T5596 1 Chinese Traditional Taiwan models 03T5586 1 Brazilian Portuguese models 03T5585 1 English for India models 03T5587 1 German models 03T5589 ...

Page 169: ...Chinese Traditional Taiwan models 03T5609 1 English for India models 03T5610 1 German models 03T5612 1 Hebrew models 03T5613 1 Romanian models 03T5616 1 0889 Windows 7 Professional 64 Recovery Discs FRU CRU US English models F2G F3G F4G F5G 89Y8805 1 French models F2G F3G F4G F5G 89Y8800 1 Spanish models F2G F3G F4G F5G 89Y8804 1 Italian models F2G F3G F4G F5G 89Y8802 1 German models F2G F3G F4G F...

Page 170: ...nglish for India models 03T5600 1 XP Professional 32 FRU CRU Arabic English models 89Y8645 1 Chinese Traditional models 89Y8646 1 Czech models 89Y8647 1 French models 89Y8648 1 Greek models 89Y8649 1 Hebrew models 89Y8650 1 Hong Kong models 89Y8651 1 Hungarian models 89Y8652 1 Japanese models 89Y8653 1 Korea models 89Y8654 1 Dutch models 89Y8655 1 Polish models 89Y8656 1 Russian English models 89Y...

Page 171: ...1Y9888 N 2 Microprocessor Core 2 Duo E7400 Processor 2 8GHz 1066MHz FSB 3M L2 R 0 VT Stepping 65W models 71Y9889 N 2 Microprocessor Core 2 Duo E6600 Processor 3 06GHz 1066MHz FSB 2M L2 R 0 Stepping 65W models 89Y0198 N 2 Microprocessor Core 2 Duo E6500 Processor 2 93GHz 1066MHz FSB 2M L2 R 0 Stepping 65W models 71Y6250 N 2 Microprocessor Core 2 Duo E6300 Processor 2 8GHz 1066MHz FSB 2M L2 R 0 Step...

Page 172: ...5R D7S D7D D7Y C8A C4Q C5A C5Q C6Q D7P A7P A5P F8J F9J E7G E8G E9G F1G F2G H1G H2G E5U E5F E6U E6F G2Q A9J G4T G5T G1M H5S H5D H5Y H5Q K8T K9S K9Y K9A L1A H4J H8S H8D H8Y H8G H8A H8V K1Q K3Q K4Q K5Q L5M L6G L7G A5U A5F A5S A5D A5Y A5G L8G 46R3323 2 3 Memory module 1GB PC3 10600 1333MHz DDR3 UDIMM models 64Y6648 2 3 Memory module 2GB PC3 10600 1333MHz DDR3 UDIMM models 64Y6649 2 4 Optical drive DVD...

Page 173: ...U E5F G1M L5M L7G 41X5582 2 6 Hard disk drive SATA 500GB 7200RPM 3Gb 16M models B9G E7G E5U E5F G1M L5M L7G 45K0410 2 7 Battery 3V Lithium models A4B A6A A6Q A6T A6V A6K A6R A7S A7Y A7Q A7K A7R A8Q A8K A8R B6T B7S B7Y B7G B8G B9G A5Q A5V A5K A5R A1U A1F A1S A1G C2U C2F C2S C2B C3B D6B D7S D7D D7Y C8A C4Q C5A C5Q C6Q D7P A7P P1P A5P E2S E2D E2Y E3S E3D E3Y E4S E4D E4Y F3A F4A F5A F6A F7J F8J F9J E7...

Page 174: ...els 57Y4781 1 Arabic French models 57Y4782 1 Belgium French models 57Y4783 1 Belgium English models 57Y4784 1 Brazilian Portuguese models 57Y4785 1 Bulgarian models 57Y4786 1 Chinese US models 57Y4787 1 Czech ABB models 57Y4788 1 Danish models 57Y4789 1 Dutch models 57Y4790 1 French models 57Y4791 1 French Canadian models 57Y4792 1 French Canadian models 57Y4793 1 German models 57Y4794 1 Greek mod...

Page 175: ...ls 41A5041 1 PS 2 Full Belgium French models 41A5042 1 PS 2 Full Belgium English models 41A5043 1 PS 2 Full Brazilian Portuguese models 41A5044 1 PS 2 Full Bulgarian models 41A5045 1 PS 2 Full Chinese US models 41A5046 1 PS 2 Full Czech ABB models 41A5047 1 PS 2 Full Danish models 41A5048 1 PS 2 Full Dutch models 41A5049 1 PS 2 Full French models 41A5050 1 PS 2 Full French Canadian models 41A5051 ...

Page 176: ...5074 1 PS 2 Full UK English models 41A5075 1 PS 2 Full US European models 41A5076 1 PS 2 Full Slovenian models 41A5077 1 7099 Keyboards Slim USB FRU CRU US English models 45J4884 1 Arabic models 54Y8300 1 Arabic French models 54Y8301 1 Belgium French models 54Y8302 1 Belgium English models 54Y8303 1 Brazilian Portuguese models 54Y8304 1 Bulgarian models 54Y8305 1 Traditional Chinese models 54Y8306...

Page 177: ...A8Q A8R B7G B8G B9G A5Q A5R A1U A1G C2U C8A C4Q C5A C5Q C6Q F3A F4A F5A F6A E7G E8G E9G F1G F2G H1G H2G E5U E6U G2Q G3U G1M H5Q K9A L1A H6G H7G H8G H8A L2G L3G L4G H9Q K1Q K2Q K3Q K4Q K5Q K6Q K7Q L5M L6G L7G A5U A5G L8G 41A5289 1 Arabic models 41A5290 1 Arabic French models B7G B8G B9G A1G E7G E8G E9G F1G F2G H1G H2G H6G H7G H8G L2G L3G L4G L6G L7G A5G L8G 41A5291 1 Belgium French models B7G B8G B...

Page 178: ...2G H6G H7G H8G L2G L3G L4G L6G L7G A5G L8G 41A5309 1 Japanese models B7G B8G B9G A1G E7G E8G E9G F1G F2G H1G H2G H6G H7G H8G L2G L3G L4G L6G L7G A5G L8G 41A5310 1 Korean models A6K A7K A8K A5K 41A5311 1 LA Spanish models A7S A7Y B7S B7Y A1S A2S A3S C2S D7S D7D D7Y E2S E2D E2Y E3S E3D E3Y E4S E4D E4Y A1S A1D A1Y H5S H5D H5Y K9S K9Y H8S H8D H8Y A5S 41A5312 1 Norwegian models B7G B8G B9G A1G E7G E8G ...

Page 179: ...A6Q A6T A6V A6K A6R A7S A7Y A7Q A7K A7R A8Q A8K A8R B6T B7S B7Y B7G B8G B9G A5Q A5V A5K A5R A1U A1F A1S A1G C2U C2F C2S C2B C3B D6B D7S D7D D7Y C8A C4Q C5A C5Q C6Q D7P A7P P1P A5P E2S E2D E2Y E3S E3D E3Y E4S E4D E4Y F3A F4A F5A F6A F7J F8J F9J E7G E8G E9G F1G F2G H1G H2G E5U E5F E6U E6F G2Q G3U A1S A1D A1Y G4T G5T G1M H5S H5D H5Y H5Q K8T K9S K9Y K9A L1A H3J H4J H6G H7G H8S H8D H8Y H8G H8A H8V L2G ...

Page 180: ...ael models B7G A1G E7G E8G E9G F1G F2G H1G H2G H6G H7G H8G L2G L3G L4G L6G L7G A5G L8G 41R3236 1 Power cord South Africa models A6A A7A A8A B7G A1G C8A C5A F3A F4A F5A F6A E7G E8G E9G F1G F2G H1G H2G G1M H8G H8A L2G L3G L4G L5M A5G L8G 41R3220 1 Power cord India models A6Q A7Q A8Q C4Q C5Q C6Q G2Q H5Q H9Q K1Q K2Q K3Q K4Q K5Q K6Q K7Q 41R3341 1 Power cord Thailand models A6T A9T B2T B3T B4T B5T B6T G...

Page 181: ...A6A A6Q A6R A7Q A7R B5A B7A A5Q A5R A1U C2U E2D F5A G3U G1M L1A H8A L5M A5U A5G 89Y8721 1 Japanese models F7J F8J F9J A9J H3J H4JJ 89Y8709 1 C L Hong Kong Chinese models A4B C2B C3B D6B 89Y8859 1 Chinese Traditional Taiwan models A6V A5V H8V 89Y8700 1 C L CORE WE EN FR GR IT NL SP models B7G B8G B9G E7G E9G F2G H1G H2G H8G L6G A5G 89Y8723 1 C L Nordics EN DK FI NO SV models B7G B8G B9G E7G E9G F2G...

Page 182: ... L6G A5G 03T5550 1 Italian models B7G B8G B9G E7G E9G F2G H1G H2G H8G L6G A5G 03T5560 1 German models B7G B8G B9G E7G E9G F2G H1G H2G H8G L6G A5G 03T5557 1 Russian models B7G B8G B9G E7G E9G F2G H1G H2G H8G L6G A5G 03T5566 1 Polish models B7G B8G B9G E7G E9G F2G H1G H2G H8G L6G A5G 03T5563 1 Hebrew models B7G B8G B9G E7G E9G F2G H1G H2G H8G L6G A5G 03T5558 1 Greek models B7G B8G B9G E7G E9G F2G H1...

Page 183: ...er FRU CRU Arabic models 03T5576 1 Russian models 03T5580 1 Spanish models 03T5581 1 English models 03T5584 1 Turkish models 03T5583 1 Serbian Latin models 03T5582 1 English for Russian models 03T5579 1 Brazilian Portuguese models 03T5577 1 English for India models 03T5578 1 7099 Windows 7 Home Premium 32 Recovery Discs FRU CRU English models 89Y8794 1 French models E6F H7G 89Y8786 1 Spanish model...

Page 184: ...nglish for India models H7G 03T5587 1 German models H7G 03T5589 1 Hebrew models H7G 03T5590 1 Romanian models H7G 03T5593 1 Chinese Simplified models 03T5598 1 Windows 7 Home Premium 64 Recovery Discs FRU CRU English models 89Y8839 1 French models 89Y8831 1 Spanish models 89Y8838 1 Korean models 89Y8836 1 Hong Kong models 89Y8842 1 Japanese models 89Y8835 1 Traditional Chinese models 89Y8829 1 C L...

Page 185: ...erman models L7G 89Y8801 1 Brazilian Portuguese models 89Y8798 1 C L Hong Kong Chinese models 89Y8858 1 Japanese models 89Y8803 1 C L Nordics EN DK FI NO SV models L7G 89Y8807 1 C L CORE WE EN FR GR IT NL SP models L7G 89Y8806 1 English for India models 89Y8799 1 Windows 7 Professional 64 Office Starter FRU CRU Italian models L7G 03T5603 1 German models L7G 03T5602 1 French models E5F 03T5601 1 Sp...

Page 186: ...ian models 89Y8659 1 Spanish models 89Y8660 1 Turkish models 89Y8661 1 US models 89Y8662 1 Machine type 7844 Item 7844 FRUs FRU CRU 2 Microprocessor Core 2 Duo E8600 Processor 3 33GHz 1333MHz FSB 6M L2 E 0 Stepping 65W models 46R8640 N 2 Microprocessor Core 2 Duo E8500 Processor 3 16GHz 1333MHz FSB 6M L2 E 0 Stepping 65W models B1M B2M D6A D6T 45C7735 N 2 Microprocessor Core 2 Duo E8400 Processor ...

Page 187: ... E3300 Processor 2 5GHz 800MHz FSB 1M L2 R 0 Stepping 65W models A5M A1U A1F A1S A1G C9S C9Y D3B D4U D4F D4S D4B F2G L8M 71Y6252 N 2 Microprocessor E3200 Processor 2 4GHz 800MHz FSB 1M L2 R 0 Stepping 65W models 71Y6251 N 2 Microprocessor 450 Processor 2 2GHz 800MHz FSB 512K L2 A 1 Stepping 35W models B9Q B9K F5J F6J F7J F8J F9J E6J E8J E9J G2J G3J G6J M2J M3J 46R9514 N 2 Microprocessor 440 Proces...

Page 188: ... B8S B8Y B8Q B8K B8R C1G C2G C3G A5M A6M A7M A8M A9M B1M B2M B4S B4Y B4A B4Q B4K B4R B4J A1U A1F A1S A1G C6S C6Y C7S C7Y C8S C8Y D1S D1Y D3B D5A D5T D5J F6J F8J H2J H3J H5J D1G D2G F1G F2G F3G F4G H6G B4G E1J E2J E3J E5J E6J G1M H7G G4J G5J G7J K1G K1M K5B K6B K7B K8B K9T L1T L2T K2J L5M L6M L7M L8M L9J M1J M2J B4U B4F M6G M7B 71Y5545 2 7 Hard disk drive SATA 160GB 7200RPM 3Gb 8M models 40Y9035 2 ...

Page 189: ...d all models 45K6088 2 2 USB ports via bracket and cable to USB header on board LP bracket LI200mm all models 42Y8006 2 AVC 65W cooler ODM ECS all models 89Y1658 2 Fan duct ODM ECS all models 89Y8123 1 AVC system fan ODM ECS all models 89Y1659 2 450mm SATA cable all models 89Y8127 1 400mm SATA cable all models 89Y8130 1 2 USB ports via bracket and cable to USB header on board LP bracket LI200mm al...

Page 190: ...A1G D1G D2G F1G F2G F3G F4G H6G B4G H7G K1G K4G M4G M5G M6G 41A5300 1 French Canadian models A1F D4F B4F C1F 41A5301 1 French Canadian models A1F D4F B4F C1F 41A5302 1 German models C1G C2G C3G A1G D1G D2G F1G F2G F3G F4G H6G B4G H7G K1G K4G M4G M5G M6G 41A5303 1 Greek models C1G C2G C3G A1G D1G D2G F1G F2G F3G F4G H6G B4G H7G K1G K4G M4G M5G M6G 41A5304 1 Greek US models C1G C2G C3G A1G D1G D2G F...

Page 191: ...1 Swiss French German models C1G C2G C3G A1G D1G D2G F1G F2G F3G F4G H6G B4G H7G K1G K4G M4G M5G M6G 41A5323 1 Thailand models K9T L1T L2T 41A5324 1 Turkish models C1G C2G C3G A1G D1G D2G F1G F2G F3G F4G H6G B4G H7G K1G K4G M4G M5G M6G 41A5325 1 Turkish models C1G C2G C3G A1G D1G D2G F1G F2G F3G F4G H6G B4G H7G K1G K4G M4G M5G M6G 41A5326 1 UK English models C1G C2G C3G A1G D1G D2G F1G F2G F3G F4G...

Page 192: ...57Y4804 1 Polish models 57Y4805 1 Portuguese models 57Y4806 1 Romanian models 57Y4807 1 Romanian models 57Y4808 1 Russian Cyrillic models 57Y4809 1 Serbian Cyrillic models 57Y4810 1 Slovak models 57Y4811 1 Spanish models 57Y4812 1 Swedish Finnish models 57Y4813 1 Swiss French German models 57Y4814 1 Thailand models 57Y4815 1 Turkish models 57Y4816 1 Turkish models 57Y4817 1 UK English models 57Y48...

Page 193: ... Iceland models 41A5057 1 PS 2 Full Italy models 41A5058 1 PS 2 Full Japanese models 41A5059 1 PS 2 Full Korean models 41A5060 1 PS 2 Full LA Spanish models 41A5061 1 PS 2 Full Norwegian models 41A5062 1 PS 2 Full Polish models 41A5063 1 PS 2 Full Portuguese models 41A5064 1 PS 2 Full Romanian models 41A5065 1 PS 2 Full Russian Cyrillic models 41A5066 1 PS 2 Full Serbian Cyrillic models 41A5067 1 ...

Page 194: ... 54Y8314 1 Greek US models 54Y8315 1 Hebrew models 54Y8316 1 Hungarian models 54Y8317 1 Iceland models 54Y8318 1 Italian models 54Y8319 1 Japanese models 54Y8320 1 Korean models 54Y8321 1 LA Spanish models 54Y8322 1 Norwegian models 54Y8323 1 Polish models 54Y8324 1 Portuguese models 54Y8325 1 Romanian models 54Y8326 1 Russian Cyrillic models 54Y8327 1 Serbian Cyrillic models 54Y8328 1 Slovak mode...

Page 195: ...J K4G L5M L6M L7M L8M M4G M5G L9J M1J M2J M3J B4U B4F C1U C1F C1S C1D C1Y C1B M6G M7B 41U3030 1 Lenovo enhanced optical USB mouse models 45J4889 1 7844 adapters and miscellaneous FRUs FRU CRU NVIDIA Quadro FX380LP 512M DVI DP LP models 64Y8206 1 NVIDIA GeForce 310 512M VGA DP LP models K6B K7B K8B 71Y8665 1 Luxshare DP DVI D S cable_R__200mm all models 43N9160 1 Luxshare DVI to VGA cord all models...

Page 196: ...d LA High Volt APU models L3Y L4Y K3Y C1Y 41R3177 1 Power cord Australia New Zealand models A5M A6M A7M A8M A9M B1M B2M K1M L5M L6M L7M L8M 41R3197 1 Power cord Korea models B7K B7R B8K B8R B9K B9R B4K B4R 41R3261 1 Power cord Hong Kong UK Ireland Singapore Malaysia Brunei models A4B E7B K5B K6B K7B K8B C1B M7B 41R3225 1 Power cord Taiwan models B7V B8V B9V B4V D2B D2V D3B D4B D7V D8V D9V E1V E2V ...

Page 197: ... German models C1G C2G C3G A1G D2G F1G F3G H6G B4G K1G M4G 89Y8705 1 Russian models C1G C2G C3G A1G D2G F1G F3G H6G B4G K1G M4G 89Y8715 1 Polish models C1G C2G C3G A1G D2G F1G F3G H6G B4G K1G M4G 89Y8711 1 Hebrew models C1G C2G C3G A1G D2G F1G F3G H6G B4G K1G M4G 89Y8706 1 Greek models C1G C2G C3G A1G D2G F1G F3G H6G B4G K1G M4G 89Y8704 1 Turkish models C1G C2G C3G A1G D2G F1G F3G H6G B4G K1G M4G ...

Page 198: ...dels C1G C2G C3G A1G D2G F1G F3G H6G B4G K1G M4G 03T5556 1 Turkish models C1G C2G C3G A1G D2G F1G F3G H6G B4G K1G M4G 03T5571 1 Slovenian models C1G C2G C3G A1G D2G F1G F3G H6G B4G K1G M4G 03T5568 1 Romanian models C1G C2G C3G A1G D2G F1G F3G H6G B4G K1G M4G 03T5565 1 Hungarian models C1G C2G C3G A1G D2G F1G F3G H6G B4G K1G M4G 03T5559 1 Czech models C1G C2G C3G A1G D2G F1G F3G H6G B4G K1G M4G 03T...

Page 199: ...SV models D1G K4G 89Y8795 1 Italian models D1G K4G models 89Y8789 1 Brazilian Portuguese models 89Y8783 1 English for India models 89Y8785 1 German models 89Y8787 1 Hebrew models 89Y8788 1 Romanian models 89Y8792 1 Windows 7 Home Premium 32 with MS Office Starter 2010 FRU CRU French models D1G K4G 03T5588 1 Korea models 03T5592 1 Spanish models D1G K4G 03T5594 1 English models D1G K4G 03T5595 1 It...

Page 200: ...1 Korea models 03T5615 1 Spanish models 03T5617 1 English models 03T5618 1 Italian models 03T5614 1 C L CORE WE EN FR GR IT NL SP models 03T5620 1 C L Nordics EN DK FI NO SV models 03T5619 1 C L Hong Kong Chinese models 03T5621 1 Chinese Traditional Taiwan models 03T5609 1 English for India models 03T5610 1 German models 03T5612 1 Hebrew models 03T5613 1 Romanian models 03T5616 1 7844 Windows 7 Pr...

Page 201: ... SP models H7G M5G 03T5607 1 C L Nordics EN DK FI NO SV models H7G M5G 03T5606 1 Brazilian Portuguese models 03T5599 1 English for India models 03T5600 1 XP Professional 32 FRU CRU Arabic English models 89Y8645 1 Chinese Traditional models 89Y8646 1 Czech models 89Y8647 1 French models 89Y8648 1 Greek models 89Y8649 1 Hebrew models 89Y8650 1 Hong Kong models 89Y8651 1 Hungarian models 89Y8652 1 Ja...

Page 202: ... A3G 71Y9888 N 2 Microprocessor Core 2 Duo E7400 Processor 2 8GHz 1066MHz FSB 3M L2 R 0 VT Stepping 65W models 71Y9889 N 2 Microprocessor Core 2 Duo E6600 Processor 3 06GHz 1066MHz FSB 2M L2 R 0 Stepping 65W models 89Y0198 N 2 Microprocessor Core 2 Duo E6500 Processor 2 93GHz 1066MHz FSB 2M L2 R 0 Stepping 65W models 71Y6250 N 2 Microprocessor Core 2 Duo E6300 Processor 2 8GHz 1066MHz FSB 2M L2 R ...

Page 203: ...ule 1GB PC3 10600 1333MHz DDR3 UDIMM models 64Y6648 2 3 Memory module 2GB PC3 10600 1333MHz DDR3 UDIMM models 64Y6649 2 4 Optical drive DVD ROM Drive 16x 48x SATA models 71Y5543 2 4 Optical drive DVD Recordable Rambo 8 SATA 12XRAM WRITE models A1G A2G A3G A4G A5G A6G A7G A8G A9G 71Y5545 2 5 System board G41T LM5 non AMT for GA models A1G A2G A3G A4G A5G A6G A7G A8G A9G 89Y0954 N 6 Hard disk drive ...

Page 204: ...ls 41R6139 1 Slot cover metal all models 03T9515 1 Card reader kit all models 03T9516 2 7846 Keyboards Lenovo Fingerprint Reader USB FRU CRU US English models 57Y4780 1 Arabic models 57Y4781 1 Arabic French models 57Y4782 1 Belgium French models 57Y4783 1 Belgium English models 57Y4784 1 Brazilian Portuguese models 57Y4785 1 Bulgarian models 57Y4786 1 Chinese US models 57Y4787 1 Czech ABB models 5...

Page 205: ...ovenian models 57Y4820 1 7846 Keyboards PS 2 FRU CRU PS 2 Full US English models 41A5039 1 PS 2 Full Arabic models 41A5040 1 PS 2 Full Arabic French models 41A5041 1 PS 2 Full Belgium French models 41A5042 1 PS 2 Full Belgium English models 41A5043 1 PS 2 Full Brazilian Portuguese models 41A5044 1 PS 2 Full Bulgarian models 41A5045 1 PS 2 Full Chinese US models 41A5046 1 PS 2 Full Czech ABB models...

Page 206: ...0 1 PS 2 Full Swiss French German models 41A5071 1 PS 2 Full Thailand models 41A5072 1 PS 2 Full Turkish models 41A5073 1 PS 2 Full Turkish models 41A5074 1 PS 2 Full UK English models 41A5075 1 PS 2 Full US European models 41A5076 1 PS 2 Full Slovenian models 41A5077 1 7846 Keyboards Slim USB FRU CRU US English models 45J4884 1 Arabic models 54Y8300 1 Arabic French models 54Y8301 1 Belgium French...

Page 207: ...ls 54Y8334 1 Turkish models 54Y8335 1 UK English models 54Y8336 1 US European models 54Y8337 1 Slovenian models 54Y8338 1 Arabic New models 54Y8339 1 Lithuanian models 54Y8340 1 Estonian models 54Y8341 1 7846 Keyboards Preferred Pro USB Keyboard FRU CRU US English models A1G A2G A3G A4G A5G A6G A7G A8G A9G 41A5289 1 Arabic models A1G A2G A3G A4G A5G A6G A7G A8G A9 41A5290 1 Arabic French models A1...

Page 208: ...A3G A4G A5G A6G A7G A8G A9 41A5317 1 Romanian models A1G A2G A3G A4G A5G A6G A7G A8G A9 41A5316 1 Russian Cyrillic models A1G A2G A3G A4G A5G A6G A7G A8G A9 41A5318 1 Serbian Cyrillic models A1G A2G A3G A4G A5G A6G A7G A8G A9 41A5319 1 Slovak models A1G A2G A3G A4G A5G A6G A7G A8G A9 41A5320 1 Spanish models A1G A2G A3G A4G A5G A6G A7G A8G A9 41A5321 1 Swedish Finnish models A1G A2G A3G A4G A5G A6...

Page 209: ... 41R3208 1 Power cord Denmark models A1G A2G A3G A4G A5G A6G A7G A8G A9G 41R3212 1 Power cord Switzerland models A1G A2G A3G A4G A5G A6G A7G A8G A9G 41R3228 1 Power cord Israel models A1G A2G A3G A4G A5G A6G A7G A8G A9G 41R3236 1 Power cord South Africa models A1G A2G A3G A4G A5G A6G A7G A8G A9G 41R3220 1 Power cord India models 41R3341 1 Power cord Thailand models 43N9029 1 7846 Power Cords Secon...

Page 210: ...EN FR GR IT NL SP models A1G A2G A4G A6G 89Y8723 1 C L Nordics EN DK FI NO SV models A1G A2G A4G A6G 89Y8722 1 Arabic models A1G A2G A4G A6G 89Y8699 1 Italian models A1G A2G A4G A6G 89Y8708 1 German models A1G A2G A4G A6G 89Y8705 1 Russian models A1G A2G A4G A6G 89Y8715 1 Polish models A1G A2G A4G A6G 89Y8711 1 Hebrew models A1G A2G A4G A6G 89Y8706 1 Greek models A1G A2G A4G A6G 89Y8704 1 Turkish ...

Page 211: ...G A4G A6G 03T5558 1 Greek models A1G A2G A4G A6G 03T5556 1 Turkish models A1G A2G A4G A6G 03T5571 1 Slovenian models A1G A2G A4G A6G 03T5568 1 Romanian models 03T5565 1 Hungarian models A1G A2G A4G A6G 03T5559 1 Czech models A1G A2G A4G A6G 03T5553 1 Slovakian models A1G A2G A4G A6G 03T5567 1 Serbian Latin models 03T5570 1 English for India models 03T5554 1 Brazilian Portuguese models 03T5551 1 78...

Page 212: ...SP models 89Y8796 1 C L Nordics EN DK FI NO SV models 89Y8795 1 Italian models D1G K4G models 89Y8789 1 Brazilian Portuguese models 89Y8783 1 English for India models 89Y8785 1 German models 89Y8787 1 Hebrew models 89Y8788 1 Romanian models 89Y8792 1 Windows 7 Home Premium 32 with MS Office Starter 2010 FRU CRU French models 03T5588 1 Korea models 03T5592 1 Spanish models 03T5594 1 English models ...

Page 213: ...832 1 Hebrew models 89Y8833 1 Romanian models 89Y8837 1 Windows 7 Home Premium with MS Office Starter 2010 FRU CRU French models 03T5611 1 Korea models 03T5615 1 Spanish models 03T5617 1 English models 03T5618 1 Italian models 03T5614 1 C L CORE WE EN FR GR IT NL SP models 03T5620 1 C L Nordics EN DK FI NO SV models 03T5619 1 C L Hong Kong Chinese models 03T5621 1 Chinese Traditional Taiwan models...

Page 214: ...3T5605 1 C L Hong Kong Chinese models 03T5608 1 C L CORE WE EN FR GR IT NL SP models A7G A8G A9G 03T5607 1 C L Nordics EN DK FI NO SV models A7G A8G A9G 03T5606 1 Brazilian Portuguese models 03T5599 1 English for India models 03T5600 1 XP Professional 32 FRU CRU Arabic English models 89Y8645 1 Chinese Traditional models 89Y8646 1 Czech models 89Y8647 1 French models 89Y8648 1 Greek models 89Y8649 ...

Page 215: ...em board After you replace the system board the VPD must be updated To update the VPD see Updating flashing the BIOS from a disc on page 209 BIOS levels An incorrect level of BIOS can cause false errors and unnecessary FRU replacement Use the following information to determine the current level of BIOS installed in the computer the latest BIOS available for the computer and where to obtain the lat...

Page 216: ...ur machine type a In the Enter a product number field type your machine type and click Go b Click Downloads and drivers c Select BIOS from the Refine results drop down list box to easily locate all the BIOS related links d Click the BIOS update link 3 Click the TXT file that contains the instructions for updating flashing the BIOS from your operating system 4 Print these instructions This is very ...

Page 217: ...wer consumption of certain components of the computer such as the system power supply processor hard disk drives and some monitors Advanced Configuration and Power Interface ACPI BIOS Being an ACPI BIOS system the operating system is allowed to control the power management features of the computer and the setting for Advanced Power Management APM BIOS mode is ignored Not all operating systems supp...

Page 218: ...212 ThinkCentre Hardware Maintenance Manual ...

Page 219: ...e publication Lenovo may make improvements and or changes in the product s and or the program s described in this publication at any time without notice The products described in this document are not intended for use in implantation or other life support applications where malfunction may result in injury or death to persons The information contained in this document does not affect or change Len...

Page 220: ...and other limited viewing uses only unless otherwise authorized by Macrovision Corporation Reverse engineering or disassembly is prohibited European conformance CE mark Trademarks The following terms are trademarks of Lenovo in the United States other countries or both Lenovo Rescue and Recovery The Lenovo logo ThinkCentre ThinkVantage Celeron Core Intel and Pentium are trademarks of Intel Corpora...

Page 221: ... Lenovo Welcome 29 locating components 68 98 M memory module 76 107 installing replacing 76 107 microprocessor replacing 83 113 O optical drive replacing 86 120 P parts replacement completing 94 132 password considerations 40 setting changing deleting 40 PC Doctor for DOS 36 PC Doctor for Rescue and Recovery 35 PCI card 74 105 installing replacing 74 105 slots 74 105 PCI card latch 74 power supply...

Page 222: ...ard components and drives accessing 104 T temporary startup device 41 the BIOS updating flashing 209 210 ThinkVantage Productivity Center 29 U updating flashing the BIOS 209 updating flashing the BIOS 210 using passwords 39 V viewing or changing settings 39 216 ThinkCentre Hardware Maintenance Manual ...

Page 223: ......

Page 224: ...Part Number 89Y9149 Printed in USA 1P P N 89Y9149 89Y9149 ...

Reviews: