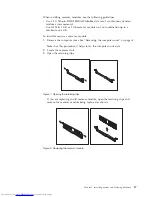
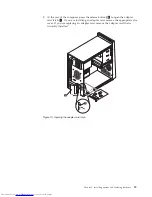

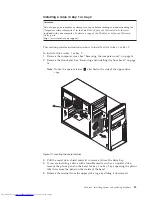
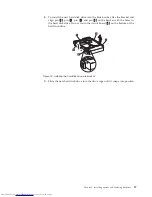


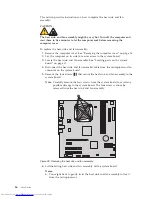
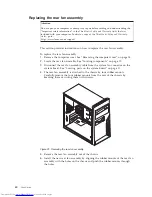

10.
Align
the
drive
cage
pivot
pin
with
the
slot
1
in
the
upper
drive
cage
and
slide
the
hard
disk
drive
cage
into
the
chassis.
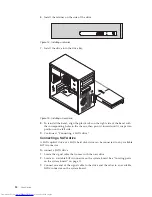
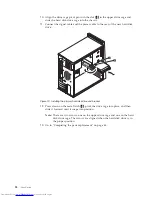
11.
Connect
the
signal
cable
and
the
power
cable
to
the
rear
of
the
new
hard
disk
drive.
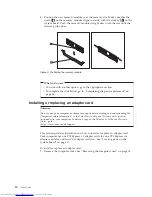
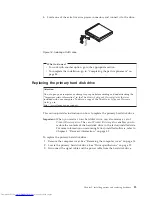
12.
Press
down
on
the
metal
latch
2
,
pivot
the
drive
cage
into
place,
and
then
slide
it
forward
until
it
snaps
into
position.
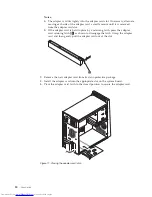
Note:
There
are
two
arrows,
one
on
the
upper
drive
cage
and
one
on
the
hard
disk
drive
cage.
The
arrows
are
aligned
when
the
hard
disk
drive
is
in
the
proper
position.
13.
Go
to
“Completing
the
parts
replacement”
on
page
44.
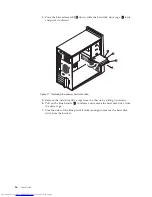
Figure
19.
Installing
the
primary
hard
disk
drive
and
bracket
28
User
Guide
Summary of Contents for 7268D1U
Page 1: ......
Page 2: ......
Page 3: ...ThinkCentre User Guide ...
Page 6: ...iv User Guide ...
Page 8: ...vi User Guide ...
Page 20: ...12 User Guide ...
Page 56: ...48 User Guide ...
Page 64: ...56 User Guide ...
Page 72: ...64 User Guide ...
Page 78: ...11 Reconnect the mouse cable to the computer 12 Turn your computer back on 70 User Guide ...
Page 88: ...80 User Guide ...
Page 89: ......
Page 90: ...Part Number 53Y6337 Printed in USA 1P P N 53Y6337 ...


