7.
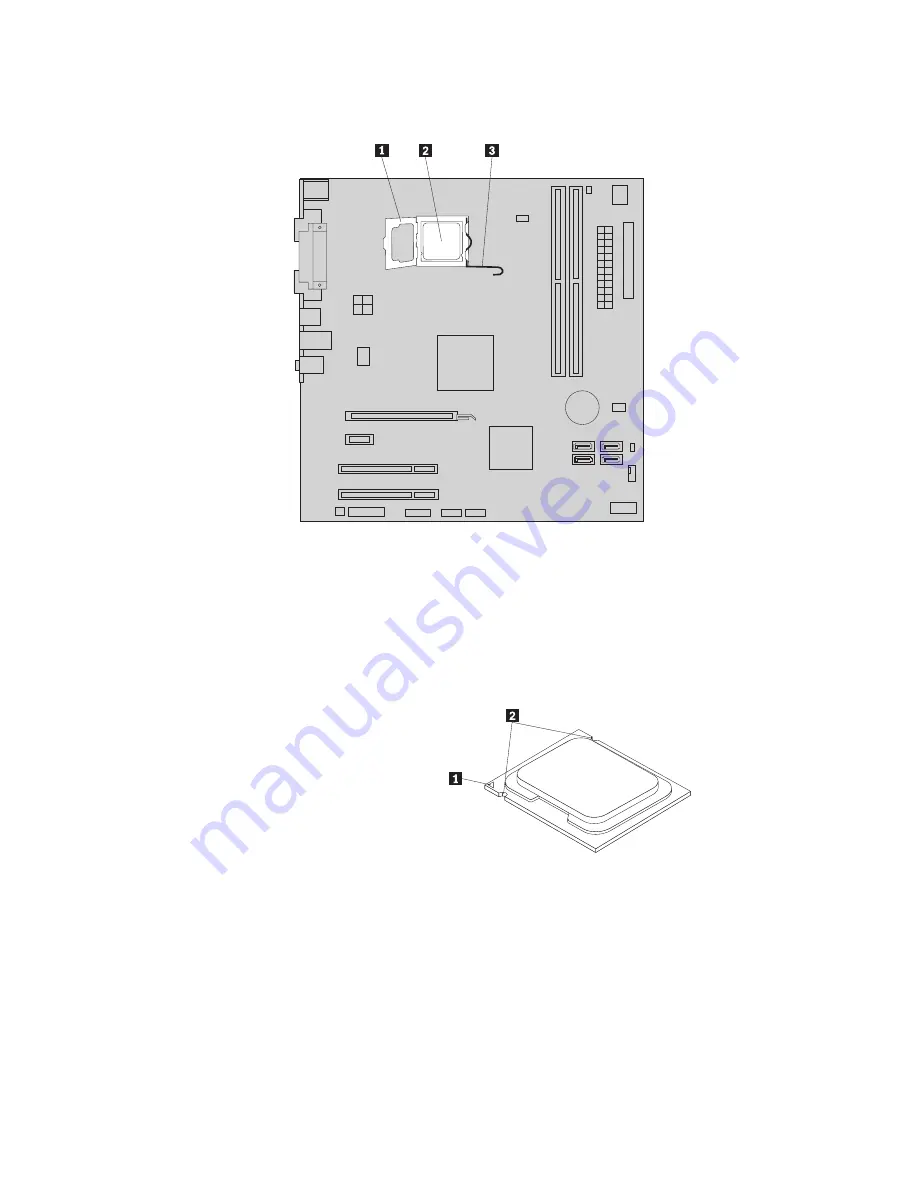
Lift
the
small
handle
3
and
open
the
retainer
1
to
access
the
microprocessor
2
.
8.
Lift
the
microprocessor
straight
up
and
out
of
the
socket.
Notes:
a.
Your
microprocessor
and
socket
might
look
different
from
the
one
illustrated.
b.
Note
the
orientation
of
the
microprocessor
in
the
socket.
You
can
either
look
for
the
small
triangle
1
on
one
corner
of
the
microprocessor
or
note
the
orientation
of
the
notches
2
on
the
microprocessor.
This
is
important
when
reinstalling
the
microprocessor
on
the
system
board.
Chapter
2.
Installing
options
and
replacing
hardware
31
Summary of Contents for 7515D9U
Page 1: ......
Page 2: ......
Page 3: ...ThinkCentre User Guide ...
Page 6: ...iv User Guide ...
Page 8: ...vi User Guide ...
Page 20: ...12 User Guide ...
Page 60: ...52 User Guide ...
Page 76: ...68 User Guide ...
Page 82: ...11 Reconnect the mouse cable to the computer 12 Turn your computer back on 74 User Guide ...
Page 92: ...84 User Guide ...
Page 93: ......
Page 94: ...Part Number 53Y6259 Printed in USA 1P P N 53Y6259 ...


