To
run
the
test,
do
as
follows:
Note:
In
the
following
procedure,
you
can
select
an
item
not
only
with
the
arrow
keys,
but
also
with
the
TrackPoint
pointer.
Instead
of
pressing
Enter,
click
the
left
button.
1.
Insert
the
PC-Doctor
disk
into
the
diskette
drive;
then
power
on
the
computer.
If
the
computer
cannot
be
powered
on,
go
to
“Power
system
checkout”
on
page
30,
and
check
the
power
sources.
If
an
error
code
appears,
go
to
“Symptom-to-FRU
index”
on
page
46.
On
the
first
screen,
select
the
model
and
press
Enter.
Follow
the
instructions
on
the
screen.
2.
The
main
panel
of
PC-Doctor
appears.
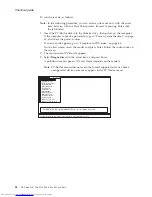
3.
Select
Diagnostics
with
the
arrow
keys,
and
press
Enter.
A
pull-down
menu
appears.
(Its
exact
form
depends
on
the
model.)
Note:
PC-Doctor
menu
does
not
mean
the
formal
support
device
list.
Some
unsupported
device
names
may
appear
in
the
PC-Doctor
menu.
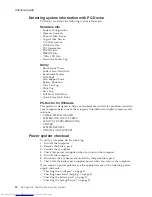
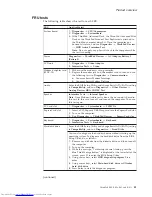
Diagnostics
Run Normal Test
Run Quick Test
CPU/Coprocessor
Systemboard
Video Adapter
Serial Ports
Parallel Ports
Fixed Disks
Diskette Drives
Other Devices
Communication
Memory Test - Full
Memory Test - Quick
Interactive Tests
Hardware Info
Utility
Quit
F1=Help
PC-DOCTOR 2.0 Copyright 2002 PC-Doctor, Inc. All Rights Reserved.
Use the cursor keys and ESC to move in menus. Press ENTER to select.
Wireless LAN
Checkout
guide
28
MT
ThinkPad
®
ThinkPad
R60,
R60e,
R61,
and
R61i
Summary of Contents for 765002U
Page 2: ......
Page 3: ...ThinkPad R60 R60e R61 and R61i Hardware Maintenance Manual ...
Page 6: ...iv MT ThinkPad ThinkPad R60 R60e R61 and R61i ...
Page 8: ...2 MT ThinkPad ThinkPad R60 R60e R61 and R61i ...
Page 81: ...3 Removing and replacing a FRU ThinkPad R60 R60e R61 and R61i 75 ...
Page 83: ...3 Removing and replacing a FRU ThinkPad R60 R60e R61 and R61i 77 ...
Page 203: ...LCD FRUs 1 3 2 5 6 7 8 9 4 Parts list ThinkPad R60 R60e R61 and R61i 197 ...


