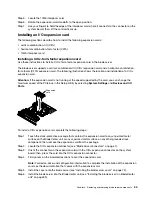

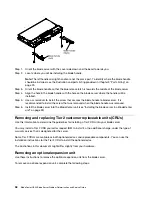

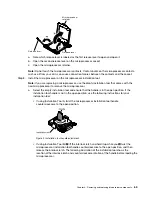


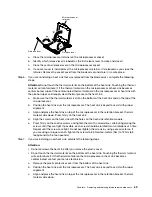


a. Note which release lever is labeled as the first release lever to open and open it.
b. Open the second release lever on the microprocessor socket.
c. Open the microprocessor retainer.
Step 4. Install the microprocessor in the microprocessor socket:
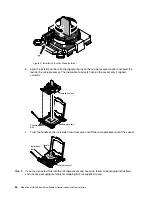
a. If a dust cover is installed over the microprocessor socket, lift the dust cover from the socket.
Store the dust cover in a safe place.
b. Touch the static-protective bag that contains the new microprocessor to any
unpainted
surface on the BladeCenter chassis or any
unpainted
metal surface on any other grounded
rack component; then, carefully remove the microprocessor and the installation tool from the
package.
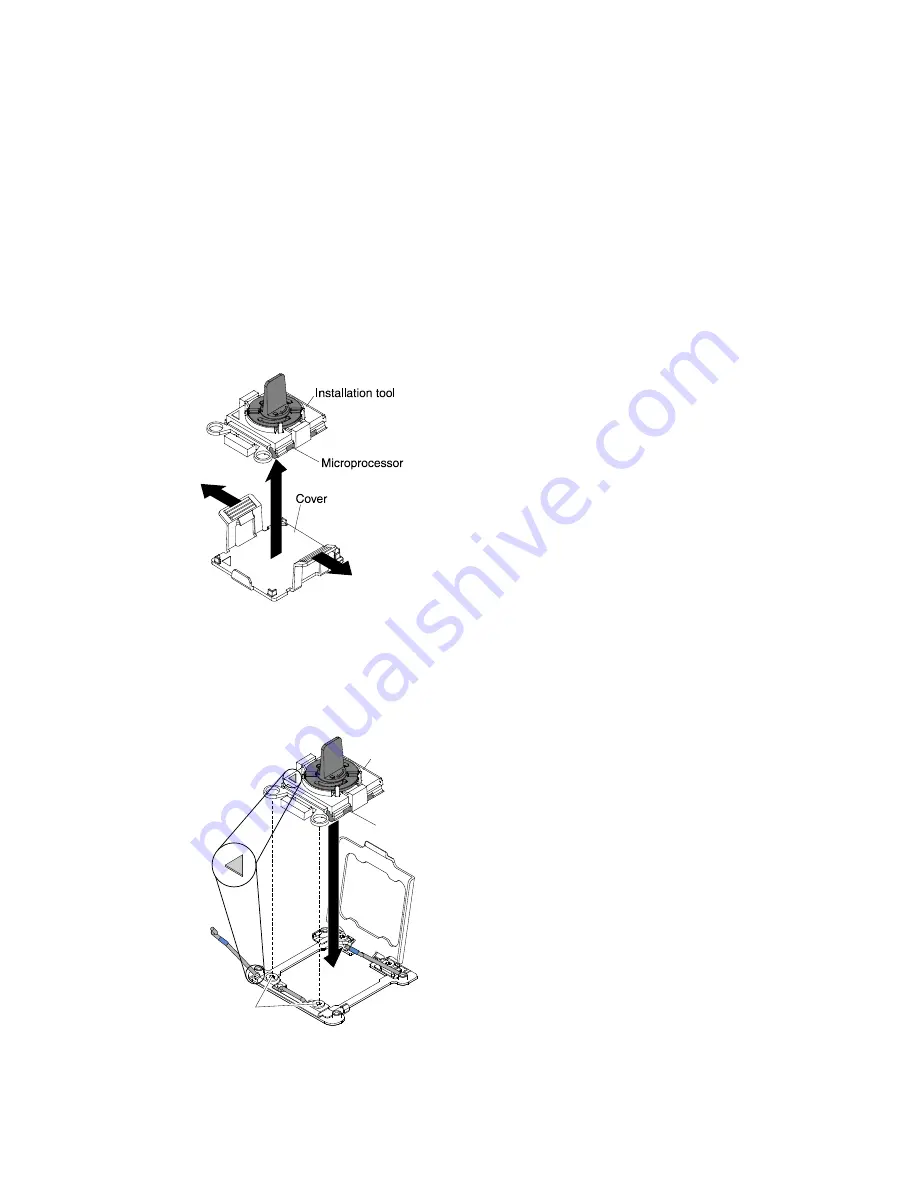
c. Release the sides of the cover and remove the cover from the installation tool. The
microprocessor is preinstalled on the installation tool.
Note:
Do not touch the microprocessor contacts. Contaminants on the microprocessor
contacts, such as oil from your skin, can cause connection failures between the contacts and
the socket.
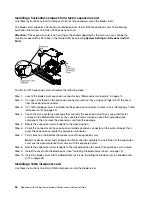
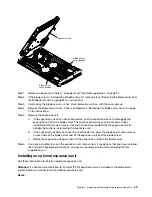
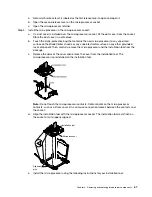
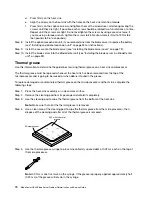
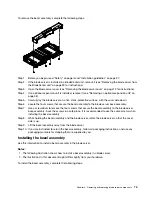
d. Align the installation tool with the microprocessor socket. The installation tool rests flush on
the socket only if properly aligned.
Installation tool
Alignment
pins
Microprocessor
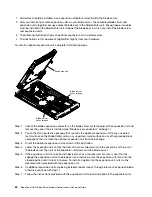
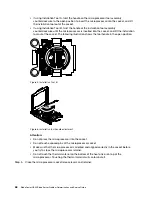
e. Install the microprocessor using the following instructions for your installation tool.
.
Removing and replacing blade server components
67
Summary of Contents for BladeCenter HS23 1929
Page 1: ...BladeCenter HS23 Blade Server Problem Determination and Service Guide Machine Types 7875 1929 ...
Page 284: ...268 BladeCenter HS23 Blade ServerProblem Determination and Service Guide ...
Page 289: ...Taiwan BSMI RoHS declaration Appendix B Notices 273 ...
Page 290: ...274 BladeCenter HS23 Blade ServerProblem Determination and Service Guide ...
Page 296: ...280 BladeCenter HS23 Blade ServerProblem Determination and Service Guide ...
Page 297: ......
Page 298: ...Part Number 00KC215 Printed in China 1P P N 00KC215 ...
Page 299: ... 1P00KC215 ...


