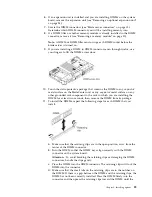
surface on any other grounded rack component; then, carefully remove the
microprocessor and the installation tool from the package.
c.
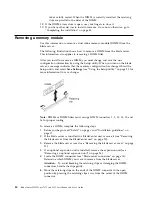
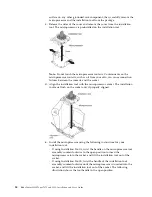
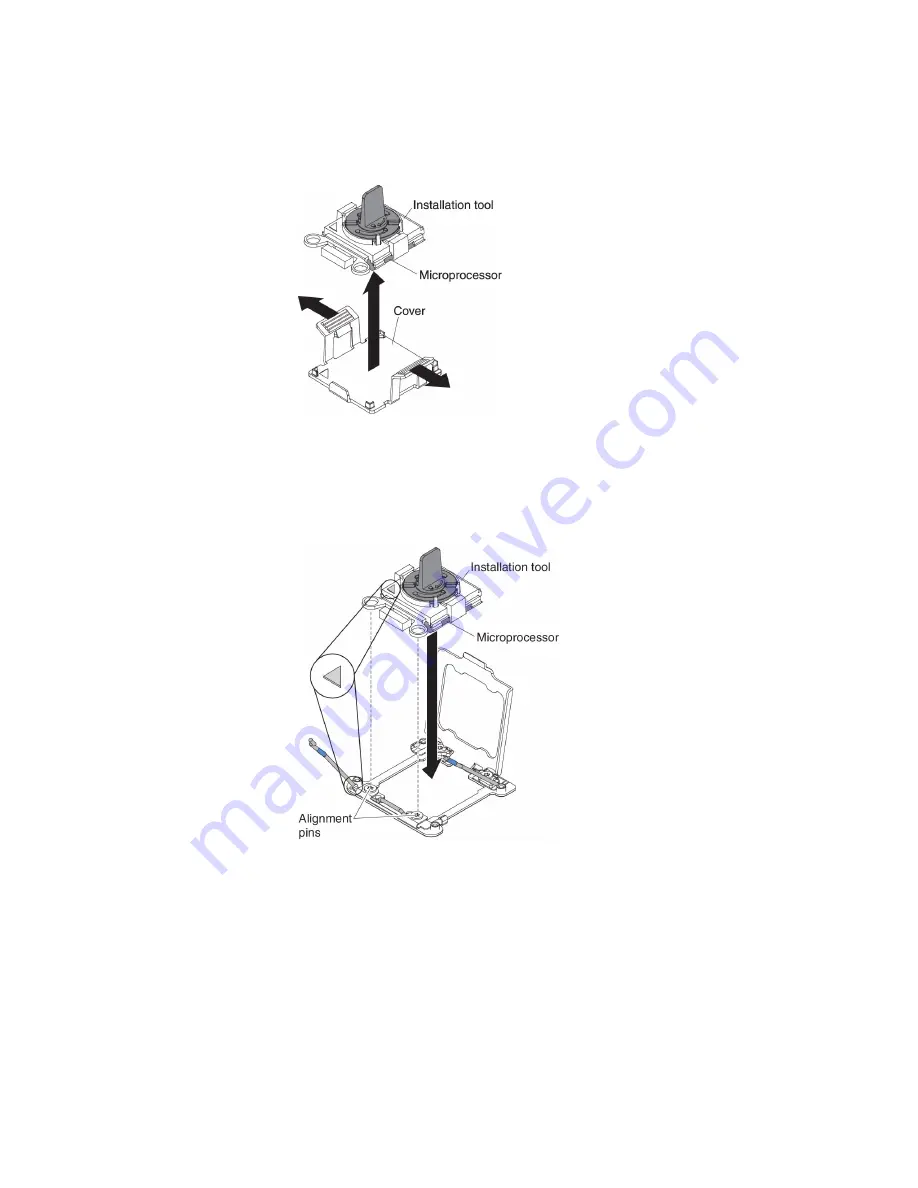
Release the sides of the cover and remove the cover from the installation
tool. The microprocessor is preinstalled on the installation tool.
Note:
Do not touch the microprocessor contacts. Contaminants on the
microprocessor contacts, such as oil from your skin, can cause connection
failures between the contacts and the socket.
d.
Align the installation tool with the microprocessor socket. The installation
tool rests flush on the socket only if properly aligned.
e.
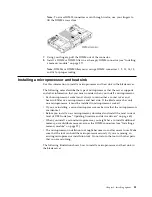
Install the microprocessor using the following instructions for your
installation tool.
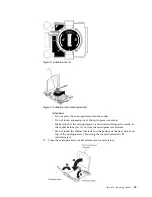
v
If using Installation Tool A, twist the handle on the microprocessor tool
assembly counterclockwise to the open position to insert the
microprocessor into the socket, and lift the installation tool out of the
socket.
v
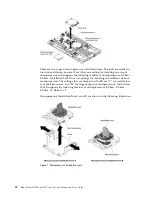
If using Installation Tool B, twist the handle of the installation tool
assembly counterclockwise until the microprocessor is inserted into the
socket, and lift the installation tool out of the socket. The following
illustration shows the tool handle in the open position.
34
BladeCenter HS23 Types 7875 and 1929: Installation and User's Guide
Summary of Contents for BladeCenter HS23
Page 12: ...xii BladeCenter HS23 Types 7875 and 1929 Installation and User s Guide ...
Page 28: ...16 BladeCenter HS23 Types 7875 and 1929 Installation and User s Guide ...
Page 62: ...50 BladeCenter HS23 Types 7875 and 1929 Installation and User s Guide ...
Page 84: ...72 BladeCenter HS23 Types 7875 and 1929 Installation and User s Guide ...
Page 98: ...86 BladeCenter HS23 Types 7875 and 1929 Installation and User s Guide ...
Page 102: ...90 BladeCenter HS23 Types 7875 and 1929 Installation and User s Guide ...
Page 103: ......
Page 104: ...Part Number 00AK736 Printed in USA 1P P N 00AK736 1P00AK736 ...

