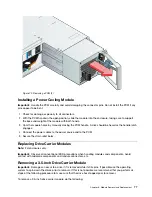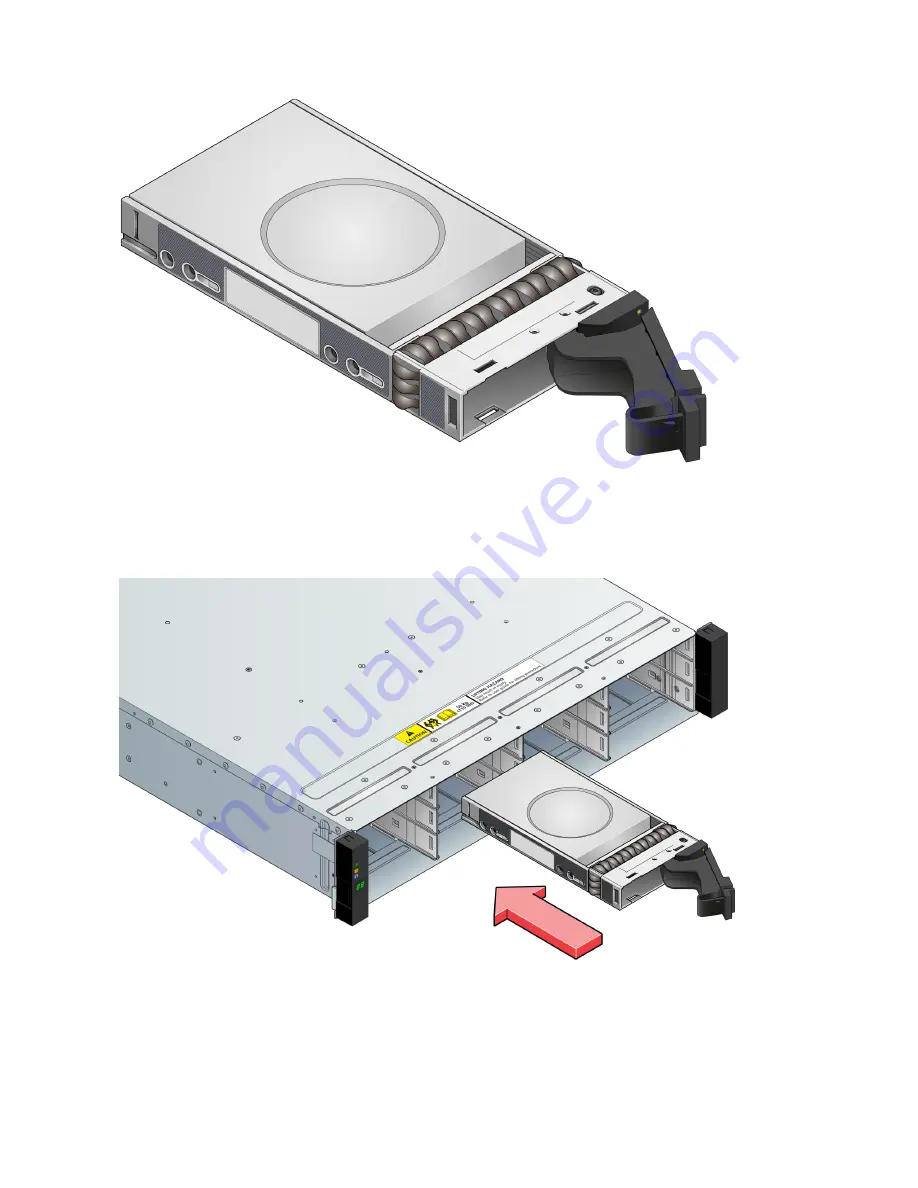
Figure 75. Installing a Drive Carrier Module (1)
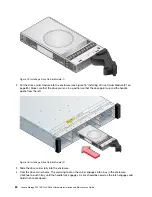
2. Put the drive carrier module into the enclosure (see Figure 76 “Installing a Drive Carrier Module (2)” on
page 80). Make sure that the drive carrier is in a position so that the drive points up and the handle
opens from the left.
Figure 76. Installing a Drive Carrier Module (2)
3. Slide the drive carrier fully into the enclosure.
4. Cam the drive carrier home. The camming foot on the carrier engages into a bay in the enclosure.
Continue to push firmly until the handle fully engages. A click should be heard as the latch engages and
holds the handle closed.
80
Lenovo Storage D1212/D1224/D3284Hardware Installation and Maintenance Guide
Summary of Contents for D1212
Page 6: ...iv Lenovo Storage D1212 D1224 D3284Hardware Installation and Maintenance Guide ...
Page 20: ...xviii Lenovo Storage D1212 D1224 D3284Hardware Installation and Maintenance Guide ...
Page 26: ...6 Lenovo Storage D1212 D1224 D3284Hardware Installation and Maintenance Guide ...
Page 52: ...32 Lenovo Storage D1212 D1224 D3284Hardware Installation and Maintenance Guide ...
Page 55: ...Figure 37 Unpacking the 2U12 and 2U24 Enclosure Systems Chapter 3 Installation 35 ...
Page 70: ...50 Lenovo Storage D1212 D1224 D3284Hardware Installation and Maintenance Guide ...
Page 136: ...116 Lenovo Storage D1212 D1224 D3284Hardware Installation and Maintenance Guide ...
Page 142: ...122 Lenovo Storage D1212 D1224 D3284Hardware Installation and Maintenance Guide ...
Page 152: ...132 Lenovo Storage D1212 D1224 D3284Hardware Installation and Maintenance Guide ...
Page 153: ......
Page 154: ......


