Step 3.
If the server has been installed in a rack, press down on the left and right side latches and slide
the server out of the rack enclosure until both slide rails lock.
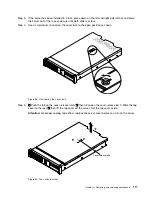
Step 4.
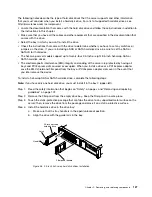
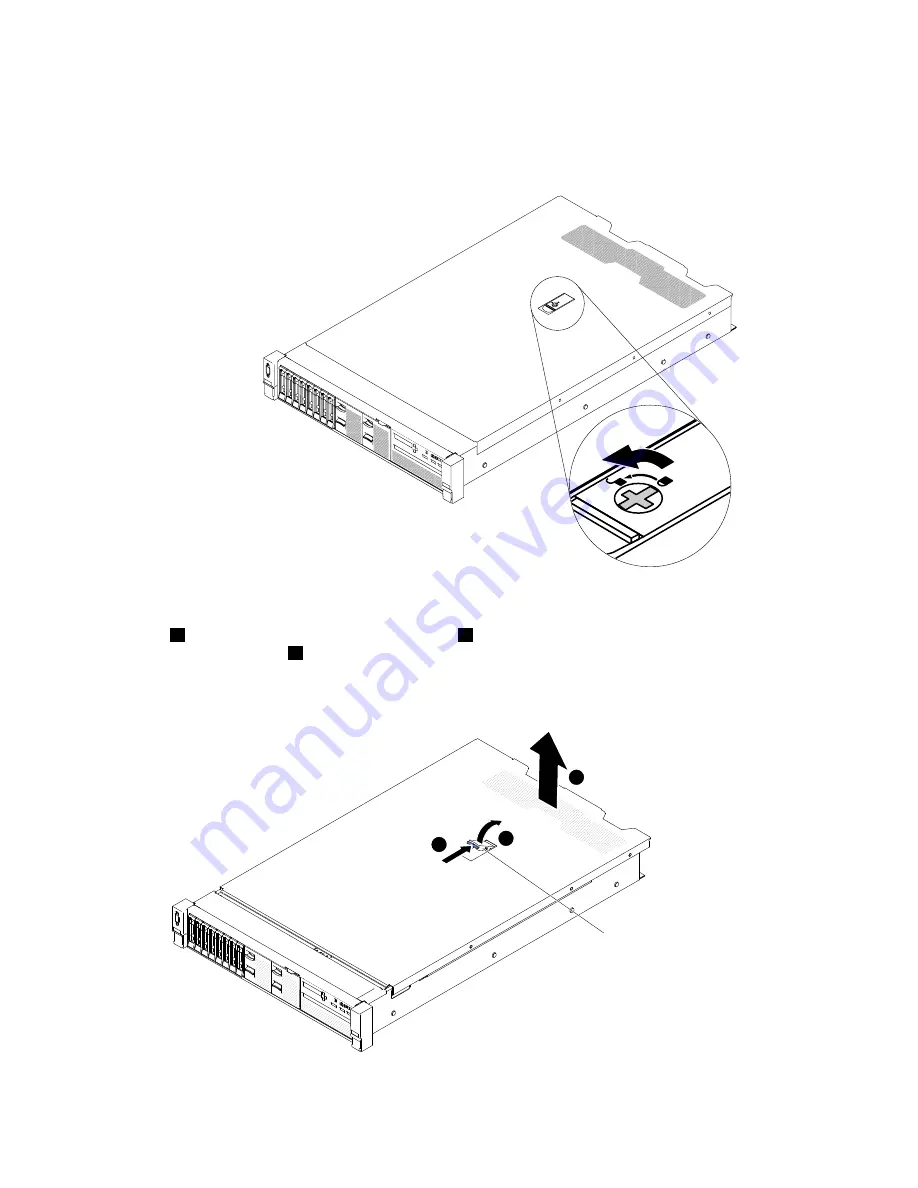
Use a screwdriver to unscrew the cover lock to the open position as shown.
000
000
000
000
000
000
000
000
00000000000000
00000000000000
00000000000000
00000000000000
00000000000000
00000000000000
00000000000000
00000000000000
00000000000000
0
0
0
0
0
0
0
0
0
000
000
000
000
000
000
000
000
00
00
00
0
0
0
0
00
00
00
00
00
00
00
00
00000
00000
00000
00000
00000000000000
00000000000000
00000000000000
00000000000000
00000000000000
00000000000000
00000000000000
00000000000000
00000000000000
Figure 43. Unscrewing the cover lock
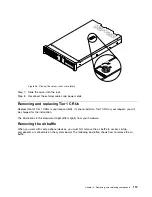
Step 5.
1
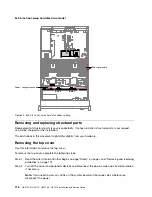
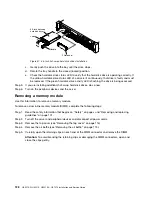
Push the tab on the cover-release latch,
2
then fully open the cover-release latch. Slide the top
cover to the rear,
3
then lift the top cover off the server. Set the top cover aside.
Attention:
For proper cooling and airflow, replace the server cover before you turn on the server.
00
00
00
00
0
0
0
0
000
000
000
000
000
000
000
00
00
00
00
00
00
00000000000000
00000000000000
00000000000000
00000000000000
00000000000000
00000000000000
00000000000000
00000000000000
00000000000000
00
00
00
00
00
00
00
00
00
00
00000
00000
00000
00000
3
2
1
Cover-release latch
Figure 44. Top cover removal
.
Removing, and replacing components
117
Summary of Contents for HX3510-G
Page 1: ...HX3510 G HX5510 HX5510 C HX7510 Installation and Service Guide Machine Type 8695 ...
Page 6: ...iv HX3510 G HX5510 HX5510 C HX7510 Installation and Service Guide ...
Page 62: ...50 HX3510 G HX5510 HX5510 C HX7510 Installation and Service Guide ...
Page 102: ...90 HX3510 G HX5510 HX5510 C HX7510 Installation and Service Guide ...
Page 112: ...100 HX3510 G HX5510 HX5510 C HX7510 Installation and Service Guide ...
Page 1222: ...1210 HX3510 G HX5510 HX5510 C HX7510 Installation and Service Guide ...
Page 1238: ...1226 HX3510 G HX5510 HX5510 C HX7510 Installation and Service Guide ...
Page 1239: ......
Page 1240: ......

