3
2
1
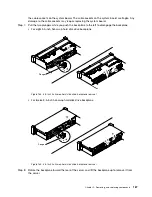
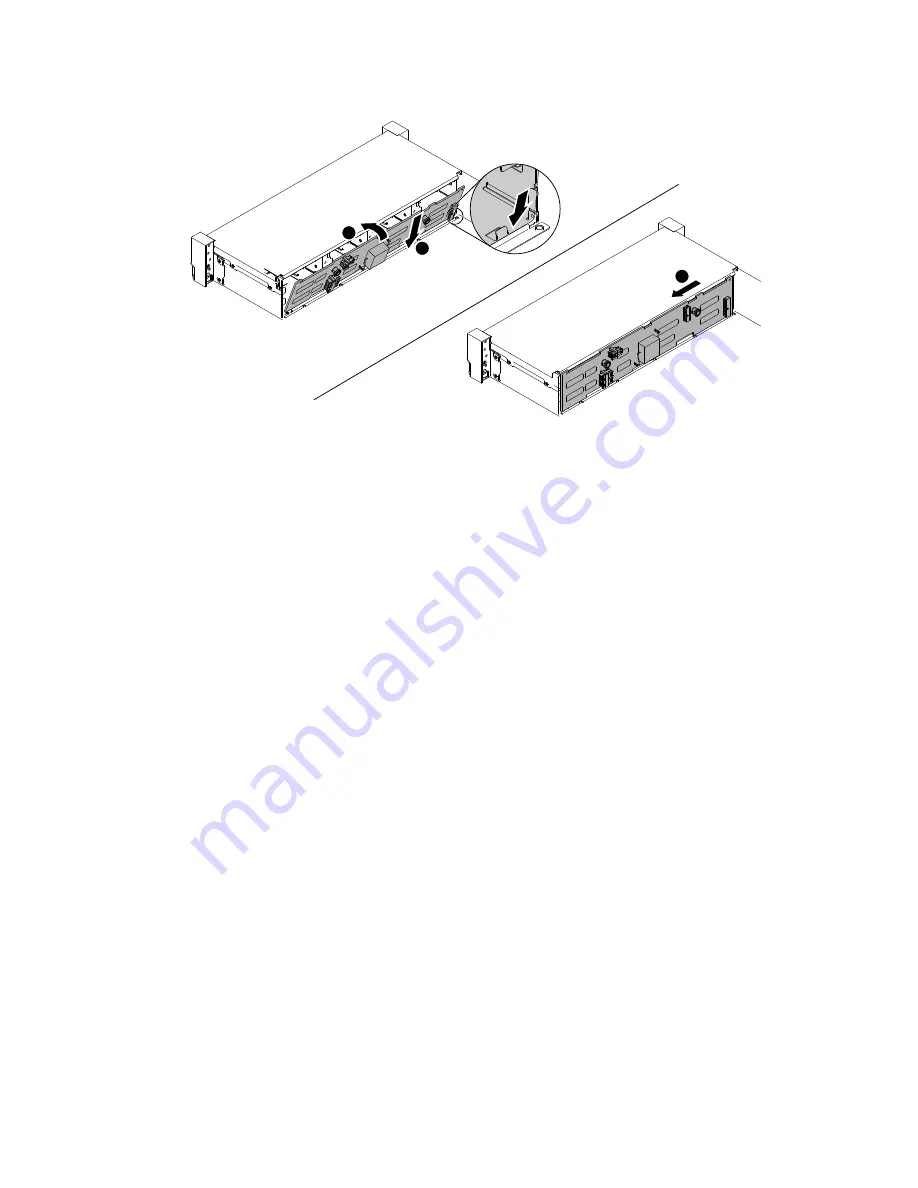
Figure 137. 3.5-inch hot-swap hard disk drive backplane installation
Step 8.
Connect the signal and power-configuration cables to the backplane and the system board. See
“3.5-inch hard disk drive cable connection” on page 115 for more information.
Step 9.
Reinstall the hard disk drives and filler panels.
Step 10. Replace the fan cage assembly and fans if you removed them (see “Replacing the fan cage
assembly” on page 136 and “Replacing a hot-swap fan” on page 138).
Step 11. Install the top cover (see “Replacing the top cover” on page 118).
Step 12. Slide the server into the rack.
Step 13. Reconnect the power cords and any cables that you removed.
Step 14. Turn on the peripheral devices and the server.
Removing the coin-cell battery (also called CMOS battery)
The following notes describe information that you must consider when replacing the battery.
• Lenovo has designed this product with your safety in mind. The lithium battery must be handled correctly
to avoid possible danger. If you replace the battery, you must adhere to the following instructions.
Note:
In the U. S., call 1-800-IBM-4333 for information about battery disposal.
• If you replace the original lithium battery with a heavy-metal battery or a battery with heavy-metal
components, be aware of the following environmental consideration. Batteries and accumulators that
contain heavy metals must not be disposed of with normal domestic waste. They will be taken back
free of charge by the manufacturer, distributor, or representative, to be recycled or disposed of in a
proper manner.
• To order replacement batteries, call 1-800-IBM-SERV within the United States, and 1-800-465-7999 or
1-800-465-6666 within Canada. Outside the U.S. and Canada, call your support center or business
partner.
Note:
After you replace the battery, you must reconfigure the server and reset the system date and time.
Statement 2
.
Removing, and replacing components
189
Summary of Contents for HX3510-G
Page 1: ...HX3510 G HX5510 HX5510 C HX7510 Installation and Service Guide Machine Type 8695 ...
Page 6: ...iv HX3510 G HX5510 HX5510 C HX7510 Installation and Service Guide ...
Page 62: ...50 HX3510 G HX5510 HX5510 C HX7510 Installation and Service Guide ...
Page 102: ...90 HX3510 G HX5510 HX5510 C HX7510 Installation and Service Guide ...
Page 112: ...100 HX3510 G HX5510 HX5510 C HX7510 Installation and Service Guide ...
Page 1222: ...1210 HX3510 G HX5510 HX5510 C HX7510 Installation and Service Guide ...
Page 1238: ...1226 HX3510 G HX5510 HX5510 C HX7510 Installation and Service Guide ...
Page 1239: ......
Page 1240: ......


