

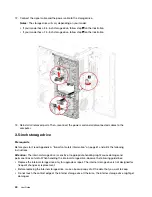
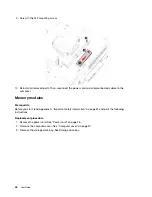

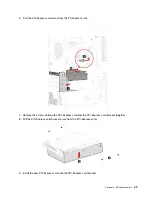


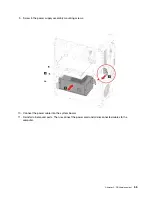


8. Reinstall all removed parts. Then, reconnect the power cord and all disconnected cables to the
computer.
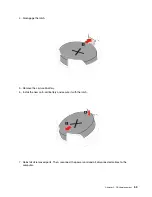
Coin-cell battery
Prerequisite
Before you start, read Appendix A “Important safety information” on page 61 and print the following
instructions.
DANGER
If the coin-cell battery is incorrectly replaced, there is danger of an explosion. The coin-cell battery
contains a small amount of harmful substance. To avoid possible injury:
• Replace only with a battery type recommended by Lenovo.
• Keep the battery away from fire.
• Do not expose it to excessive heat.
• Do not expose it to water or rain.
• Do not short-circuit it.
• Do not drop, crush, puncture the battery, or subject it to strong forces. Battery abuse or
mishandling can cause the battery to overheat, which can cause gasses or flame to "vent" from
the battery or coin-cell battery.
Note:
To dispose of the coin-cell battery, refer to “Lithium coin-cell battery notice” in the
Safety and
Warranty Guide
.
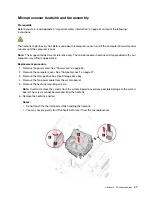
Your computer has a special type of memory that maintains the date, time, and settings for built-in features,
such as parallel connector assignments (configurations). A coin-cell battery keeps this information active
when you turn off the computer.
The coin-cell battery normally requires no charging or maintenance throughout its life; however, no coin-cell
battery lasts forever. If the coin-cell battery fails, the date and time information is lost. An error message is
displayed when you turn on the computer.
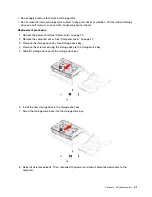
Replacement procedure
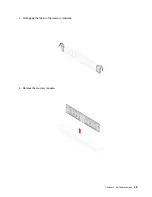
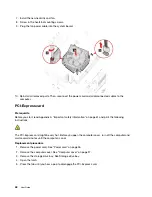
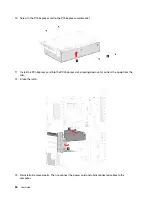
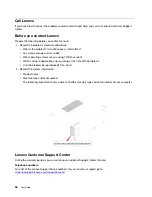
1. Remove the power cord. See “Power cord” on page 26.
2. Remove the computer cover. See “Computer cover” on page 27.
3. Remove the storage drive bay. See Storage drive bay.
52
User Guide
Summary of Contents for IdeaCentre C5 14IMB05
Page 1: ...User Guide IdeaCentre Gaming 5 14L 05 IdeaCentre Creator 5 14L 05 ...
Page 4: ...ii User Guide ...
Page 6: ...iv User Guide ...
Page 12: ...6 User Guide ...
Page 30: ...24 User Guide ...
Page 34: ...28 User Guide ...
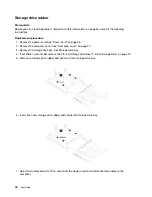
Page 41: ...5 Release the latch on the storage drive bay and pull slightly Chapter 5 CRU replacement 35 ...
Page 44: ...9 Mount the new storage drive bay on the case 38 User Guide ...
Page 62: ...56 User Guide ...
Page 66: ...60 User Guide ...
Page 80: ...74 User Guide ...
Page 96: ...90 User Guide ...
Page 99: ......
Page 100: ......


