background image

43

Chapter 2. Using Your Computer

1

Connect the power cord to the transformer pack.

2

Plug the power cord into an electrical outlet.

3

Connect the AC adapter to the AC power adapter jack of the computer.

You can check the status of your battery at any time by looking at the

battery meter at the bottom of your display.

Notes:

ƒ

When you do not use the AC adapter, disconnect it from the electrical 

outlet.

ƒ

Do not wrap the power cord tightly around the AC power transformer 

pack when it is connected to the transformer.

ƒ

You can charge the battery when the AC adapter is connected to the 

computer and the battery is installed. You need to charge it in any of the 

following conditions:

ƒ

When you purchase a new battery

ƒ

If the battery status indicator (amber) starts blinking

ƒ

If the battery has not been used for a long time

When you charge the battery, make sure that its temperature is between 0° 

and 50°C (32° -122°F).

Summary of Contents for L7500 - IdeaPad U110

Page 1: ...Lenovo IdeaPad U110 User Guide User Guide V1 0 V1 0 ...

Page 2: ...with RESTRICTED RIGHTS Use duplication or disclosure by the Government is subject to the GSA ADP Schedule contract with Lenovo if any or the standard terms of this commercial license or if the agency is unable to accept this Program under these terms then we provide this Program under the provisions set forth in Commercial Computer Software Restricted Rights at FAR 52 227 19 when applicable or und...

Page 3: ... and operating system when calculating hard disk capacity Hard disk manufacturers use a radix of 1000 i e 1G 1 000MB 1MB 1 000KB 1KB 1 000 bytes However when identifying hard disk capacity operating systems use a radix of 1024 i e 1GB 1 024MB 1MB 1 024KB 1KB 1 024 bytes The standard adopted by your computer is that of the hard disk manufacturers Since the standards adopted by the hard disk manufac...

Page 4: ... size of the reserved space for this partition varies according to the model operating system and software of the computer For the sake of safety this partition is not evident which is commonly referred to as a hidden partition It is invisible in the operating system and this portion of disk space is not included when displaying hard disk capacity In addition after the hard disk is partitioned or ...

Page 5: ...Integrated Camera 26 Using the Internet 28 Securing your computer 31 Using battery and AC adapter 41 Chapter 3 Using external devices 46 Connecting a Universal Serial Bus USB device 46 Connecting an IEEE 1394 device 48 Connecting a PC card device 49 Connecting an external display 51 Connecting a headphone and audio device 52 Connecting an external microphone 54 Connecting a Bluetooth device 55 Cha...

Page 6: ...umbers 91 Appendix B Customer Replaceable Units CRUs 93 Appendix C Features and Specifications 94 Features 94 Specifications 96 Appendix D Notices 98 Notices 98 Wireless related information 101 Electronic Emissions Notices 103 WEEE and Recycling Statements 107 EU WEEE Statements 108 Japan Recycling Statements 109 Notice for Users in the U S A 111 Notice on Deleting Data from Your Hard Disk 111 Tra...

Page 7: ...se the keyboard avoid keeping your palms on the palm rest for a prolonged period of time Your computer generates some heat during normal operation The amount of heat depends on the amount of system activity and the battery charge level Extended contact with your body even through clothing could cause discomfort or even a skin burn Periodically take breaks from using the keyboard by lifting your ha...

Page 8: ...dy Extended contact with your body even through clothing may cause a skin burn Route the cables of an AC adapter a mouse a keyboard a printer or any other electronic device or communication lines so that they cannot be walked on tripped over pinched by your computer or other objects or in any way subjected to treatment that could disturb the operation of your computer Applying strong force to the ...

Page 9: ...r press Fn F1 to put it in sleep mode Before moving the computer make sure that the power on indicator is off This will help to prevent damage to the hard disk drive and possible loss of data Do not drop bump scratch twist hit vibrate or push your computer display or external devices ...

Page 10: ...vi Read This First Do not distort bend or extrude your liquid crystal display Do not place heavy objects on your computer or display ...

Page 11: ... your computer to avoid spills and keep your computer away from water to avoid the danger of electrical shock Use a quality carrying case that provides adequate cushion and protection Do not pack your computer in a tightly packed suitcase or bag ...

Page 12: ...r Computer Top View The illustrations in this manual may differ from the actual product Wireless LAN antennas A diversity antenna system is built into the display for optimal reception enabling wireless communication wherever you are ...

Page 13: ...crophone can be used for video conferencing voice narration or simple audio recordings Computer display LCD color display Speakers Built in stereo speakers System status indicators 18 Touch inductive panel 16 Novo button 17 Power button Use the Power button to turn on the computer Keyboard 13 Touch pad 12 ...

Page 14: ...3 Chapter 1 Getting to Know Your Computer Left side View ...

Page 15: ...ttery pack use the supplied AC adapter only Fan louvers The fan louvers allow hot air to exhaust from the computer Important Make sure that paper books clothing cables or other objects do not block any of the fan louvers or else overheating of the computer may occur Wireless device switch Use this switch to simultaneously turn on or turn off Wireless LAN and Bluetooth devices VGA port 51 USB 2 0 p...

Page 16: ...5 Chapter 1 Getting to Know Your Computer Right side View ...

Page 17: ...security cable and lock to fit this keyhole Note Before purchasing any security product verify that it is compatible with this type of security keyhole PCI Express card new card slot 50 Multi media reader slot 22 Headphone SPDIF jack external 52 Microphone jack external 54 IEEE 1394 connector 48 USB 2 0 port 46 LAN port 28 ...

Page 18: ...7 Chapter 1 Getting to Know Your Computer Bottom View ...

Page 19: ...he unlocked position to insert or remove the battery pack Move the manual latch to the locked position after inserting the battery pack Memory RAM compartment The memory compartment provides expansion capabilities for additional memory The BIOS automatically detects the amount of memory in the system and configures CMOS accordingly during the Power On Self Test POST process There is no hardware or...

Page 20: ...9 Chapter 1 Getting to Know Your Computer Front View System status indicators 18 ...

Page 21: ...puter is in sleep you can quickly wake it and bypass the startup process To put the computer to sleep do one of the following Click Start and select Sleep from the Start menu Press Fn F1 Warning Wait until the power indicator light starts blinking indicating that the computer is in sleep before you move your computer Moving your computer while the hard disk is spinning can damage the hard disk cau...

Page 22: ...ay to achieve its optimum performance Adjusting the brightness You can increase or decrease the brightness on your display To adjust the brightness on your display press Fn up down arrow Switching between wide screen and normal screen You can change the aspect ratio on your display To switch between wide screen and normal mode press Fn F4 to open Resolution switchover screen Select 1366 768 or 102...

Page 23: ...click buttons at the bottom of the keyboard To move the cursor on the screen slide your fingertip over the pad in the direction in which you want the cursor to move The functions of the left and right click buttons correspond to those of the left and right mouse buttons on a conventional mouse ...

Page 24: ...Bus USB device on page 46 Using the Keyboard Your computer has a numeric keypad and function keys incorporated in the standard keyboard Numeric Keypad The keyboard has keys that when enabled work as a 10 key numeric keypad To enable or disable the numeric keypad press Fn Insert NmLk The illustrations in this manual may differ from the actual product ...

Page 25: ...sing Your Computer 14 Function Key Combinations Through the use of the function keys you can change operational features instantly To use this function press and hold the Fn key then press one of the function keys ...

Page 26: ...mode Fn F5 Enable disable the built in wireless device feature Fn F6 Enable disable the touch pad Fn F7 Play pause Media Player playback Fn F8 Stop Media Player playback Fn F9 Skip to the previous track Fn F10 Skip to the next track Fn F11 F12 function Fn Insert NmLk Enable disable the Numeric keypad Fn Delete ScrLk Enable disable Scroll Lock Fn PrtSc SysRq System request Fn Pause Break Pause to v...

Page 27: ...buttons Your computer has several special keys and buttons Touch inductive panel To display the buttons press the Mute or Volume key Open Dolby function setup screen Open user define utility Open user define utility Mute unmute the sound Change volume ...

Page 28: ...vice etc otherwise the system may not operate properly Once done the system can no longer return to its previous state All data on the primary hard disk partition usually drive C will subsequently be lost Make sure all important files on the primary hard disk partition have been backed up onto another hard disk or USB hard disk drive before this operation For details see OneKey Recovery User Guide...

Page 29: ...how the current status of your computer Your computer has system status indicators as follows Drive in use Blue Flashing Blue Data is being read from or written to the hard disk or optical disc drive When this indicator is on do not put the computer into sleep mode or turn off the computer ...

Page 30: ...e Caps Lock light is off lower case letters are entered Power Indicator Blue System is powered on Blinking Blue System is in sleep mode OFF System is powered off or in hibernation mode Battery Status Indicator Amber Battery is charging The color and status of the indicator varies depending on the battery power level Wireless Device Indicator Amber Bluetooth is enabled Blue Wireless LAN is enabled ...

Page 31: ... on page 66 Inserting a disc 1Press the Eject button to open the drive tray 2Place the disc on the tray then gently push the drive tray back in The drive will begin reading the data from the disc Attention It is normal to hear the CD spinning in the optical drive while data is being read Ejecting a disc 1Press the Eject button to open the drive tray 2Remove the disc from the tray then gently push ...

Page 32: ... Center and so on For convenient CD DVD playing see Touch inductive panel on page 16 For details on Shuttle Center see Using the Shuttle Center on page 23 Copying files to CDs DVDs You can copy files to your CDs DVDs with Power2Go a software for burning data music videos and photos onto CDs and DVDs For instructions on Power2Go see the help file on your software ...

Page 33: ...edia Reader slot used to insert a memory card such as an SD Card a Multi media Card a Memory Stick an xD Picture Card an SD pro card or a Memory Stick pro card Note Only use the memory card listed above for more information about the usage read the instructions shipped with the memory card ...

Page 34: ...ard out of the Multi media reader slot Using the Shuttle Center Shuttle Center is an integrated multimedia player for DVD playback video playback photo viewing and music playback To start Shuttle Center Click Start All Programs Lenovo Shuttle Center To exit Shuttle Center Click the Exit icon Playing CDs 1Insert a CD 2Select Music from the top menu by using the left right keys and a Enter key 3Sele...

Page 35: ...from the top menu by using the left right keys and a Enter key 2Select folder file by using the up down keys and a Enter key Note While listening to the music a computer generated visualization will be displayed Playing DVDs VCDs SVCDs You can play DVD VCD SVCD format discs 1Insert a disc 2Select Movies from the top menu by using the left right keys and a Enter key 3Select Disc icon by using the u...

Page 36: ...der to view avi divx dvr ms and etcetera 1Select Videos from the top menu by using the left right keys and a Enter key 2Select folder file by using the up down keys and a Enter key Viewing photos You can view digital picture files such as BMP JPEG and PNG formats 1Select Pictures from the top menu by using the left right keys and a Enter key 2Select folder file by using the up down keys and a Ente...

Page 37: ...cation because Vista does not include a program for taking pictures or movies with the integrated camera Using EasyCapture EasyCapture helps you to make entertaining mug shots and videos with the integrated camera on your computer Note Depending on the software version these functions may differ To start EasyCapture Click Start All Programs Lenovo EasyCapture Lenovo EasyCapture 2 5 To exit EasyCap...

Page 38: ...in recording Note To display the Record icon click the Recording View icon If you want to start recording automatically after a five second delay click the Self timer icon 2Click the Stop icon to stop the recording To view your videos 1Click the arrow icon on the right side of the main program window to open the additional options window 2Click the Video Gallery tab 3Select the video you want to v...

Page 39: ...nnection or local area network LAN and wireless LAN for wireless connection Using LAN port The LAN port supports a standard RJ 45 connector and allows you to connect the computer to an Ethernet connection or local area network LAN Lenovo IdeaPad U110 UG V1 0_en book Page 28 Monday March 17 2008 9 17 AM ...

Page 40: ...face Security window opens 4Select LAN Network Interface and press the Enter key The Options window opens 5Choose UNLOCKED to enable your LAN Network Interface and LOCKED to disable 6Press F10 to exit 7Select OK in the Setup Confirmation window Important Make sure to detach the mechanical lock from your computer when using the LAN port Attention As the voltage of a telephone connection is higher t...

Page 41: ...nd unlock Wireless Network Interface via BIOS Setup Utility 1Turn on your computer press F2 while the initial screen is displayed The BIOS Setup Utility screen opens 2Select Security using the cursor directional keys 3Select I O Interface Security and press the Enter key The I O Interface Security window opens 4Select Wireless Network Interface and press the Enter key The Options window opens 5Cho...

Page 42: ...ermission Attach a mechanical lock to the keyhole of the computer then secure the chain on the lock to a stationary object Refer to the instructions shipped with the mechanical lock Refer to the Right side View on page 5 for the location of the security keyhole Note You are responsible for evaluating selecting and implementing the locking devices and security features Lenovo makes no comments judg...

Page 43: ...2 Click the Register button 3 Read the recognition guidelines and click the Next button 4 Enter your system password and click the Next button 5 Click the Start button to begin registering your face 6 When the face registration is complete click the OK button Notes Make sure the integrated camera is active For details see Using the integrated camera on page 29 The face registration and verificatio...

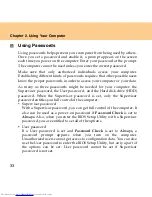
Page 44: ...r password the User password and the Hard disk drive HDD password When the Supervisor password is set only the Supervisor password entitles you full control of the computer Supervisor password With a Supervisor password you can get full control of the computer It also can be used as a power on password if Password Check is set to Always Also when you enter the BIOS Setup Utility with a Supervisor ...

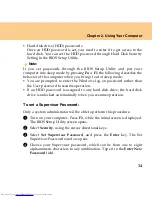
Page 45: ...ssword rather than the User password to resume operation If an HDD password is assigned to any hard disk drive the hard disk drive is unlocked automatically when you resume operation To set a Supervisor Password Only a system administrator will be able to perform this procedure 1 Turn on your computer Press F2 while the initial screen is displayed The BIOS Setup Utility screen opens 2 Select Secur...

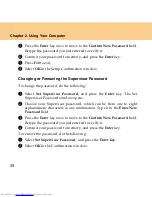
Page 46: ...g 1 Select Set Supervisor Password and press the Enter key The Set Supervisor Password window opens 2 Choose your Supervisor password which can be from one to eight alphanumeric characters in any combination Type it in the Enter New Password field 3 Press the Enter key once to move to the Confirm New Password field Retype the password you just entered to verify it 4 Commit your password to memory ...

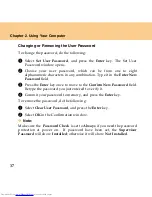
Page 47: ... screen is displayed The BIOS Setup Utility screen opens 2 Select Security using the cursor directional keys 3 Select Set User Password and press the Enter key The Set User Password window opens 4 Choose your User password which can be from one to eight alphanumeric characters in any combination Type it in the Enter New Password field 5 Press the Enter key once to move to the Confirm New Password ...

Page 48: ...assword field 3 Press the Enter key once to move to the Confirm New Password field Retype the password you just entered to verify it 4 Commit your password to memory and press the Enter key To remove the password do the following 1 Select Clear User Password and press the Enter key 2 Select OK in the Confirmation window Note Make sure the Password Check is set to Always if you need the password pr...

Page 49: ...word deletes the user password To set a hard disk password To set a hard disk password do the following 1 Turn on your computer Press F2 while the initial screen is displayed The BIOS Setup Utility screen opens 2 Select Security using the cursor directional keys 3 Select Hard Disk Security Setting and press the Enter key The Hard Disk Security screen opens 4 Select Set Master and User Passwords an...

Page 50: ...ny password to memory and press the Enter key 0 Press F10 to exit A Select OK in the Setup Confirmation window The next time you turn on your computer you will have to enter the HDD user or master password to get access to your operating system Changing or Removing the HDD Passwords To change or remove the HDD password do as follows To change the HDD user password select Change HDD User Password a...

Page 51: ...rrect password in the Enter CURRENT Password then enter the new password in the Enter New Password field and retype it to verify it in the Confirm New Password field Note When you change the HDD master password the HDD user password will be removed To remove the HDD master password select Change HDD Master Password and press the Enter key twice Both HDD user and master passwords will be removed ...

Page 52: ... to do more save more and spend more time unplugged Mobility has revolutionized business by enabling you to take your work wherever you go With your computer batteries you will be able to work longer without being tied to an electrical outlet Note The operating system may run slower when using the battery mode Checking Battery Status You can determine the percentage of battery power remaining by u...

Page 53: ...k drive and how bright you make the computer display Using the AC Adapter The power to run your computer can come either from the lithium ion Li ion battery pack provided with it or from AC power through the AC adapter While you use AC power the battery charges automatically The AC adapter that comes with your computer has two basic components 1The transformer pack that converts AC power for use w...

Page 54: ...adapter disconnect it from the electrical outlet Do not wrap the power cord tightly around the AC power transformer pack when it is connected to the transformer You can charge the battery when the AC adapter is connected to the computer and the battery is installed You need to charge it in any of the following conditions When you purchase a new battery If the battery status indicator amber starts ...

Page 55: ...t the AC adapter to the power jack of the computer The charging time is affected by the physical environment Note To increase the life of the battery the computer does not start recharging the battery immediately when it drops from fully charged Handling the Battery Danger Do not attempt to disassemble or modify the battery pack Attempting to do so can cause an explosion or liquid leakage from the...

Page 56: ...ren Danger Do not put the battery pack in trash that is disposed of in landfills When disposing of the battery comply with local ordinances or regulations and your company s safety standards Danger There is a danger of an explosion if the backup battery is incorrectly stored The lithium battery contains lithium and can explode if it is not properly handled or disposed of Replace only with a batter...

Page 57: ...s compatible with USB 2 0 or USB 1 1 devices such as a keyboard mouse camera hard disk drive printer scanner and optical drive USB allows devices to be connected and disconnected without rebooting the computer hot swapping and allows specific classes of hardware to be used without requiring individual device drivers to be installed ...

Page 58: ...47 Chapter 3 Using external devices Attention When using high power consumption USB device use external device power adapter Otherwise the system will be shut down device will not be detected etcetera ...

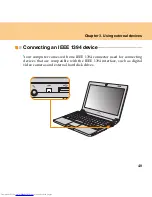
Page 59: ...al devices Connecting an IEEE 1394 device Your computer comes with one IEEE 1394 connector used for connecting devices that are compatible with the IEEE 1394 interface such as digital video cameras and external hard disk drives ...

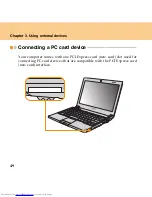
Page 60: ...3 Using external devices Connecting a PC card device Your computer comes with one PCI Express card new card slot used for connecting PC card devices that are compatible with the PCI Express card new card interface ...

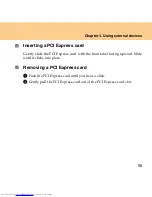
Page 61: ...ress card Gently slide the PCI Express card with the front label facing upward Slide until it clicks into place Removing a PCI Express card 1Push the PCI Express card until you hear a click 2Gently pull the PCI Express card out of the PCI Express card slot ...

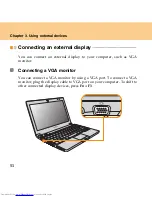
Page 62: ...n connect an external display to your computer such as VGA monitor Connecting a VGA monitor You can connect a VGA monitor by using a VGA port To connect a VGA monitor plug the display cable to VGA port on your computer To shift to other connected display devices press Fn F3 ...

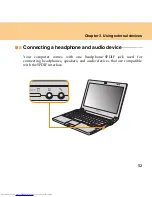
Page 63: ...Using external devices Connecting a headphone and audio device Your computer comes with one headphone SPDIF jack used for connecting headphones speakers and audio devices that are compatible with the SPDIF interface ...

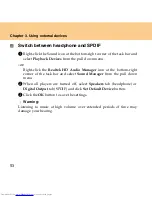
Page 64: ...ght click the Realtek HD Audio Manager icon at the bottom right corner of the task bar and select Sound Manager from the pull down menu 2When all players are turned off select Speakers tab headphone or Digital Output tab SPDIF and click Set Default Device button 3Click the OK button to save the settings Warning Listening to music at high volume over extended periods of time may damage your hearing...

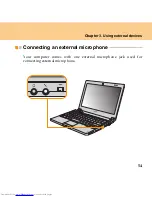
Page 65: ...54 Chapter 3 Using external devices Connecting an external microphone Your computer comes with one external microphone jack used for connecting external microphone ...

Page 66: ...ransfer data wirelessly to Bluetooth devices such as computers PDAs and cell phones Enabling Bluetooth communications 1Slide the Wireless device switch latch to the right 2Press Fn F5 3Set the Bluetooth to Enable Note When you do not need to use the Bluetooth function turn it off to save battery power ...

Page 67: ...ith my computer See Read This First on page iii and also See Chapter 6 Safety Use and Care Information on page 74 of this guide More tips can be found in Chapter 1 and 2 What are the main hardware features of my new computer More information can be found in Chapter 1 and 2 Where can I find the detailed specifications for my computer See http consumersupport lenovo com I need to upgrade a device or...

Page 68: ...r See Chapter 5 Getting Help and Service on page 69 of this Guide For the phone numbers of the Customer Support Center nearest to you See Lenovo Warranty Service Telephone Numbers on page 91 Where can I find warranty information See the separate Safety and Warranty Guide for detailed warranty information For the warranty applicable to your computer including the warranty period and type of warrant...

Page 69: ...off the computer then turn it on again and listen again If you are using an external monitor See Computer Screen Problems on page 62 If a user password is set enter the correct password and press Enter If the user password prompt does not appear the brightness level might be set to minimum brightness Adjust the brightness level by pressing Fn If the screen still remains blank make sure that The ba...

Page 70: ...When I turn on the computer only a white cursor appears on a blank screen Restore backed up files to your Windows environment or the entire contents of your hard disk to the original factory contents using OneKey Recovery If you still see only the cursor on the screen have the computer serviced My screen goes blank while the computer is on Your screen saver or power management may be enabled Do on...

Page 71: ...drive replaced Proof of purchase is required and a fee will be charged for parts and service If you forget your supervisor password Lenovo authorized servicer cannot reset your password You must take your computer to a Lenovo authorized servicer or a marketing representative to have the system board replaced Proof of purchase is required and a fee will be charged for parts and service Keyboard Pro...

Page 72: ...r enters sleep mode the sleep indicator turns on immediately after Power on self test POST Make sure that The battery is charged The operating temperature is within the acceptable range See Specifications on page 96 If the battery is charged and the temperature is within range have the computer serviced The critical low battery error message appears and the computer immediately turns off The batte...

Page 73: ...er off state Connect the AC adapter to the computer then press the power button to resume operation If the system still does not return from sleep mode your system has stopped responding and you cannot turn off the computer reset the computer Unsaved data may be lost To reset the computer press and hold the Power button for 4 seconds or more If the computer is still not reset remove the AC adapter...

Page 74: ... set The monitor type is correct To check these settings do as follows 1 Right click on the desktop and select Personalize from the pull down menu 2 Click Display Settings and check whether the screen resolution and color quality are correctly set 3 Click the Advanced Settings button 4 Click the Adapter tab 5 Make sure that the correct device driver name is shown in the adapter information window ...

Page 75: ...reen Did you install the operating system or application program correctly If they are installed and configured correctly have the computer serviced Missing discolored or bright dots appear on the screen every time you turn on your computer This is an intrinsic characteristic of the TFT technology Your computer s display contains multiple thin film transistors TFTs A small number of missing discol...

Page 76: ... off The headphone jack is not used Speakers is selected as a playback device To check the settings right click the Sound icon at the bottom right corner of the task bar and select Playback from the pull down menu or Right click the Realtek HD Audio Manager icon at the bottom right corner of the task bar and select Sound Manager from the pull down menu To change the playback device settings to Spe...

Page 77: ...tor shows empty or Your computer operates after the battery status indicator shows empty Discharge and recharge the battery The operating time for a fully charged battery is short For details see Handling the Battery in Chapter 2 The computer does not operate with a fully charged battery The surge protector in the battery might be active Please take the battery to the service station The battery d...

Page 78: ...rt Use the OneKey Recovery to help solve or identify your problem For details about OneKey Recovery see OneKey Recovery User Guide Other Problems Your computer does not respond To turn off your computer press and hold the Power button for 4 seconds or more If the computer still does not respond remove the AC adapter and the battery Your computer might lock when it enters sleep mode during a commun...

Page 79: ... Utility Make sure that the startup sequence in the BIOS Setup Utility is set so that the computer starts from the device you want Also make sure that the device from which the computer starts is enabled In the Boot menu in the BIOS Setup Utility make sure that the device is included in the Boot Device Priority list ...

Page 80: ...what to do if you experience a problem with your computer and whom to call for service should it be necessary Microsoft Service Packs are the latest software source for Windows product updates They are available by means of a Web download connection charges may apply or from a disc For more specific information and links go to the Microsoft Web site at http www microsoft com Lenovo offers Up and R...

Page 81: ...enter If you have tried to correct the problem yourself and still need help during the warranty period you can get help and information by telephone through the Customer Support Center The following services are available during the warranty period Proble determination Trained personnel are available to assist you with determining if you have a hardware problem and deciding what action is necessar...

Page 82: ... To determine if your Lenovo hardware product is under warranty and when the warranty expires go to http consumersupport lenovo com and click Warranty then follow the instructions on the screen Refer to your Lenovo hardware warranty for a full explanation of Lenovo warranty terms Be sure to retain your proof of purchase to obtain warranty service If possible be near your computer when you make you...

Page 83: ...mbers for your Customer Support Center location are located in Appendix A Warranty Information on page 88 Note Telephone numbers are subject to change without notice For the latest list of Customer Support Center telephone numbers and hours of operation visit the Support Web site at http consumersupport lenovo com If the number for your country or region is not listed contact your Lenovo reseller ...

Page 84: ...ders authorized to perform warranty service Service methods and procedures vary by country and some services might not be available in all countries Service centers in certain countries might not be able to service all models of a particular machine type In some countries fees and restrictions might apply at the time of service To determine whether your computer is eligible for International Warra...

Page 85: ...rge level Extended contact with your body even through clothing could cause discomfort or eventually a skin burn When the AC adapter is connected to an electrical outlet and your computer it generates heat Do not place the adapter in contact with any part of your body while using it Never use the AC adapter to warm your body Extended contact with your body even through clothing may cause a skin bu...

Page 86: ...ard or other parts of the computer or through connectors on I O devices connected to it Even though this kind of electrostatic discharge ESD is the opposite of a discharge from your body or clothing to the computer it poses the same risk of a computer malfunction Your computer is designed and manufactured to minimize any effects of electrostatic charge An electrostatic charge above a certain limit...

Page 87: ... cables Be sure your computer is in sleep or hibernation mode or turned off before moving it This will prevent damage to the hard disk drive and data loss When picking up your open computer hold it by the bottom Do not pick up or hold your computer by the display Use a quality carrying case that provides adequate cushion and protection Do not pack your computer in a tightly packed suitcase or bag ...

Page 88: ...of an optical drive before closing the tray When installing your hard disk follow the instructions shipped with your hardware and apply pressure only where needed on the device Take Care in Setting Passwords Remember your passwords If you forget a supervisor or hard disk password Lenovo authorized service providers will not reset it and you might have to replace your system board or hard disk driv...

Page 89: ...hile the AC adapter is plugged in This could break the adapter plug Turn off your computer if you are replacing a device or else verify that the device is warm or hot swappable Before you install any of the following devices touch a metal table or a grounded metal object This action reduces any static electricity from your body The static electricity could damage the device ExpressCard Memory Card...

Page 90: ... and taking care not to let any excess liquid drip 5 Wipe the surface to remove the detergent 6 Rinse the sponge with clean running water 7 Wipe the cover with the clean sponge 8 Wipe the surface again with a dry soft lint free cloth 9 Wait for the surface to dry completely and remove any cloth fibers from the computer surface Cleaning Your Computer Keyboard 1 Absorb some isopropyl rubbing alcohol...

Page 91: ...oft lint free cloth If you see a scratchlike mark on your display it might be a stain transferred from the keyboard when the cover was pressed from the outside 2 Wipe or dust the stain gently with a soft dry cloth 3 If the stain remains moisten a soft lint free cloth with water or a 50 50 mixture of isopropyl alcohol and water that does not contain impurities 4 Wring out as much of the liquid as y...

Page 92: ... customers with disabilities Ergonomic Information Working in the virtual office may mean adapting to frequent changes in your environment Following some simple rules will make things easier and bring you the maximum benefits of your computer Keeping in mind such basics as good lighting and proper seating for example can help you improve your performance and achieve greater comfort Note This examp...

Page 93: ...r work will also help to prevent any minor discomfort associated with your working posture Display Position the display to maintain a comfortable viewing distance of 510 760 mm 20 30 inches Avoid glare or reflections on the display from overhead lighting or outside sources of light Keep the display screen clean and set the brightness to levels that enable you to see the screen clearly Press Fn up ...

Page 94: ... a relaxed and neutral horizontal position Type with a soft touch without pounding the keys Leg Position Keep your thighs parallel to the floor and your feet flat on the floor or on a footrest What If You are Traveling It may not be possible to observe the best ergonomic practices when you are using your computer while on the move or in a casual setting Regardless of the setting try to observe as ...

Page 95: ... a vision care specialist for advice Maintenance An important part of owning your computer is maintenance With proper care you can avoid common problems The following sections provide information that can help you to keep your computer running smoothly General Tips for Maintenance 1 Check the capacity of your hard disk drive from time to time If the hard disk drive gets too full Windows will slow ...

Page 96: ...unused application programs Note You might also want to look for application program duplication or overlapping versions Clean out your Inbox Sent and Trash folders from your e mail client program At least once a week make a point to back up your data If critical data is present it is a good idea to perform a daily backup Lenovo has many backup options available for your computer CD RW drives and ...

Page 97: ...te the following tips might help along the way Remove all external devices such as the printer keyboard and so on Make sure that the battery is charged and that you have the AC power adapter connected Boot into the BIOS and load the default settings Turn off the computer and start the recovery process If your computer uses discs as the recovery media do not remove the disc from the drive until you...

Page 98: ...as its own specific driver If you add a new component the operating system needs to be instructed on how to operate that piece of hardware After you install the driver the operating system can recognize the hardware component and understand how to use it Note Due to the fact that drivers are programs like any other file on your computer they are susceptible to corruption and might not perform prop...

Page 99: ... your computer see Chapter 3 Warranty Information in the Safety and Warranty Guide included with your computer Warranty Information Product or Machine Type Country or Region of Purchase Warranty Period Type of Warranty Service Notebook 11306 2304 Taiwan Parts and Labor 1 year Battery pack 1 year 3 4 India Indonesia Malaysia Singapore Thailand Philippines Vietnam China Hong Kong S A R China Macau S...

Page 100: ...t Lenovo provides warranty service without charge for a parts and labor during the first year of the warranty period or a longer period as required by law and b parts only on an exchange basis in the second and third years of the warranty period Your Service Provider will charge you for any labor provided in performance of the repair or replacement s in the second and third year of warranty period...

Page 101: ...ards or monitors is your responsibility Lenovo specifies in the materials shipped with a replacement CRU whether the defective CRU must be returned When return is required 1 return instructions a prepaid return shipping label and a container are included with the replacement CRU and 2 you may be charged for the replacement CRU if your Service Provider does not receive the defective CRU within thir...

Page 102: ... Service your product will be repaired or exchanged at a designated service center with delivery or shipping arranged by you You are responsible to deliver or mail as your Service Provider specifies prepaid unless specified otherwise the product suitably packaged to a designated location After the product has been repaired or exchanged it will be made available for your collection Failure to colle...

Page 103: ...ree 1800 113324 Alternate No 011 26388288 SMS 9900173324 Hong Kong 852 2516 3919 Taiwan 886 0800 000 702 Macau 0800 689 United States 1 877 453 6686 France 0826 536 686 South Africa 0861 536 686 Australia 1300 557 073 New Zealand 0800 446 833 Russia Toll free 8 800 700 7888 Alternate No 7 495 662 7888 Additionally you can find support information and updates including service phone numbers for unl...

Page 104: ...nplug from the computer Examples of these types of CRUs include the AC adapter and power cord External CRUs with latches These CRUs include a latch to help you remove and replace the part Examples of these types of CRUs include the notebook main battery an optical drive a hard disk drive and an extended battery Your computer contains the following types of internal CRUs Internal CRUs located behin...

Page 105: ...ull down menu select Properties Memory Double data rate DDR synchronous dynamic random access memory DRAM II Storage device 1 8 inch hard disk drive SSD hard disk drive specific models only Display Size 11 1 inch Wide screen Resolution The resolution switch function of 1366 768 and 1024 768 Keyboard Fn key function Touch pad Volume control buttons Touch inductive panel CapsLock ...

Page 106: ...nector ExpressCard slot 34 mm ExpressCard new card External Optical drive CD ROM DVD ROM CD RW DVD ROM CD RW DVD or DVD RW DVD ROM depending on the model Wireless features Wireless LAN Bluetooth Specific models only Wireless device switch Camera Integrated camera Digital media reader 6 in 1 SD card Multi media Card Memory Stick xD Picture Card Memory Stick Pro SD pro digital media slot ...

Page 107: ...0 ft Operating with no optical disc in the drive 5 to 35 C 41 to 95 F Operating with an optical disc in the drive 10 to 35 C 50 to 95 F Storage 0 to 50 C 32 to 122 F At altitudes above 2438 m 8000 ft Maximum operating temperature 31 3 C 88 F Note When you charge the battery make sure that its temperature is between 0 and 50 C 32 122 F Relative humidity Operating with no optical disc in the drive 8...

Page 108: ...fications Power source AC adapter Input rating of the AC adapter 90 264 V ac 47 to 63 Hz 65 W Battery pack Lithium ion Li Ion battery pack Nominal voltage 14 4 V dc 4 cells 14 4 V 10 8V dc 7 cells Capacity 18 Wh 4 cells 57 Wh 7 cells ...

Page 109: ...ate and verify the operation of any other product program or service Lenovo may have patents or pending patent applications covering subject matter described in this document The furnishing of this document does not give you any license to these patents You can send license inquiries in writing to Lenovo United States Inc 1009 Think Place Building One Morrisville NC 27560 U S A Attention Lenovo Di...

Page 110: ...s All information contained in this document was obtained in specific environments and is presented as an illustration The result obtained in other operating environments may vary Lenovo may use or distribute any of the information you supply in any way it believes appropriate without incurring any obligation to you Any references in this publication to non Lenovo Web sites are provided for conven...

Page 111: ...tion described in all the manuals included with your computer may not match the actual configuration of the computer you purchased Export classification notice This product is subject to the Untied States Export Administration Regulations EAR and has an Export Classification Control Number ECCN of 4A994 b It can be re exported except to any of the embargoed countries in the EAR E1 country list ...

Page 112: ... b g Standard on Wireless LANs as defined and approved by the Institute of Electrical and Electronics Engineers The Wireless Fidelity WiFi certification as defined by the Wi Fi Alliance Bluetooth Daughter Card is designed to be interoperable with any Bluetooth product that is compliant to Bluetooth Specification 2 0 EDR as defined by the Bluetooth SIG Following profiles are supported by Bluetooth ...

Page 113: ...ample mobile phones Due to the fact that Wireless LAN PCI Express Mini Card and Bluetooth Daughter Card operate within the guidelines found in radio frequency safety standards and recommendations Lenovo believes the integrated wireless cards are safe for use by consumers These standards and recommendations reflect the consensus of the scientific community and result from deliberations of panels an...

Page 114: ...ter Electronic Emissions Notices The following information refers to Lenovo IdeaPad U110 machine type 2304 11306 Federal Communications Commission FCC Statement This equipment has been tested and found to comply with the limits for a Class B digital device pursuant to Part 15 of the FCC Rules These limits are designed to provide reasonable protection against harmful interference in a residential i...

Page 115: ...rs must be used in order to meet FCC emission limits Proper cables and connectors are available from Lenovo authorized dealers Lenovo is not responsible for any radio or television interference caused by using other than recommended cables or connectors or by unauthorized changes or modifications to this equipment Unauthorized changes or modifications could void the user s authority to operate the...

Page 116: ...da Cet appareil numérique de la classe B est conforme à la norme NMB 003 du Canada European Union EMC Directive Conformance Statement This product is in conformity with the protection requirements of EU Council Directive 2004 108 EC on the approximation of the laws of the Member States relating to electromagnetic compatibility Lenovo cannot accept responsibility for any failure to satisfy the prot...

Page 117: ... licensed communication devices Properly shielded and grounded cables and connectors must be used in order to reduce the potential for causing interference to radio and TV communications and to other electrical or electronic equipment Such cables and connectors are available from Lenovo authorized dealers Lenovo cannot accept responsibility for any interference caused by using other than recommend...

Page 118: ...nology IT equipment to responsibly recycle their equipment when it is no longer needed Lenovo offers a variety of programs and services to assist equipment owners in recycling their IT products Information on product recycling offerings can be found on Lenovo s Internet site at http www pc ibm com ww lenovo about environment ...

Page 119: ...pean Union This label is applied to various products to indicate that the product is not to be thrown away but rather reclaimed upon end of life per this Directive Users of electrical and electronic equipment EEE with the WEEE marking per Annex IV of the WEEE Directive must not dispose of end of life EEE as unsorted municipal waste but use the collection framework available to them for the return ...

Page 120: ...motion of Effective Utilization of Resources Lenovo Japan provides through its PC Collecting and Recycling Services for the collecting reuse and recycling of disused computers and monitors For details visit the Lenovo Web site at www ibm com jp pc service recycle pcrecycle http www ibm com jp pc service recycle pcrecycle Pursuant to the Law for Promotion of Effective Utilization of Resources the c...

Page 121: ...um ion battery pack or a nickel metal hydride battery pack If you are a company employee who uses a Lenovo notebook computer and need to dispose of a battery pack contact the proper person in Lenovo sales service or marketing and follow that person s instructions You also can refer to the instructions at www ibm com jp pc environment recycle battery http www ibm com jp pc environment recycle batte...

Page 122: ... called the hard disk Before you dispose of sell or hand over your computer you need to delete that data Handing your computer over to someone else without deleting the loaded software such as operating systems and application software may even violate License Agreements You are advised to check the terms and conditions of those Agreements Deleting the data from the hard disk is not easy There are...

Page 123: ... destroy the data physically by smashing the hard disk with a hammer or magnetically by means of strong magnetic power thus making the data unreadable But we recommend that you make use of the software payware or service pay service specifically developed for the purpose Trademarks Lenovo lenovo logo IdeaPad VeriFace OneKey Recovery OneKey Antivirus OneKey Rescue APS Power express Energy managemen...

Page 124: ...C Camera 15 26 Caring Your Computer 74 Cleaning Computer Cover 79 Computer Display 80 Computer Keyboard 79 Computer display 2 Customer Replaceable Unit CRU parts list 93 Customer Support Center 70 D Display Adjusting 11 Cleaning 80 E EasyCapture 26 F FCC Statement 103 Features 94 Frequently Asked Questions 56 Function key combinations 14 ...

Page 125: ...on Mode Problems 61 I IEEE 1394 connector 48 Indicators 18 Integrated camera 2 Internet 28 K Keyboard 2 Cleaning 79 Problems 60 Using 13 M Maintenance 84 Microphone Built in 2 External 54 Multi media Reader Slot 23 N Notice Electronic Emissions 103 EU Environmental 105 for US Users 111 Novo button 2 17 Numeric Keypad 13 O Optical drive 20 ...

Page 126: ...Hard Disk Drive 67 Hibernation Mode 61 Keyboard 60 Password 60 Sleep Mode 61 Sound 65 Startup 67 R Read This First iii S Security 31 Security keyhole 6 ShuttleCenter 23 Speaker 2 Specifications 96 Storage Media Handling 77 System status indicators 2 T Touch inductive panel 2 16 Touch pad 2 12 Trademarks 112 Troubleshooting 58 U USB port 6 46 ...

Page 127: ...x 116 V VeriFace 32 VGA port 4 51 Volume button 15 W Warranty Information 88 Web Help 70 Wireless device switch 4 Wireless LAN Antennas 1 Connecting 30 Interoperability 101 Switches 15 Usage Environment 102 ...

Page 128: ......

Page 129: ...New World New Thinking www lenovo com Lenovo China 2007 P N 147001745 ...

Reviews: