c
c
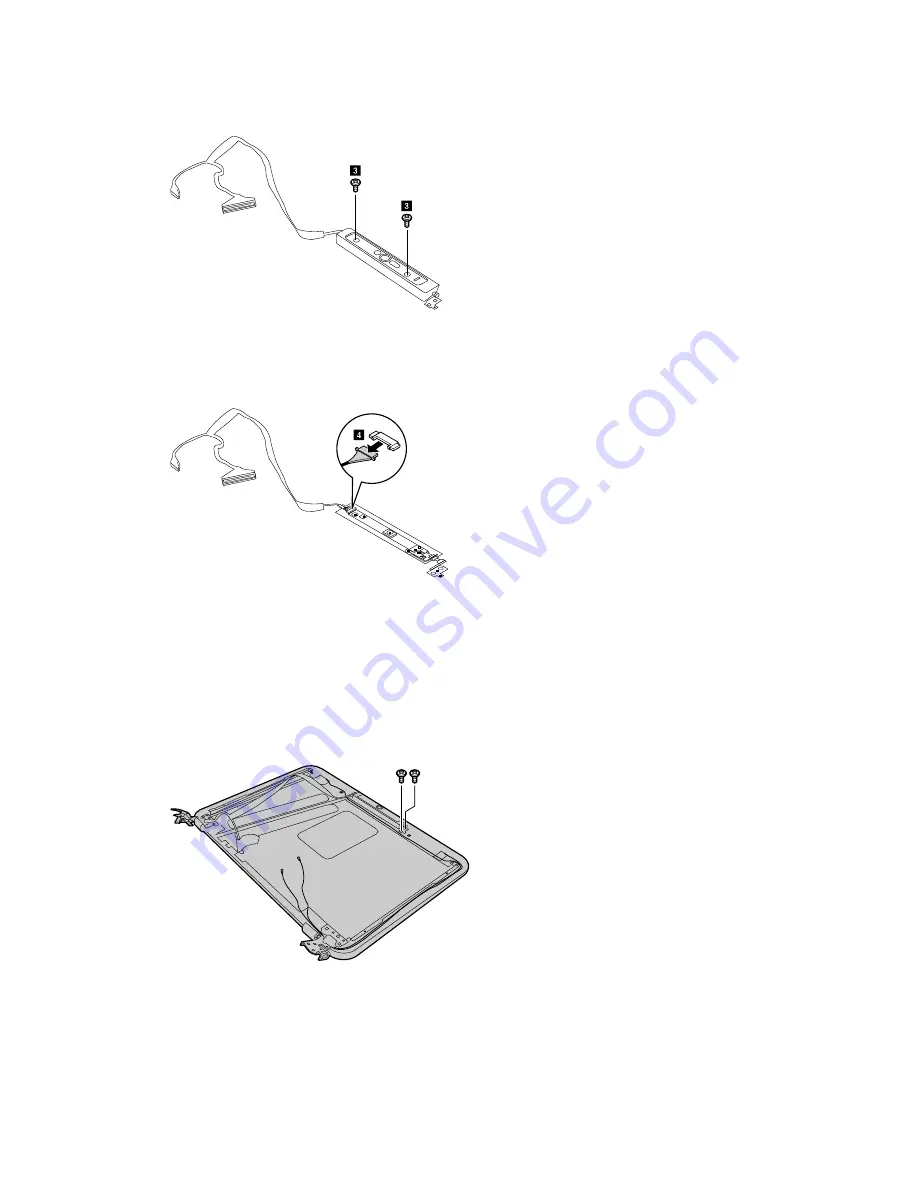
Figure 24. Remove two screws
Step 3.
Unplug the LCD & Camera cable from the camera board.
d
Figure 25. Unplug LCD & camera cable
Step 4.
Remove the LCD & camera cable or the camera assembly.
If you need to replace the LCD & camera cable, tear if off the LCD base cover.
If you need to replace the camera assembly, remove the two screws that secure the camera on
the LCD base cover.
Figure 26. Remove the camera module
Refer to Table 13 “Part numbers for LCD FRUs” on page 44 to look up the Lenovo part numbers for
replacement parts for:
Camera assembly
LCD & camera cable
Chapter 4
.
Removing a FRU or CRU
37
Summary of Contents for N22-20
Page 1: ...Hardware Maintenance Manual Lenovo N22 20 Chromebook ...
Page 2: ......
Page 3: ...Hardware Maintenance Manual Lenovo N22 20 Chromebook ...
Page 4: ...First Edition February 2016 Copyright Lenovo 2016 ...
Page 6: ...iv Hardware Maintenance Manual ...
Page 11: ...DANGER DANGER DANGER DANGER Chapter 1 Safety information 5 ...
Page 12: ...6 Hardware Maintenance Manual ...
Page 13: ...PERIGO PERIGO PERIGO PERIGO Chapter 1 Safety information 7 ...
Page 14: ...PERIGO PERIGO PERIGO PERIGO DANGER DANGER 8 Hardware Maintenance Manual ...
Page 15: ...DANGER DANGER DANGER DANGER DANGER Chapter 1 Safety information 9 ...
Page 16: ...DANGER VORSICHT VORSICHT VORSICHT VORSICHT 10 Hardware Maintenance Manual ...
Page 17: ...VORSICHT VORSICHT VORSICHT VORSICHT Chapter 1 Safety information 11 ...
Page 18: ...12 Hardware Maintenance Manual ...
Page 19: ...Chapter 1 Safety information 13 ...
Page 20: ...14 Hardware Maintenance Manual ...
Page 21: ...Chapter 1 Safety information 15 ...
Page 22: ...16 Hardware Maintenance Manual ...
Page 23: ...Chapter 1 Safety information 17 ...
Page 24: ...18 Hardware Maintenance Manual ...
Page 46: ...40 Hardware Maintenance Manual ...
Page 48: ...42 Hardware Maintenance Manual ...
Page 54: ...48 Hardware Maintenance Manual ...
Page 56: ...50 Hardware Maintenance Manual ...
Page 58: ......
Page 59: ......
Page 60: ......


