1. Connect the power cable to the microprocessor 2 expansion board power connector from the
power paddle card.
2. You might need to install the air baffle before connecting the power cable.
Step 18. Install the fan cage assembly (see “Installing the fan cage assembly” on page 274).
Step 19. Install the air baffle (see “Installing the air baffle” on page 190).
Step 20. Install the power supplies (see “Installing a hot-swap power supply” on page 255).
Step 21. Install and lock the left-side cover (see “Installing the left-side cover” on page 185).
Step 22. Stand the server back up in its vertical position.
If you have replaced a server component or installed an optional device in the server, you need to reconnect
the power cords and all external cables, and turn on the server and peripheral devices.
Removing a heat sink retention module
Use this information to remove a heat sink retention module.
Read the safety information in “Safety” on page v and “Installation guidelines” on page 35.
If you are replacing a server component in the server, you need to turn off the server and peripheral devices,
and disconnect the power cords and all external cables.
To remove a heat sink retention module, complete the following steps.
Step 1.
Carefully turn the server on its side so that it is lying flat, with the cover facing up.
Attention:
Do not allow the server to fall over.
Step 2.
Unlock and remove the left-side cover (see “Removing the left-side cover” on page 184).
Step 3.
Remove the air baffle (see “Removing the air baffle” on page 189).
Step 4.
Remove the heat sink (see “Removing a microprocessor and heat sink” on page 283).
Note:
When you remove a microprocessor and heat sink, be sure to keep each heat sink with
its microprocessor for reinstallation.
Step 5.
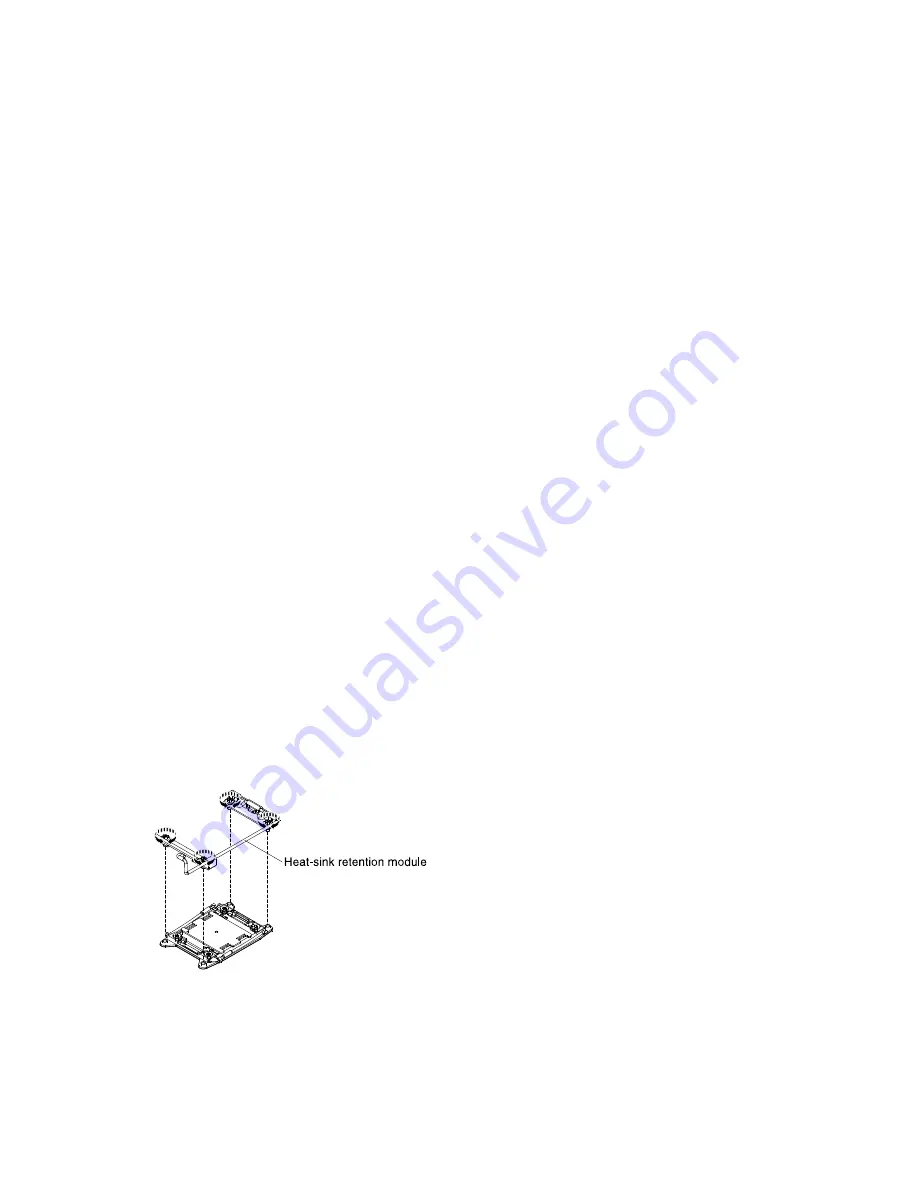
Use a screwdriver and remove the four screws that secure the retention module to the system
board; then, lift the retention module from the system board.
Figure 235. Heat sink retention module removal
If you are instructed to return the server component or optional device, follow all packaging instructions,
and use any packaging materials for shipping that are supplied to you.
306
System x3500 M4 Installation and Service Guide
Summary of Contents for System x3500 M4
Page 1: ...System x3500 M4 Installation and Service Guide Machine Type 7383 ...
Page 6: ...iv System x3500 M4 Installation and Service Guide ...
Page 14: ...xii System x3500 M4 Installation and Service Guide ...
Page 140: ...126 System x3500 M4 Installation and Service Guide ...
Page 180: ...166 System x3500 M4 Installation and Service Guide ...
Page 194: ...180 System x3500 M4 Installation and Service Guide ...
Page 978: ...964 System x3500 M4 Installation and Service Guide ...
Page 1002: ...988 System x3500 M4 Installation and Service Guide ...
Page 1160: ...1146 System x3500 M4 Installation and Service Guide ...
Page 1164: ...1150 System x3500 M4 Installation and Service Guide ...
Page 1172: ...Taiwan BSMI RoHS declaration 1158 System x3500 M4 Installation and Service Guide ...
Page 1181: ......
Page 1182: ......


