


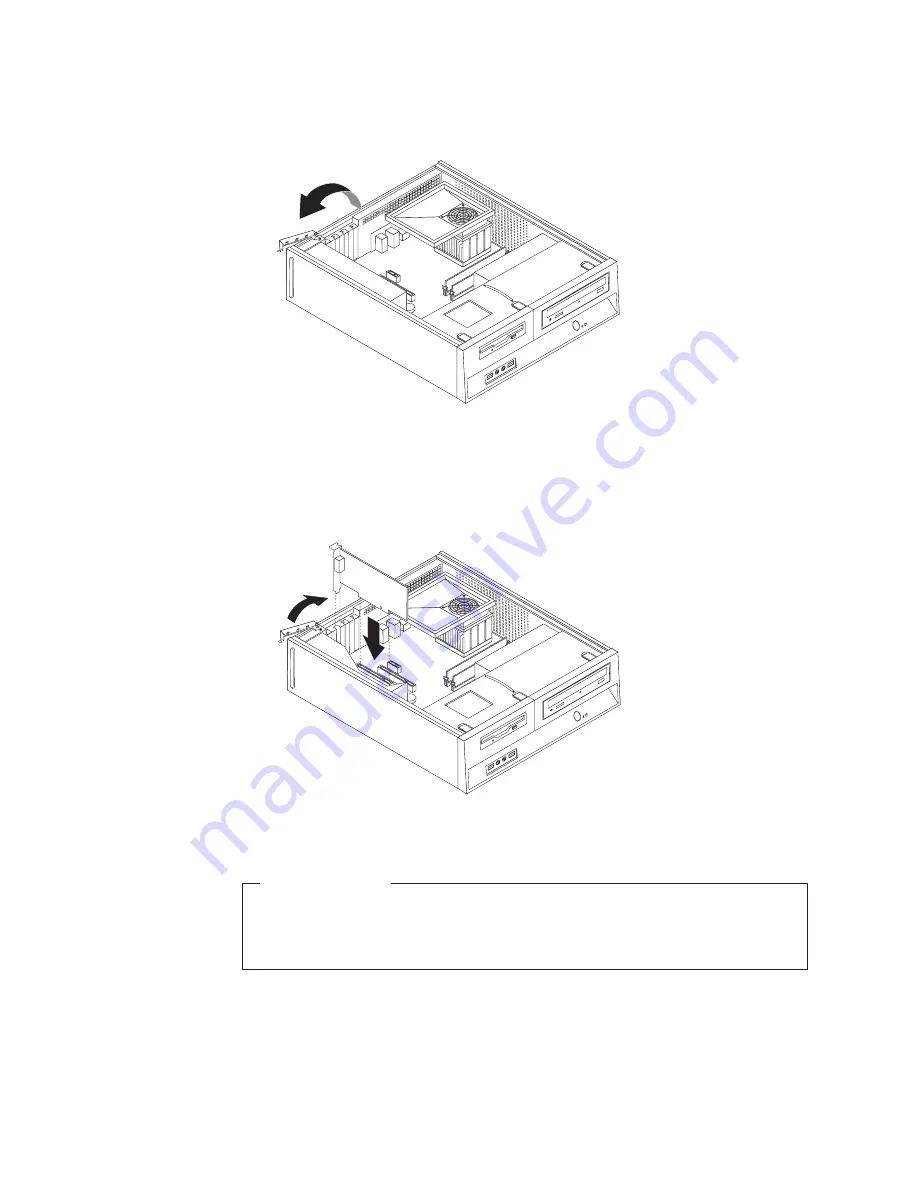
2.
Open
the
adapter
latch
and
remove
the
connector
cover
for
the
appropriate
expansion
connector.
3.
Remove
the
adapter
from
its
static-protective
package.
4.
Install
the
adapter
into
the
appropriate
connector
on
the
system
board.
5.
Close
the
adapter
latch
to
secure
the
adapter.
What
to
do
next:
v
To
work
with
another
option,
go
to
the
appropriate
section.
v
To
complete
the
installation,
go
to
Capitolo
4,
“Completing
the
parts
replacement”,
a
pagina
31.
Installing
internal
drives
This
section
provides
information
and
instructions
for
installing
and
removing
internal
drives.
Figura
11.
Opening
the
adapter
latch
Figura
12.
Securing
the
adapter
14
Hardware
Installation
and
Replacement
Guide
Summary of Contents for THINK CENTRE 9126
Page 2: ......
Page 3: ...ThinkCentre Hardware Installation and Replacement Guide ...
Page 6: ...iv Hardware Installation and Replacement Guide ...
Page 8: ...vi Hardware Installation and Replacement Guide ...
Page 10: ...2 Hardware Installation and Replacement Guide ...
Page 16: ...8 Hardware Installation and Replacement Guide ...
Page 44: ...36 Hardware Installation and Replacement Guide ...
Page 47: ......
Page 48: ...Numero parte 43C4818 Stampato in Italia 1P P N 43C4818 ...


